A while back I had fun making pins with Shrinky Dinks and I keep thinking about making more. The images I had picked out in the past were mostly white (or were just prints) with a touch of color that I added with Copic markers. The next ones I make I hope to do more drawing and coloring, something original. I wanted to see what supplies I had that would work and which would look the best once shrunk.
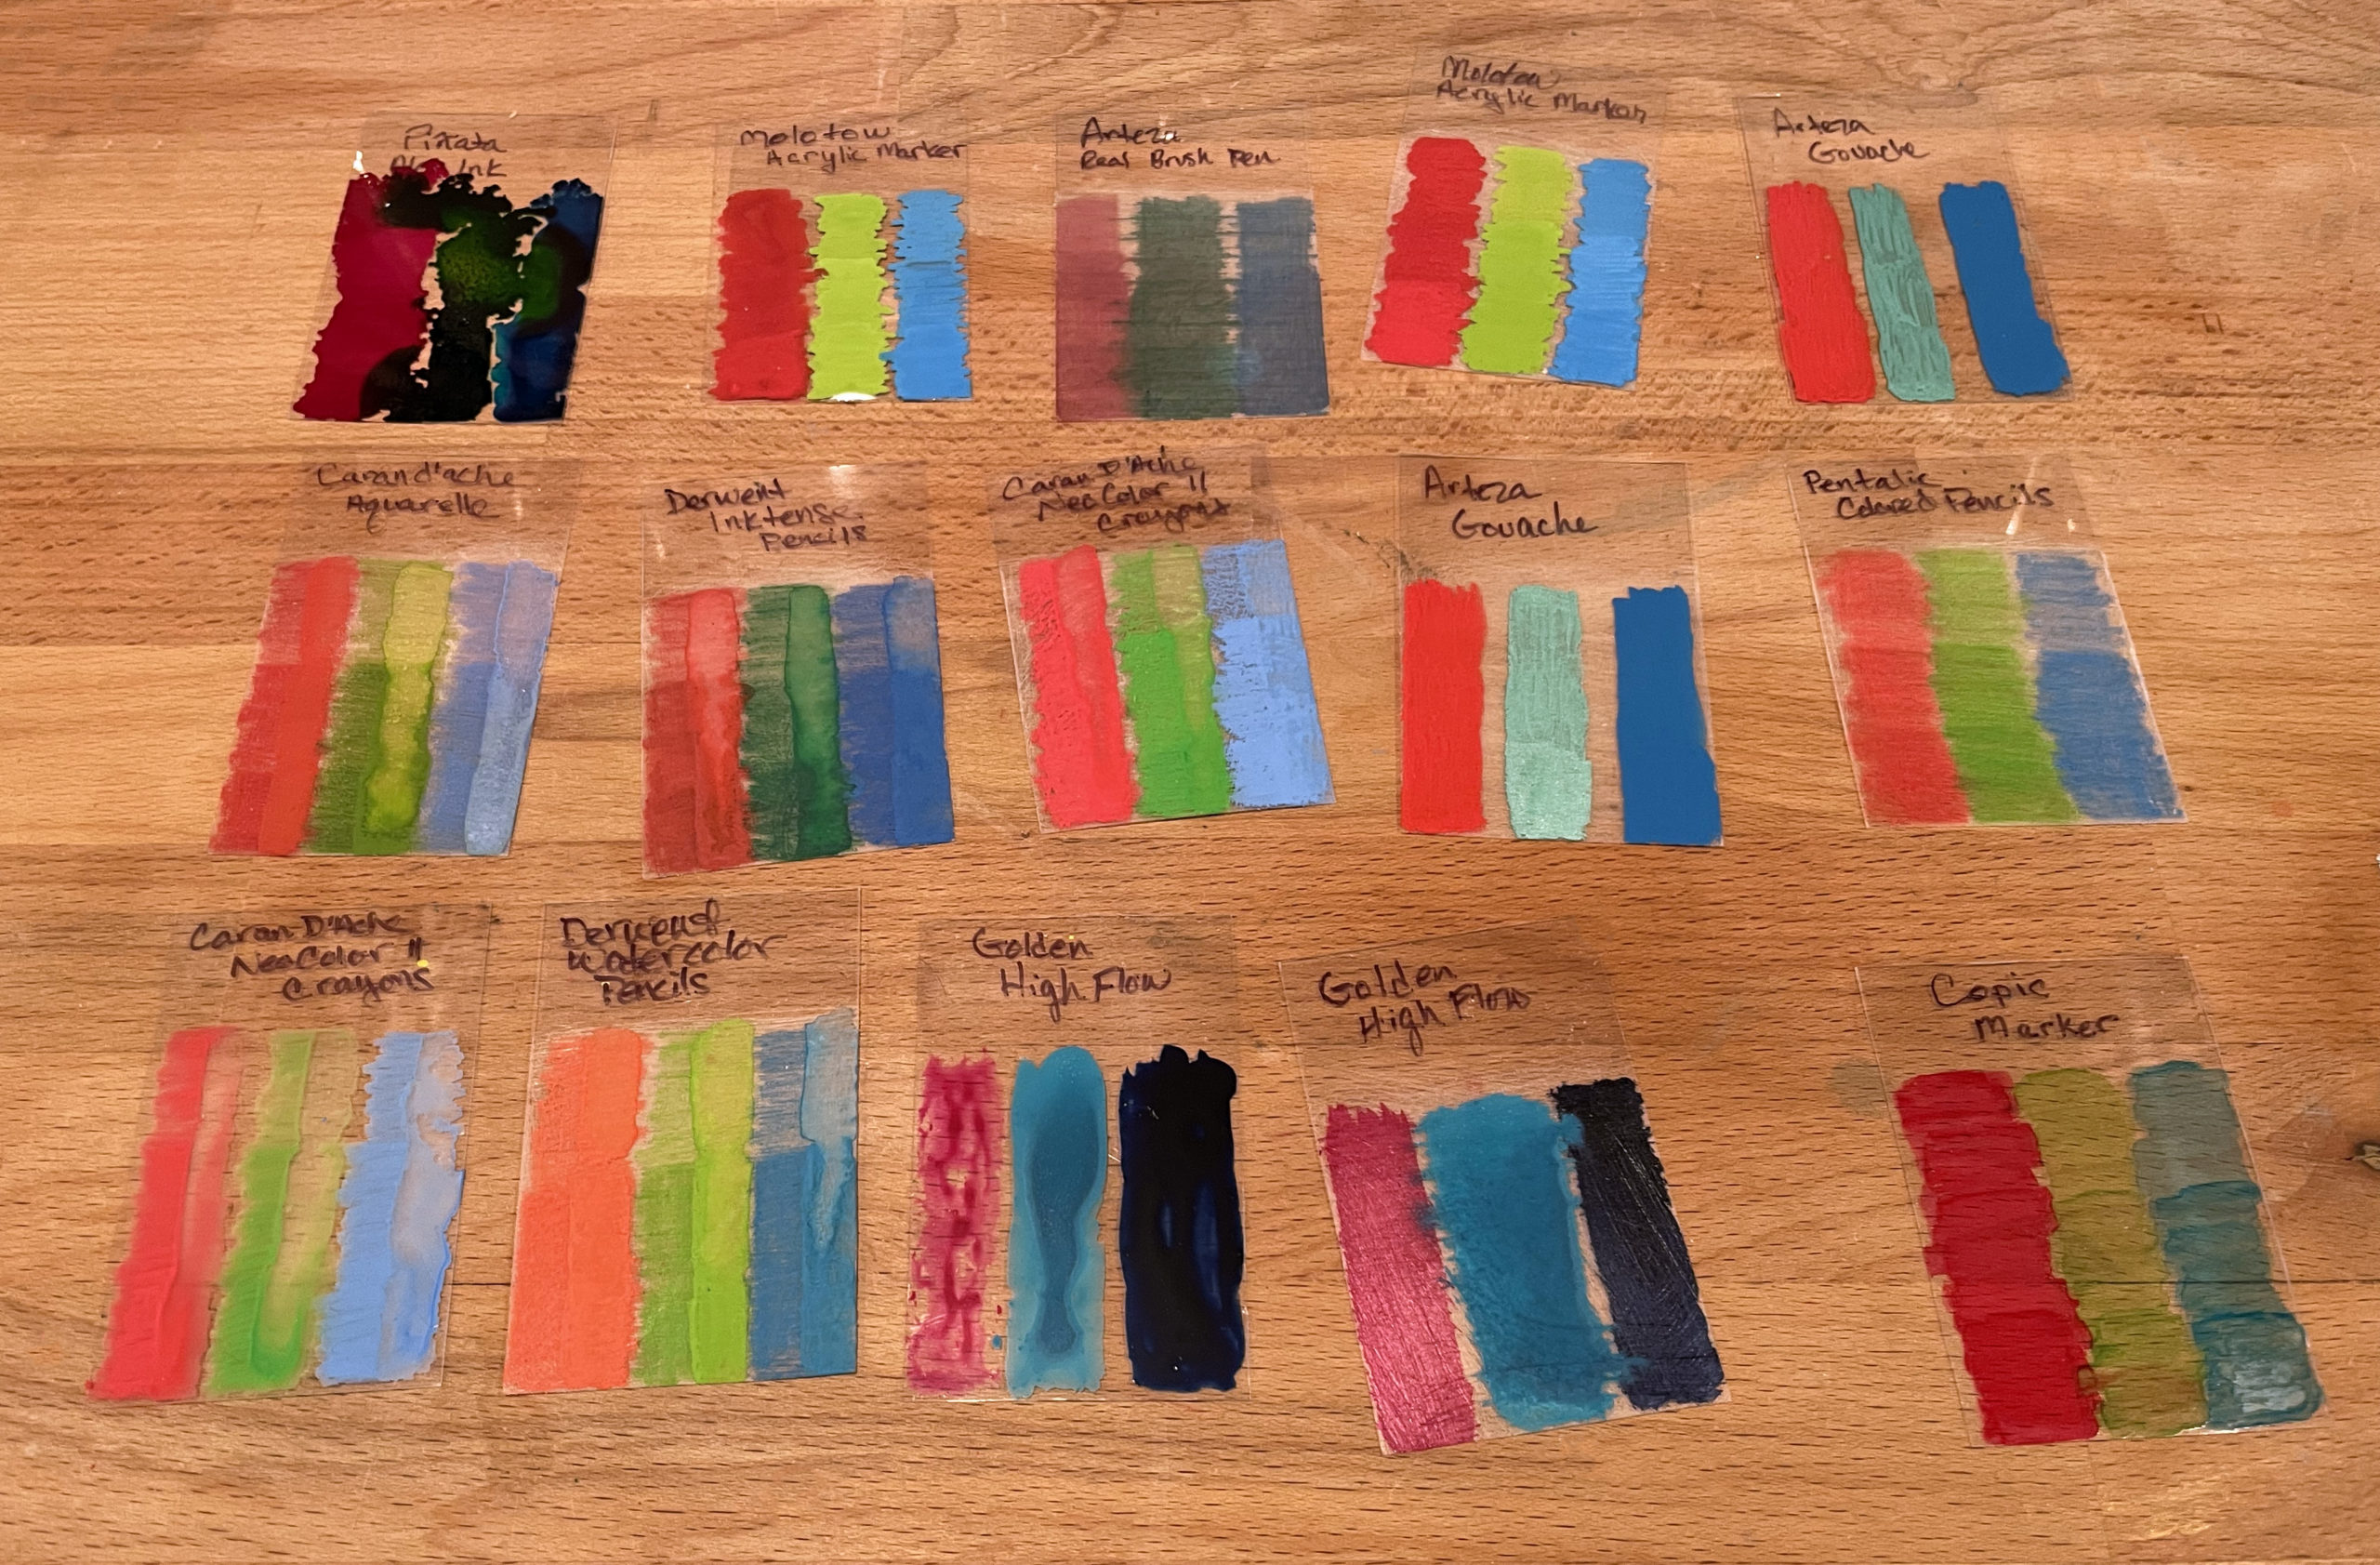
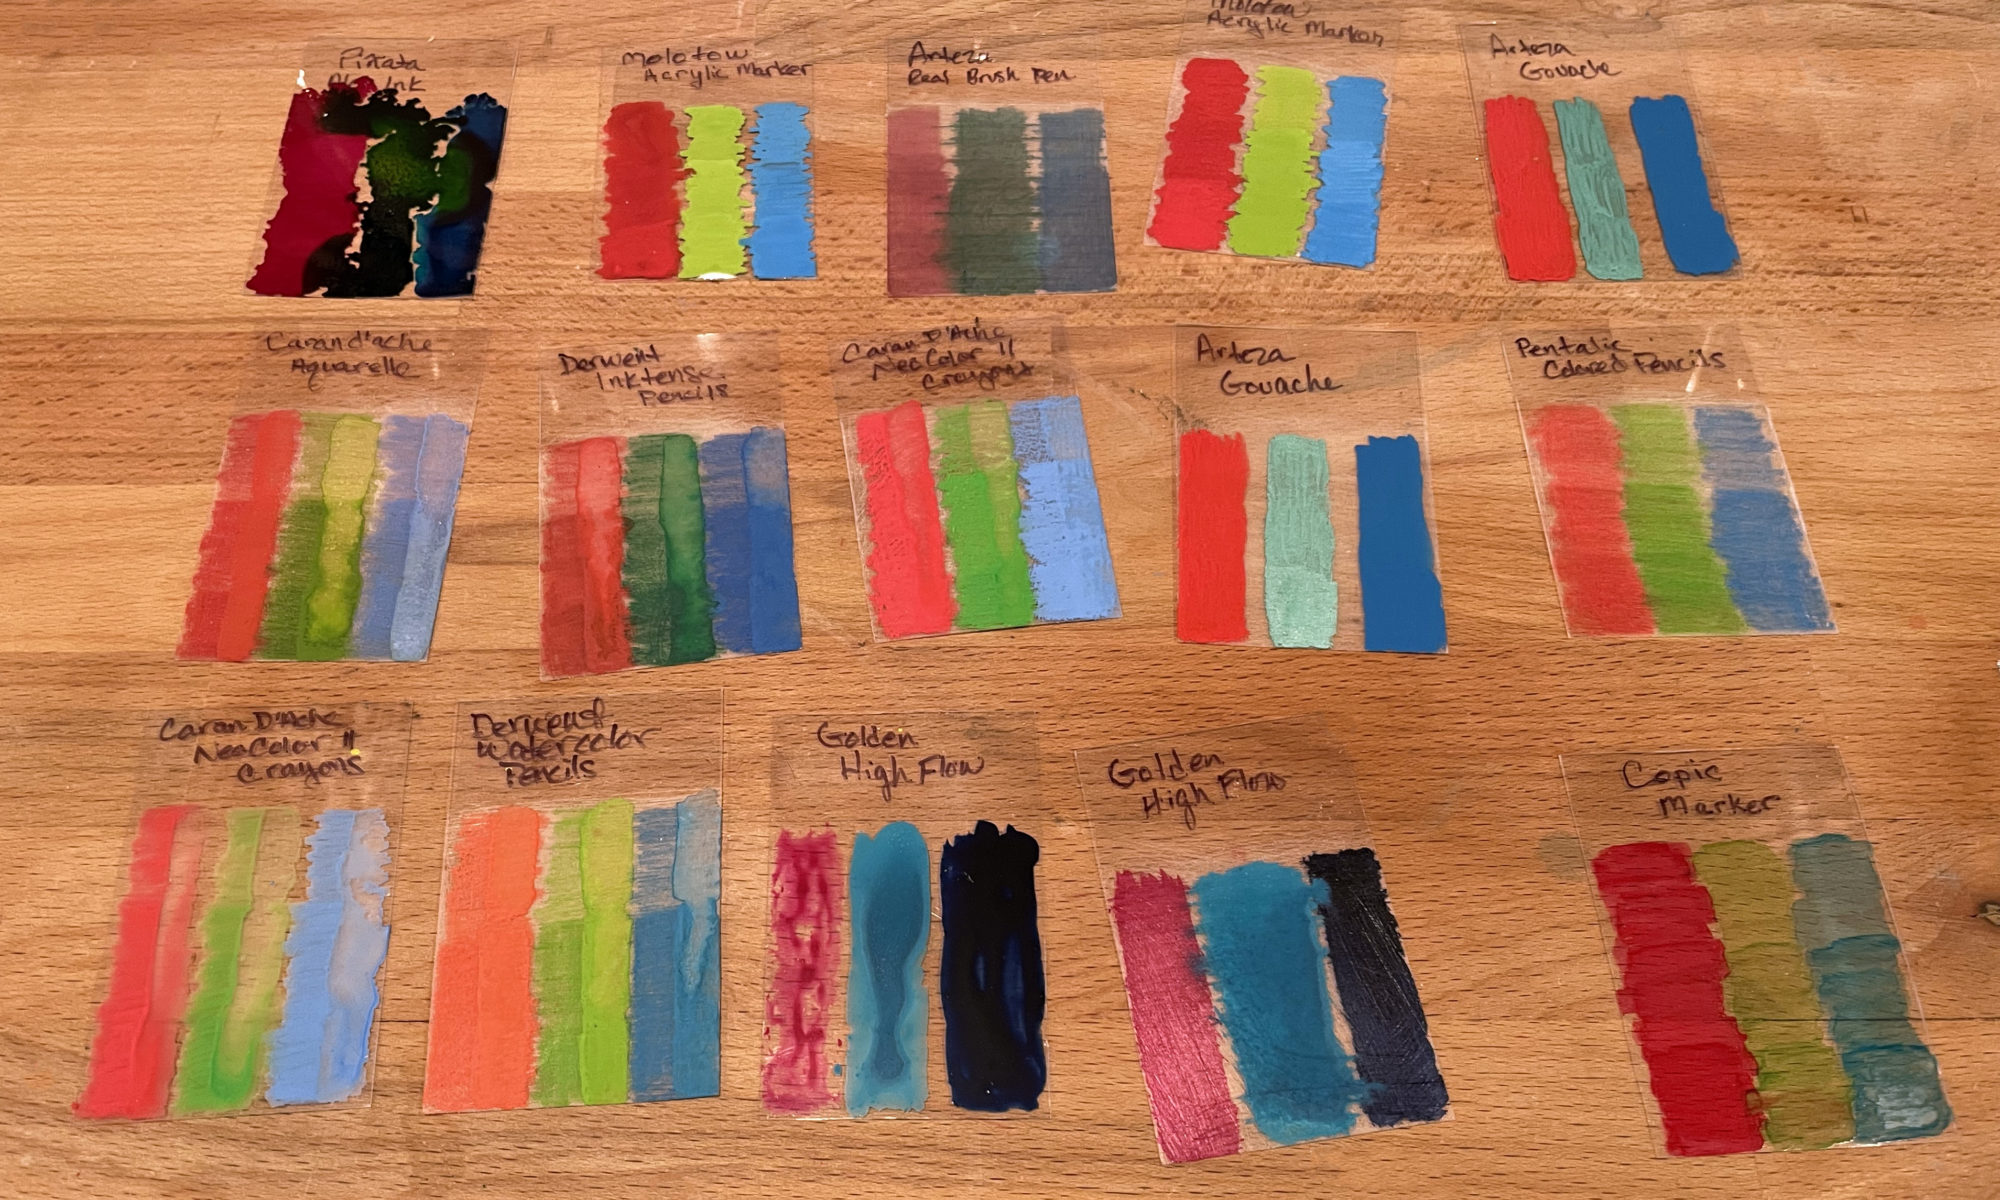
After raiding my art mediums and picking out a bunch of items I thought would have a chance at turning out well, I made a whole bunch of Shrinky Dinks for test tiles and I’ll show what each result was below. This probably isn’t super interesting but maybe it’ll show up in someone’s google search and answer some questions.
Before I get into that I should say that most of the tiles have multiple layers. I wanted to see how much product could be put on the film before you started seeing any issues. The top of each color is 1 layer, middle is 2, and bottom is 3 layers.
Some of these will have multiple tiles because the medium was able to be applied without sanding the film. One tile will be sanded, one will not be. As you’ll see below, it’s always better to sand.
Pentalic Colored Pencils
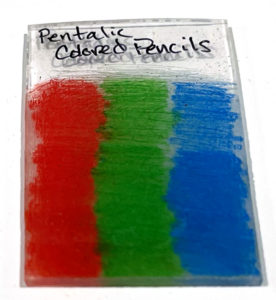
Sanding required.
The first is one of the OG mediums of Shrinky Dinks, colored pencils. I had a box of Pentalic brand colored pencils, which are those tin of pencils you can pretty much find anywhere. I knew this one would work because people have always used them, but I still wanted to make this tile so I could compare it to the others.
1 light layer is pretty scratchy looking because of the sanding. Multiple layers or a heavy hand will give you a nice solid color.
After handling the tile, I did notice color on my fingers. You may need to put a top coat on this to stop any from rubbing off.
Arteza Real Brush Pens
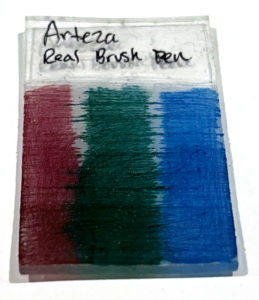
Sanding required.
The Arteza Real Brush Pens gave a really nice even coverage. However, because they are fluid, they bled within the scratches created from sanding.
Copic Markers
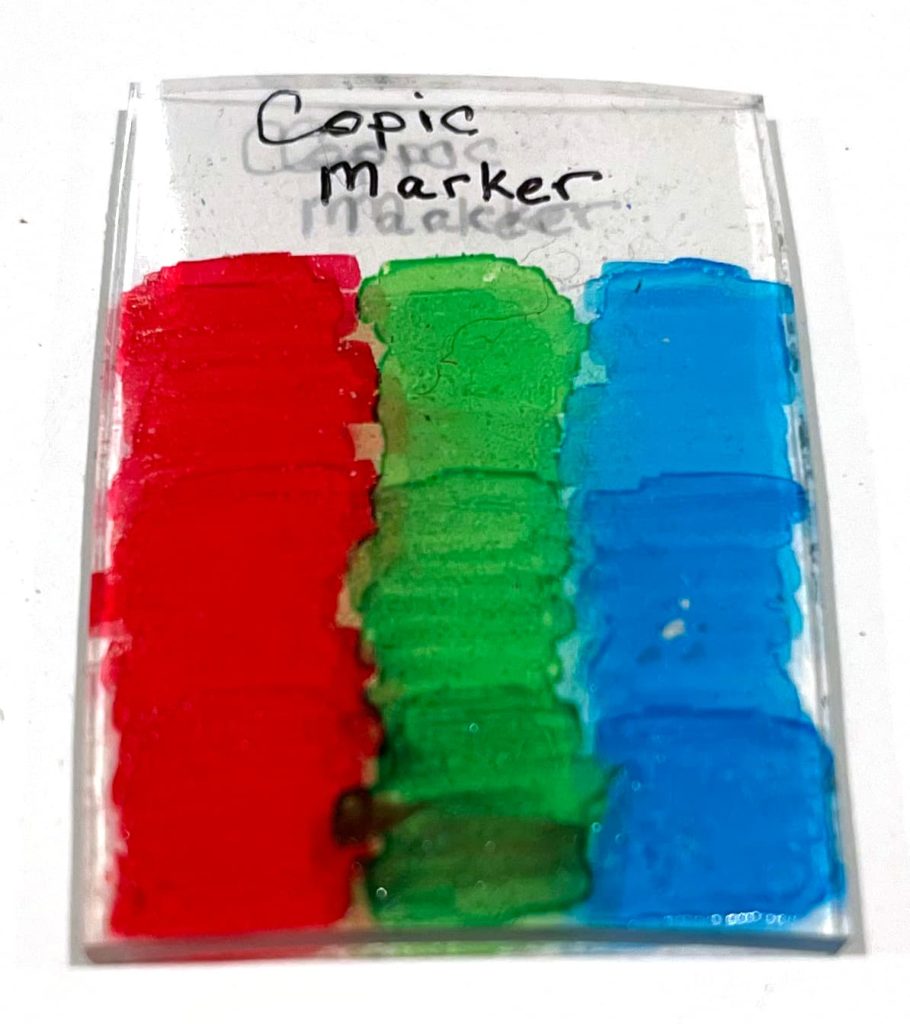
Sanding not required.
Copic markers turned out great. They do get a little streaky when multiple layers are applied. 1 layer gave solid coverage. Multiple layers didn’t really add anything and you’re likely just reactivating previous layers.
Caran d’Ache Aquarelle Pencils
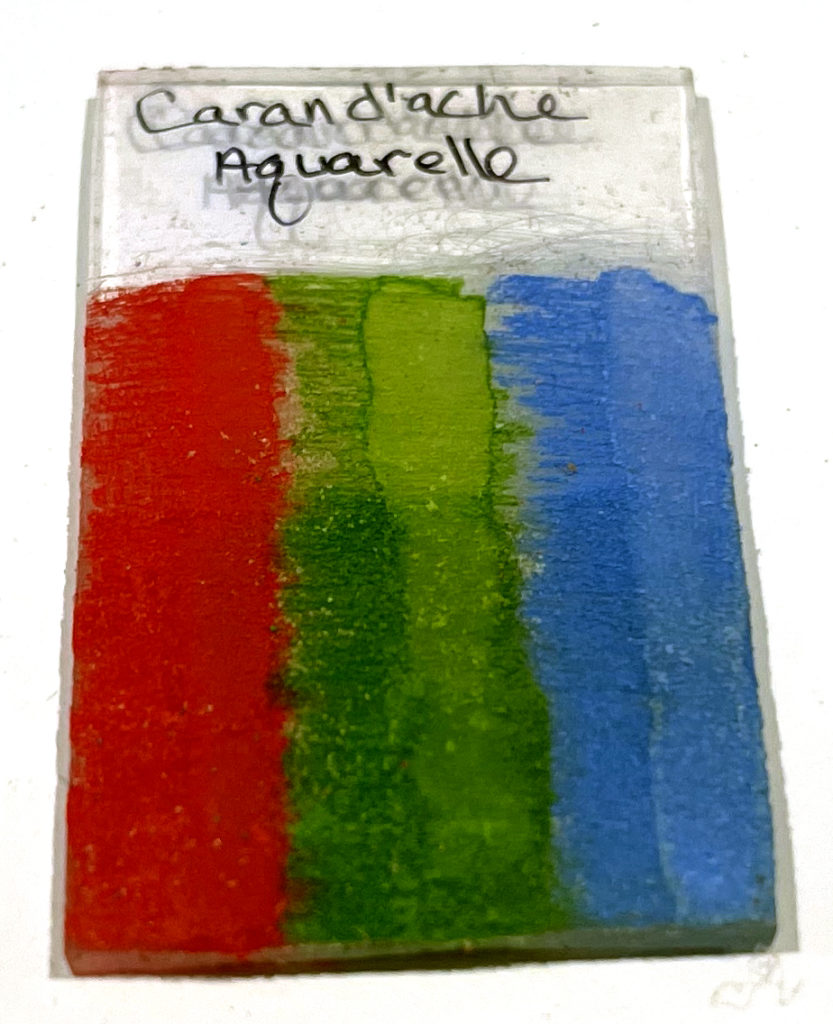
Sanding required.
I had hoped these were going to turn out better because I love working with them. The right side of each color had water applied to it. Unfortunately, once they shrink they get crusty and start flaking off.
Derwent Watercolor Pencils
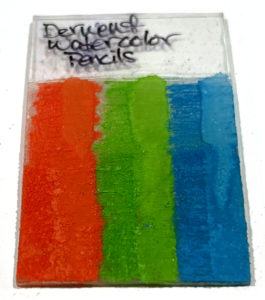
Sanding required.
I was pretty sure these were going to work out great because they’re a colored pencil, but I was wrong. A light coloring and some water seemed to work decently, but any more than that and they started getting flaky. It might be fun to try if you’re willing to accept the limitations.
Golden High Flow Acrylics
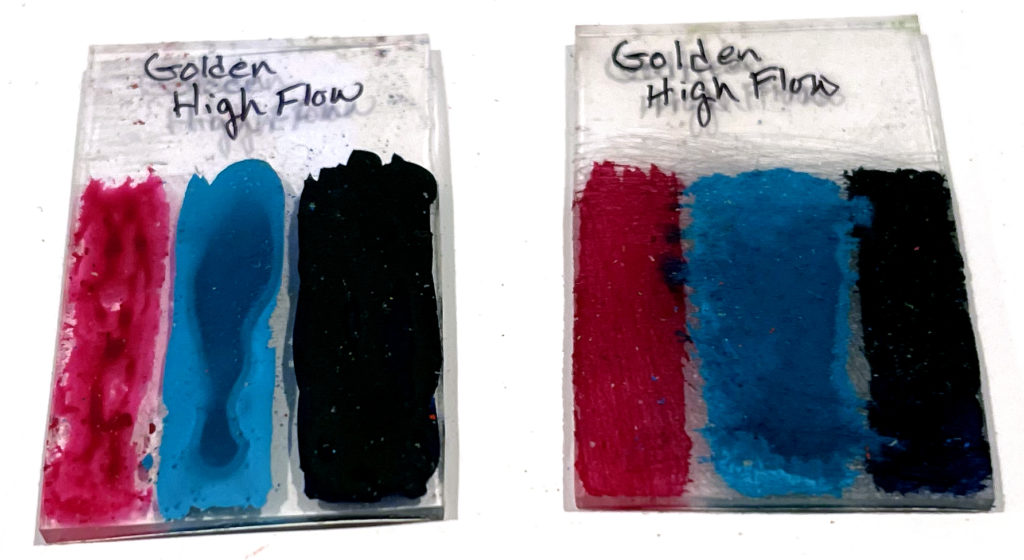
Sanding may or may not be required.
The left tile was not sanded and the right tile has been sanded.
I had to do this one several times because the first time I screwed up shrinking them. For the tile that was not sanded it applied fine the first time I tried it, however, on the second attempt the red started beading up. Perhaps this was skin oils or something else the tile touched, but there were places the acrylic would not stay put on. Make sure the film is perfectly clean before trying this one.
When sanded, the liquid acrylic can bleed and flow through the groove left from sanding.
Last, these took overnight to dry. It’s pretty much like water sitting on top of plastic. It isn’t going anywhere anytime soon.
Piñata Alcohol Inks
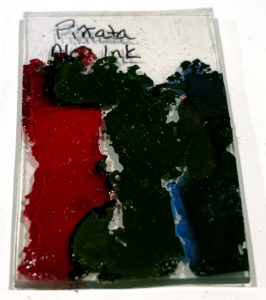
Sanding not required.
I wasn’t planning on using this one because alcohol inks are so unpredictable, but I wanted to see if they would work regardless. Alcohol Inks will not require sanding because they permanently adhere to pretty much anything. However, some of the colors I tried did get very dark once shrunk. Both the green and the blue inks on the tile came out almost black.
If you want to experiment with this one, I’d suggest sticking to very light colors and cutting out any shapes after the inks have dried.
Caran d’Ache NeoColor II Crayons
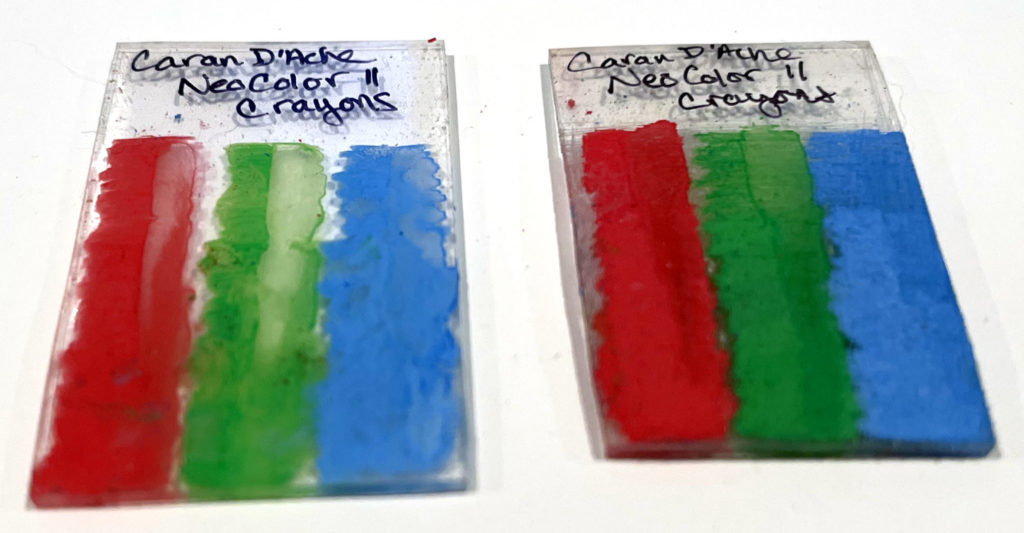
Sanding not required, but recommended.
The left tile was not sanded and the right tile has been sanded.
When the film is not sanded, the crayons are pretty splotchy and applying any water to blend will just wipe the color off.
The sanded tile turned out much better. Applying water did make the color transparent, while the unblended areas were very solid. You can also build up the crayon without it getting flaky.
Molotow Acrylic Markers
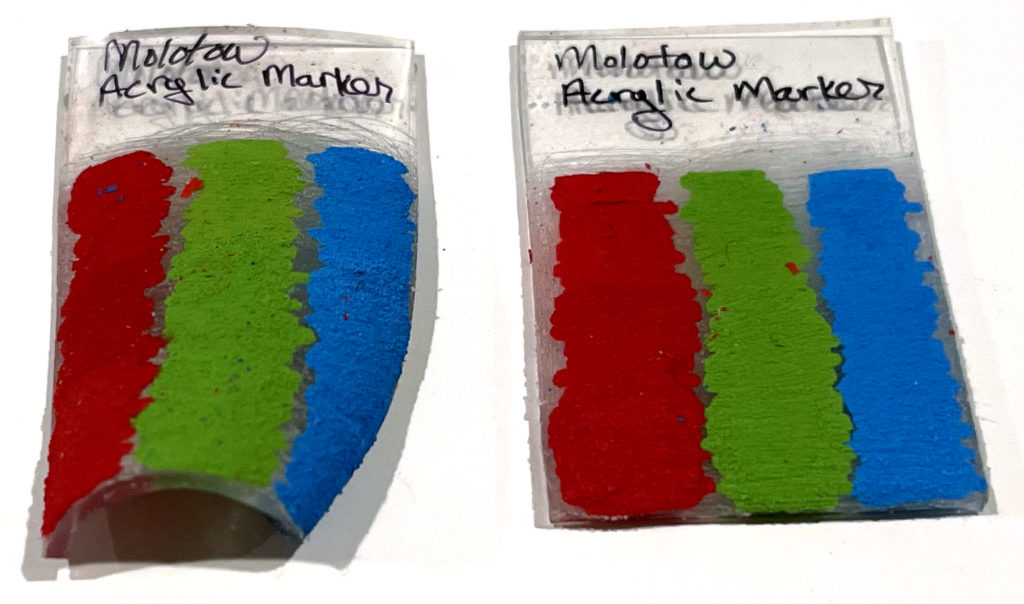
Sanding not required.
I have see many people use acrylic markers and it seems to be a favorite. You can build it up several layers and it can become textured, but I did not see anything flake off. I think the random flecks of color you see came from the Gouache (see below).
The problem I had was that it’s curled up strangely when shrunk. I made this tile several times and it curled up in the oven to the point I had to manhandle it directly out the oven and forcefully flatten it while still hot.
While I plan on using this one, make sure to do a test piece to practice and to know what you’re in for.
Arteza Gouache
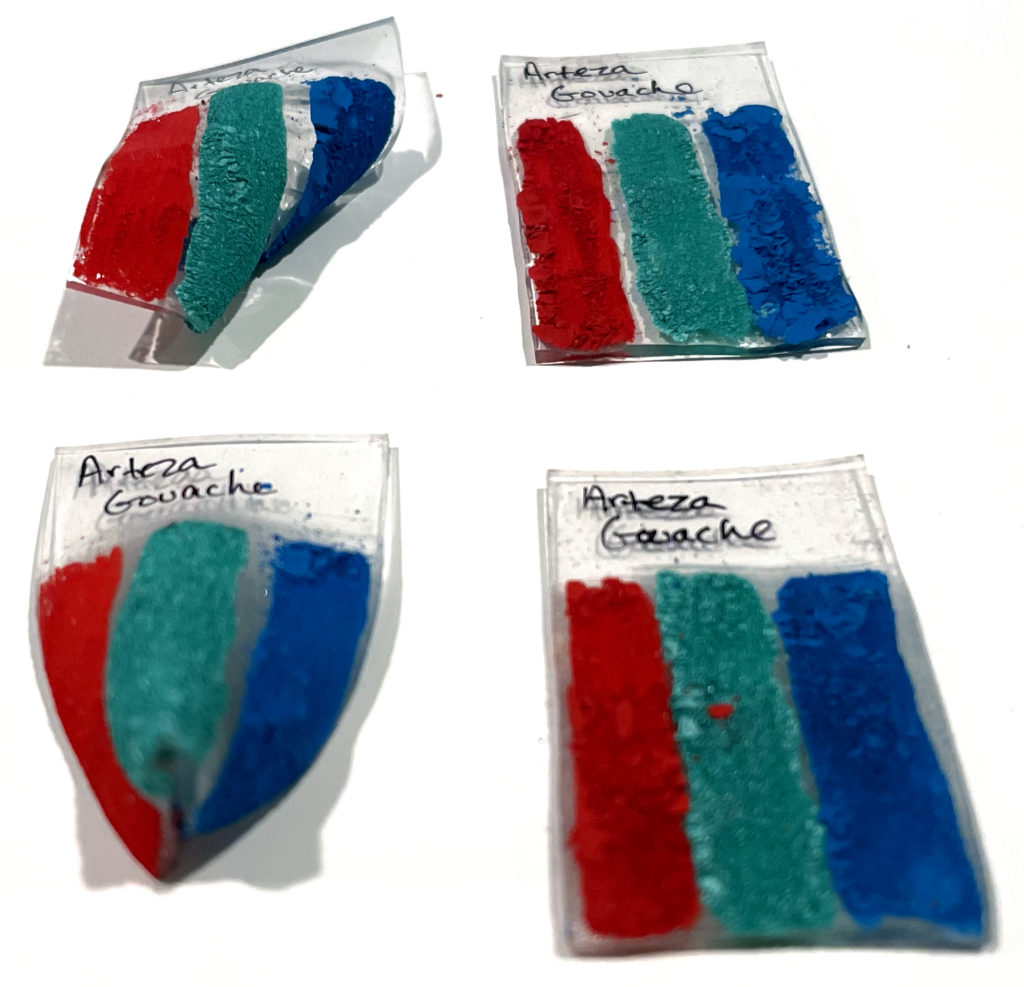
Sanding not required.
This was probably the worst medium I tried. I thought since I did acrylics that I’d sneak in a gouache, but that was a horrible decision. Just like acrylic markers, it curled up badly in the oven and needed to be manhandled to flatten out. It also was the worst flaking mess and got color flakes everywhere.
Don’t do this.
Results
Every product I tried on shrinky dinks had pro’s and con’s (some only had con’s).
If you want a transparent color, use Copic / Alcohol markers.
If you want opaque coverage, colored pencils are the easiest to use but can appear slightly dull compared to the others. You may also need to have a top coat to stop pencil from rubbing off. I also plan to use acrylic markers when my project can tolerate some texture and think I can manhandle hot plastic into a flat shape.
I never knew how many mediums would work on shrinky Dink’s. I thought it was only stays on. Thanks for all the tips!
It did pop up at my Google search and was indeed very helpful! Thanks 🙂
Indeed you showed up in my google search. Thanks for sharing. 😁
legendary post thank you
Thanks for doing these test tiles! Google search popped it right up 🙂 I’m putting together a street art lesson plan using shrinky dinks and was wondering what will be the easiest and quickest medium to use. The colored pencil samples I did last night did indeed require a top coat to stick without rubbing off and I was hoping to skip that step, but it does seem like the colored pencils will be the easiest to use. I’ve heard of some people using chalk pastels, too. I’ll dig those out tonight to see how they fare. Thanks again for the post!
Google for the win – thanks for your helpful info!!
This did pop up on my Google search, thanks for making it! Very thorough and helpful guide to different mediums.
Ack, so helpful! Thank you!
Thanks for this! Yep, Google came through!
Thank you! This was exactly the information I was looking for!
Thanks for showing your results. It was quite helpful.
this is so awesome! second all the comments saying I did find this in a Google search and it answered exactly what I was wondering
Thank you Daniel! As you said this is useful for someone’s Google search. Sending happy creative vibes with appreciation from England
Like everyone before me, Google brought me to you. Great post! I loved seeing all the results before I started. Super helpful.
*And to Alice above me in England last night, sending you happy, creative, vibes from Minnesota!
Fantastic and thorough post! Thanks so much for taking the time to document all these mediums!
Thank you for this article! As everyone said the Google search brought this up and is exactly what I needed!
I’m impressed with your testing methods and how many different mediums you used. However, I still don’t know *how* to sand the plastic paper. You refer to it but I wish you would give directions for sanding — what kind of sandpaper, how much you need to sand it, what direction (back and forth? in circles?), etc. Maybe you can update this post or do a separate post on the sanding process.
This is an amazing post and incredibly helpful! Thank you for doing this. You saved me a ton of time 🙂 It popped up on a Google Search as I’m sitting here experimenting with Shrinky Dink jewelry and searching for what media will work.