
A while back, I found 3D printing files for a rigid heddle loom. A new loom had been on my wish list for years but I never pulled the trigger. Honestly, I think I’ve become frugal in my old age. Years ago I wouldn’t have thought twice about adding a new loom to my cart and checking out, but these days I just can’t justify in my mind paying hundreds of dollars for a couple pieces of wood and some plastic. Especially when I’ve had 3d printers in my home for 10 or 15 years now and I pretty much DIY everything I can.
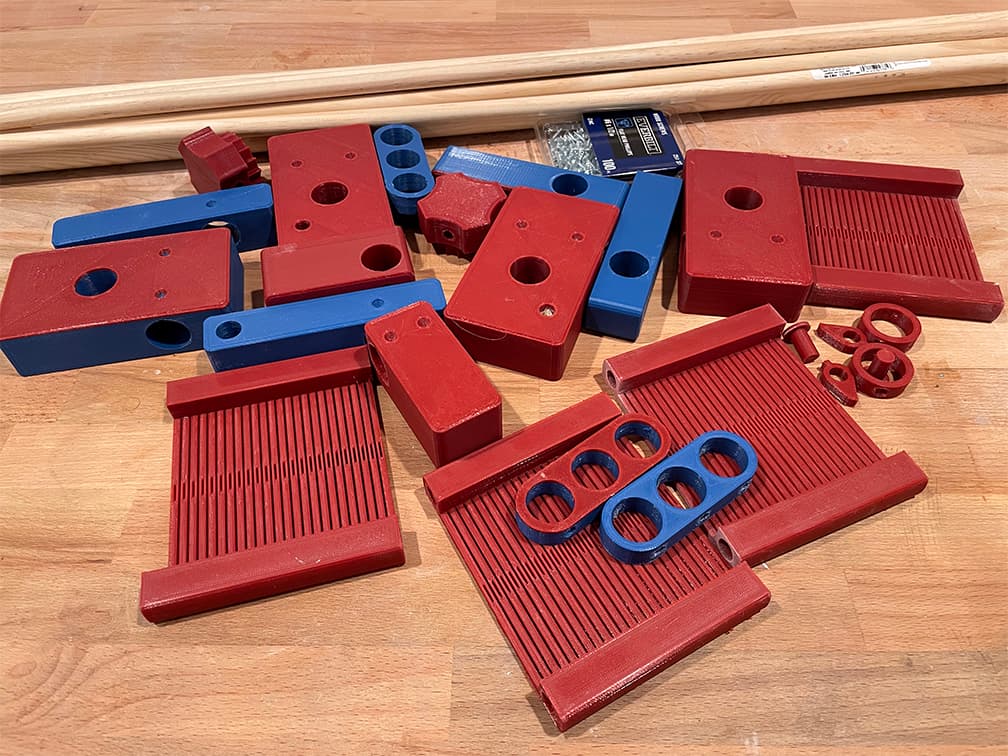
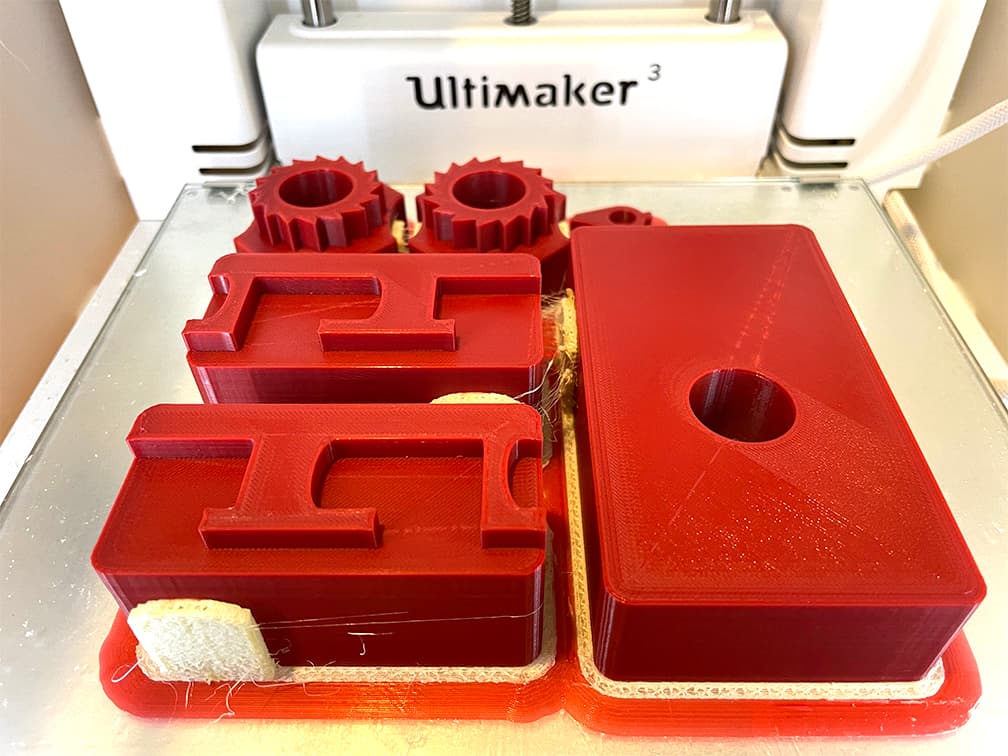
I found a new home for my old loom and set out to printing a new one. I should’ve started printing sooner because it took many days to print all the parts. It also took a bit more than a spool of filament, hence the multi color pieces.
While it printed, I was also sourcing the other materials and tools I would need. The hack a week blog has a really useful list of the dowel rod sizes and the lengths you will need to cut. I also needed a package of #6 wood screws.
Apparently, someone raided the dowel rod selection at the Home Depot a few blocks away so it took a few trips to find each of the 3 sizes needed. Places like Michaels and Joann’s will also carry a decent selection in their hobby wood section.
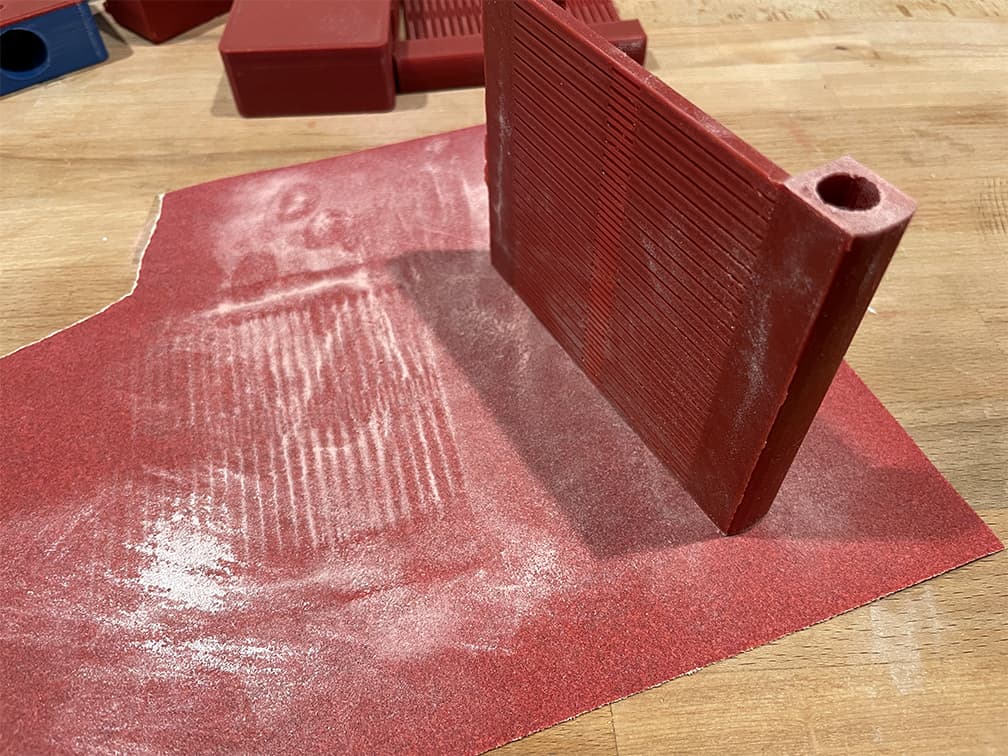
Start off by building the rigid heddle reed. The rest of the loom needs to fit around the reed, so this is the most important part. I started by sanding the sides of the pieces to make sure they sat snug up against each other and the slots appeared to be even between the parts.
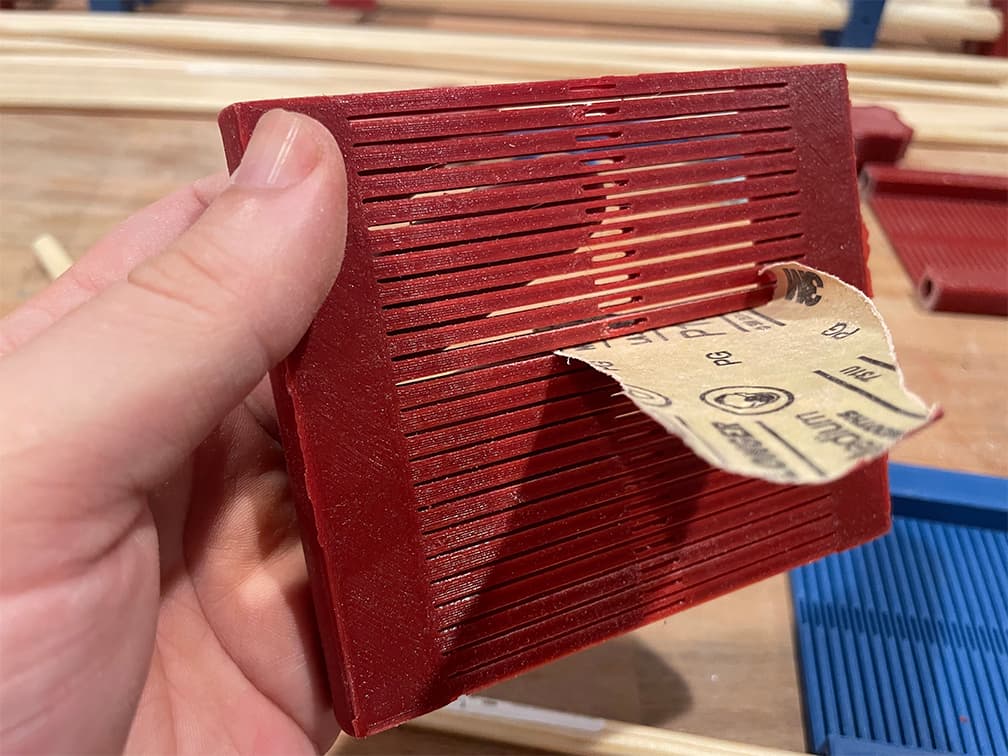
You’re also going to want to clean up the slots with sand paper and some snips. The yarn will need to slide through without getting snagged.
Among the free files are several sizes of reeds. I printed the 12 dent reed because I normally use sock and lace weight yarns so this is probably a bit more cleanup than you may have to do.
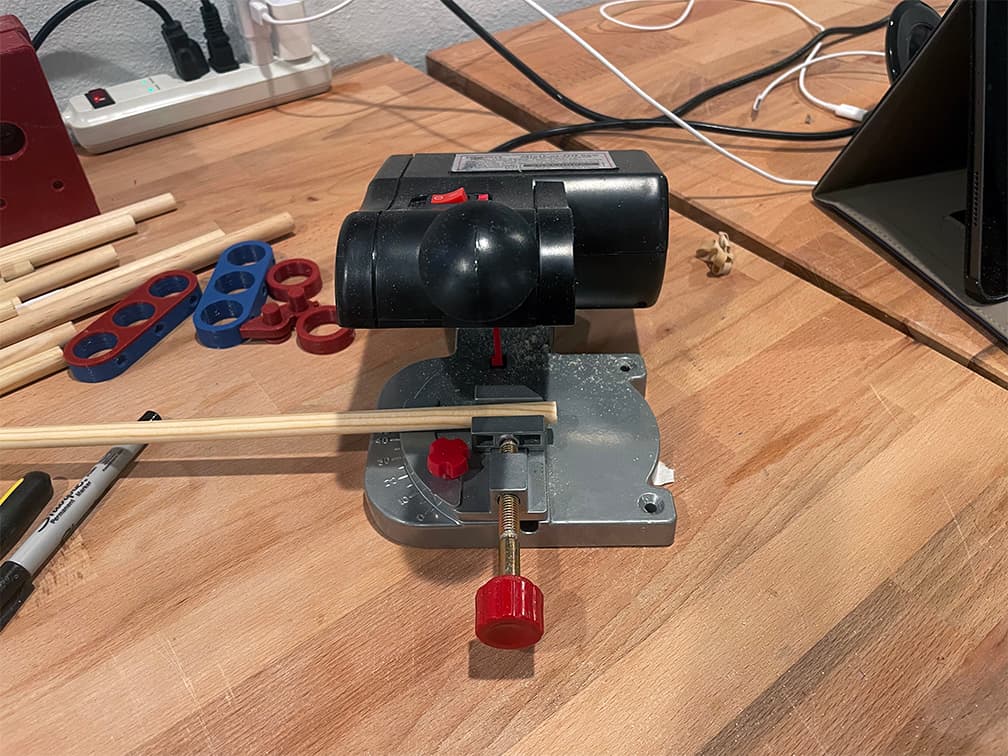
One of the tools I was really grateful for having was my mini cut-off saw. I have used this thing for everything from miniatures to making window screens. The 7/8″ rods are a bit big for it, but you can finagle it into cutting them.
One of the problems with a free or open-source pattern is that it hasn’t really been tested out. The struggle started immediately once I started putting all the pieces together.
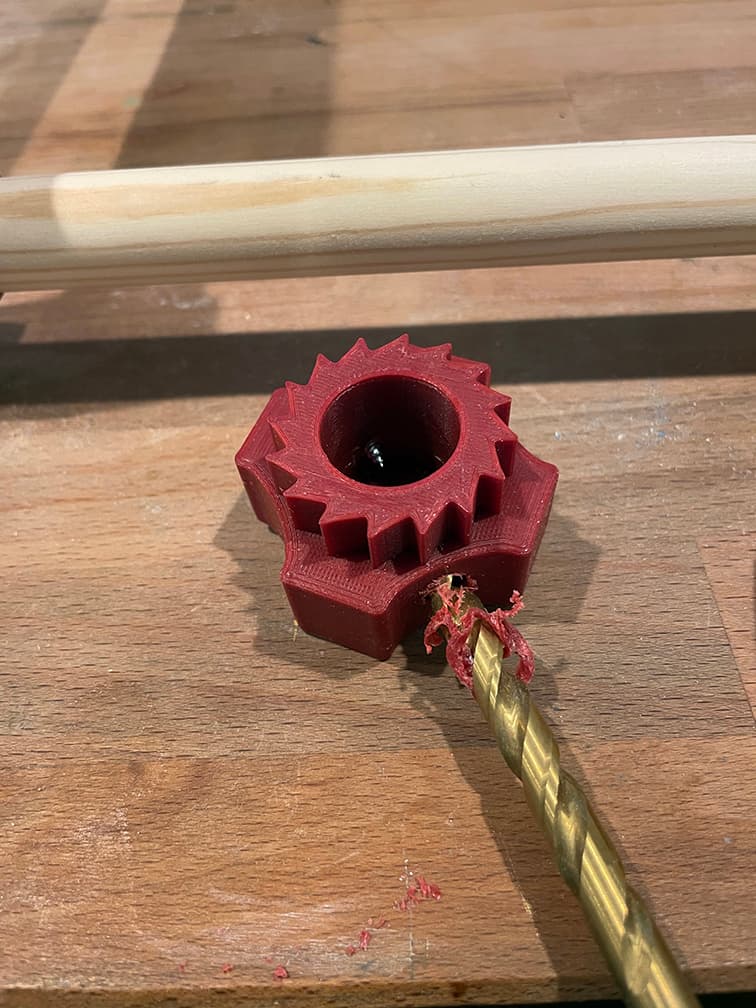
Most of the holes in the 3D printed parts were not sized properly. Several of the screw holes had to be drilled out and several of the dowel rods had to be sanded down so they could slide through the openings.
If you are capable of editing 3d models, I would highly suggest modifying the parts for larger openings. My arms still hurt from all the sanding I did to get this to fit together.
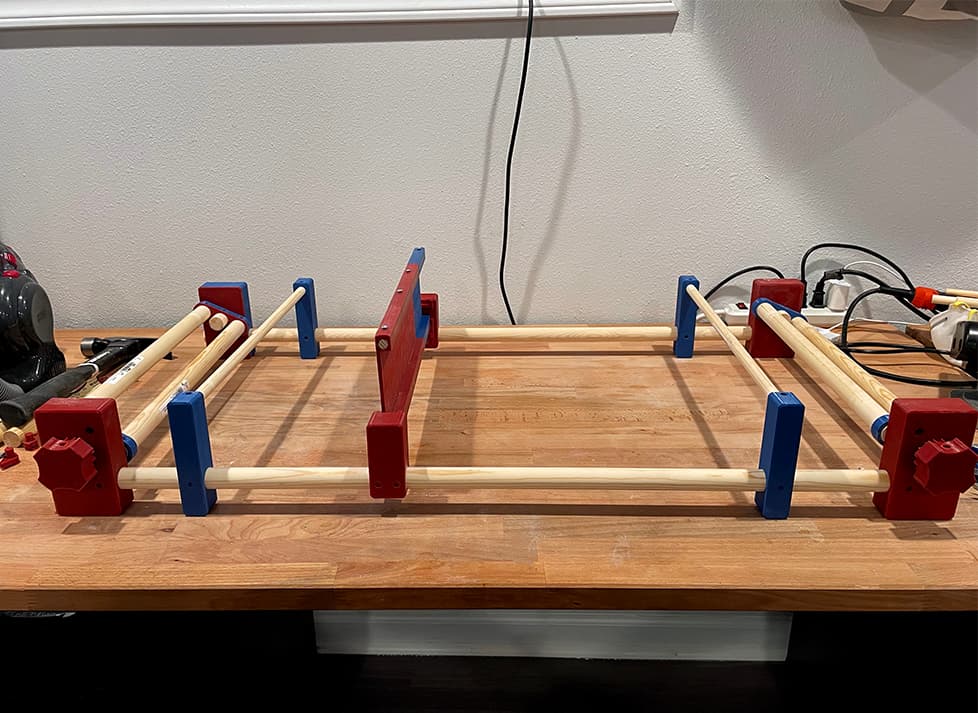
Once the rods were sanded and could easily be run through the 3D parts it pretty much just slapped together. A hole lot of screws are added where ever there is a hole for one.
I am slightly concerned with the locking mechanism on each end, but I’ll be trying the loom out next and reporting back to the author of the files for any future improvements.
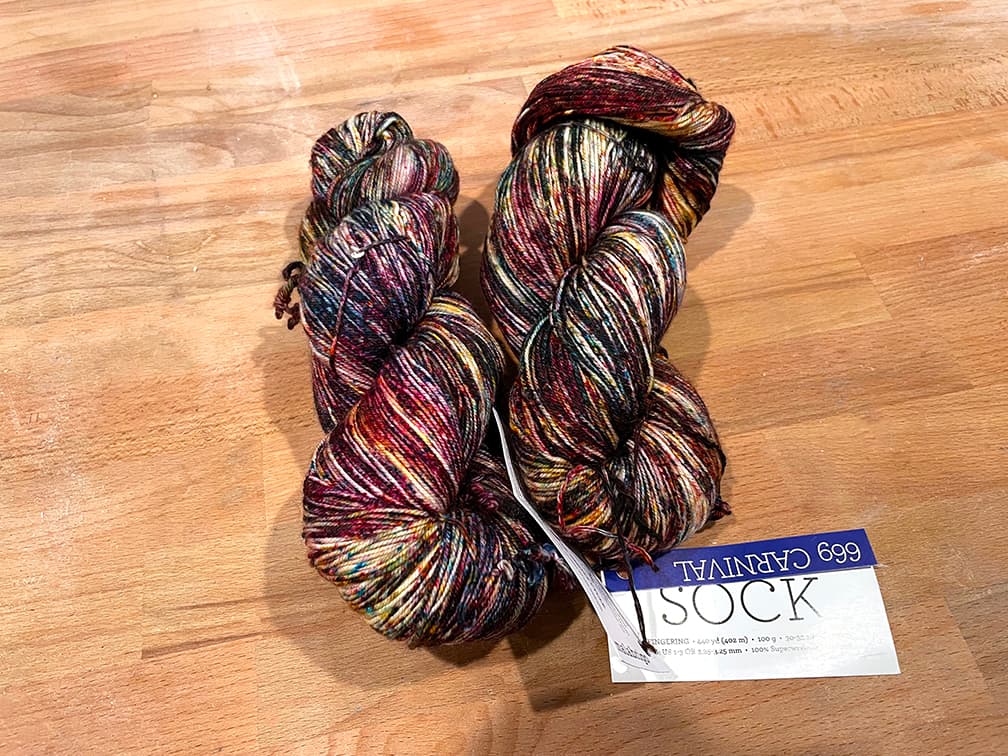
I’ve been stashing away beautiful yarns for my new loom and I’m excited to see how the weaves turn out. I have realized I have a bad habit of picking yarns that are probably too dark. I really want something more colorful and vibrant. Hopefully I picked a better yarn this time but I guess we’ll see what happens!