In my last post, Trying a Punch Needle Kit, I created a little fox. I mentioned in that post that you were basically creating a mini rug. So, of course, I spent days obsessing over rug making. Most of that time I found myself on the Oxford Company YouTube channel watching video after video on the process of making a rug.
Amy Oxford’s videos are really easy to follow and full of information. Her videos break down every step in making a rug, from Creating a Carpet Tack Frame, Transferring your pattern to your material, to Hemming your work and the finishing touches. Even if I was not planning on trying to make a rug, I could see myself watching her videos because Amy comes across very kind and her videos are very slow-paced and calming.
Preparation
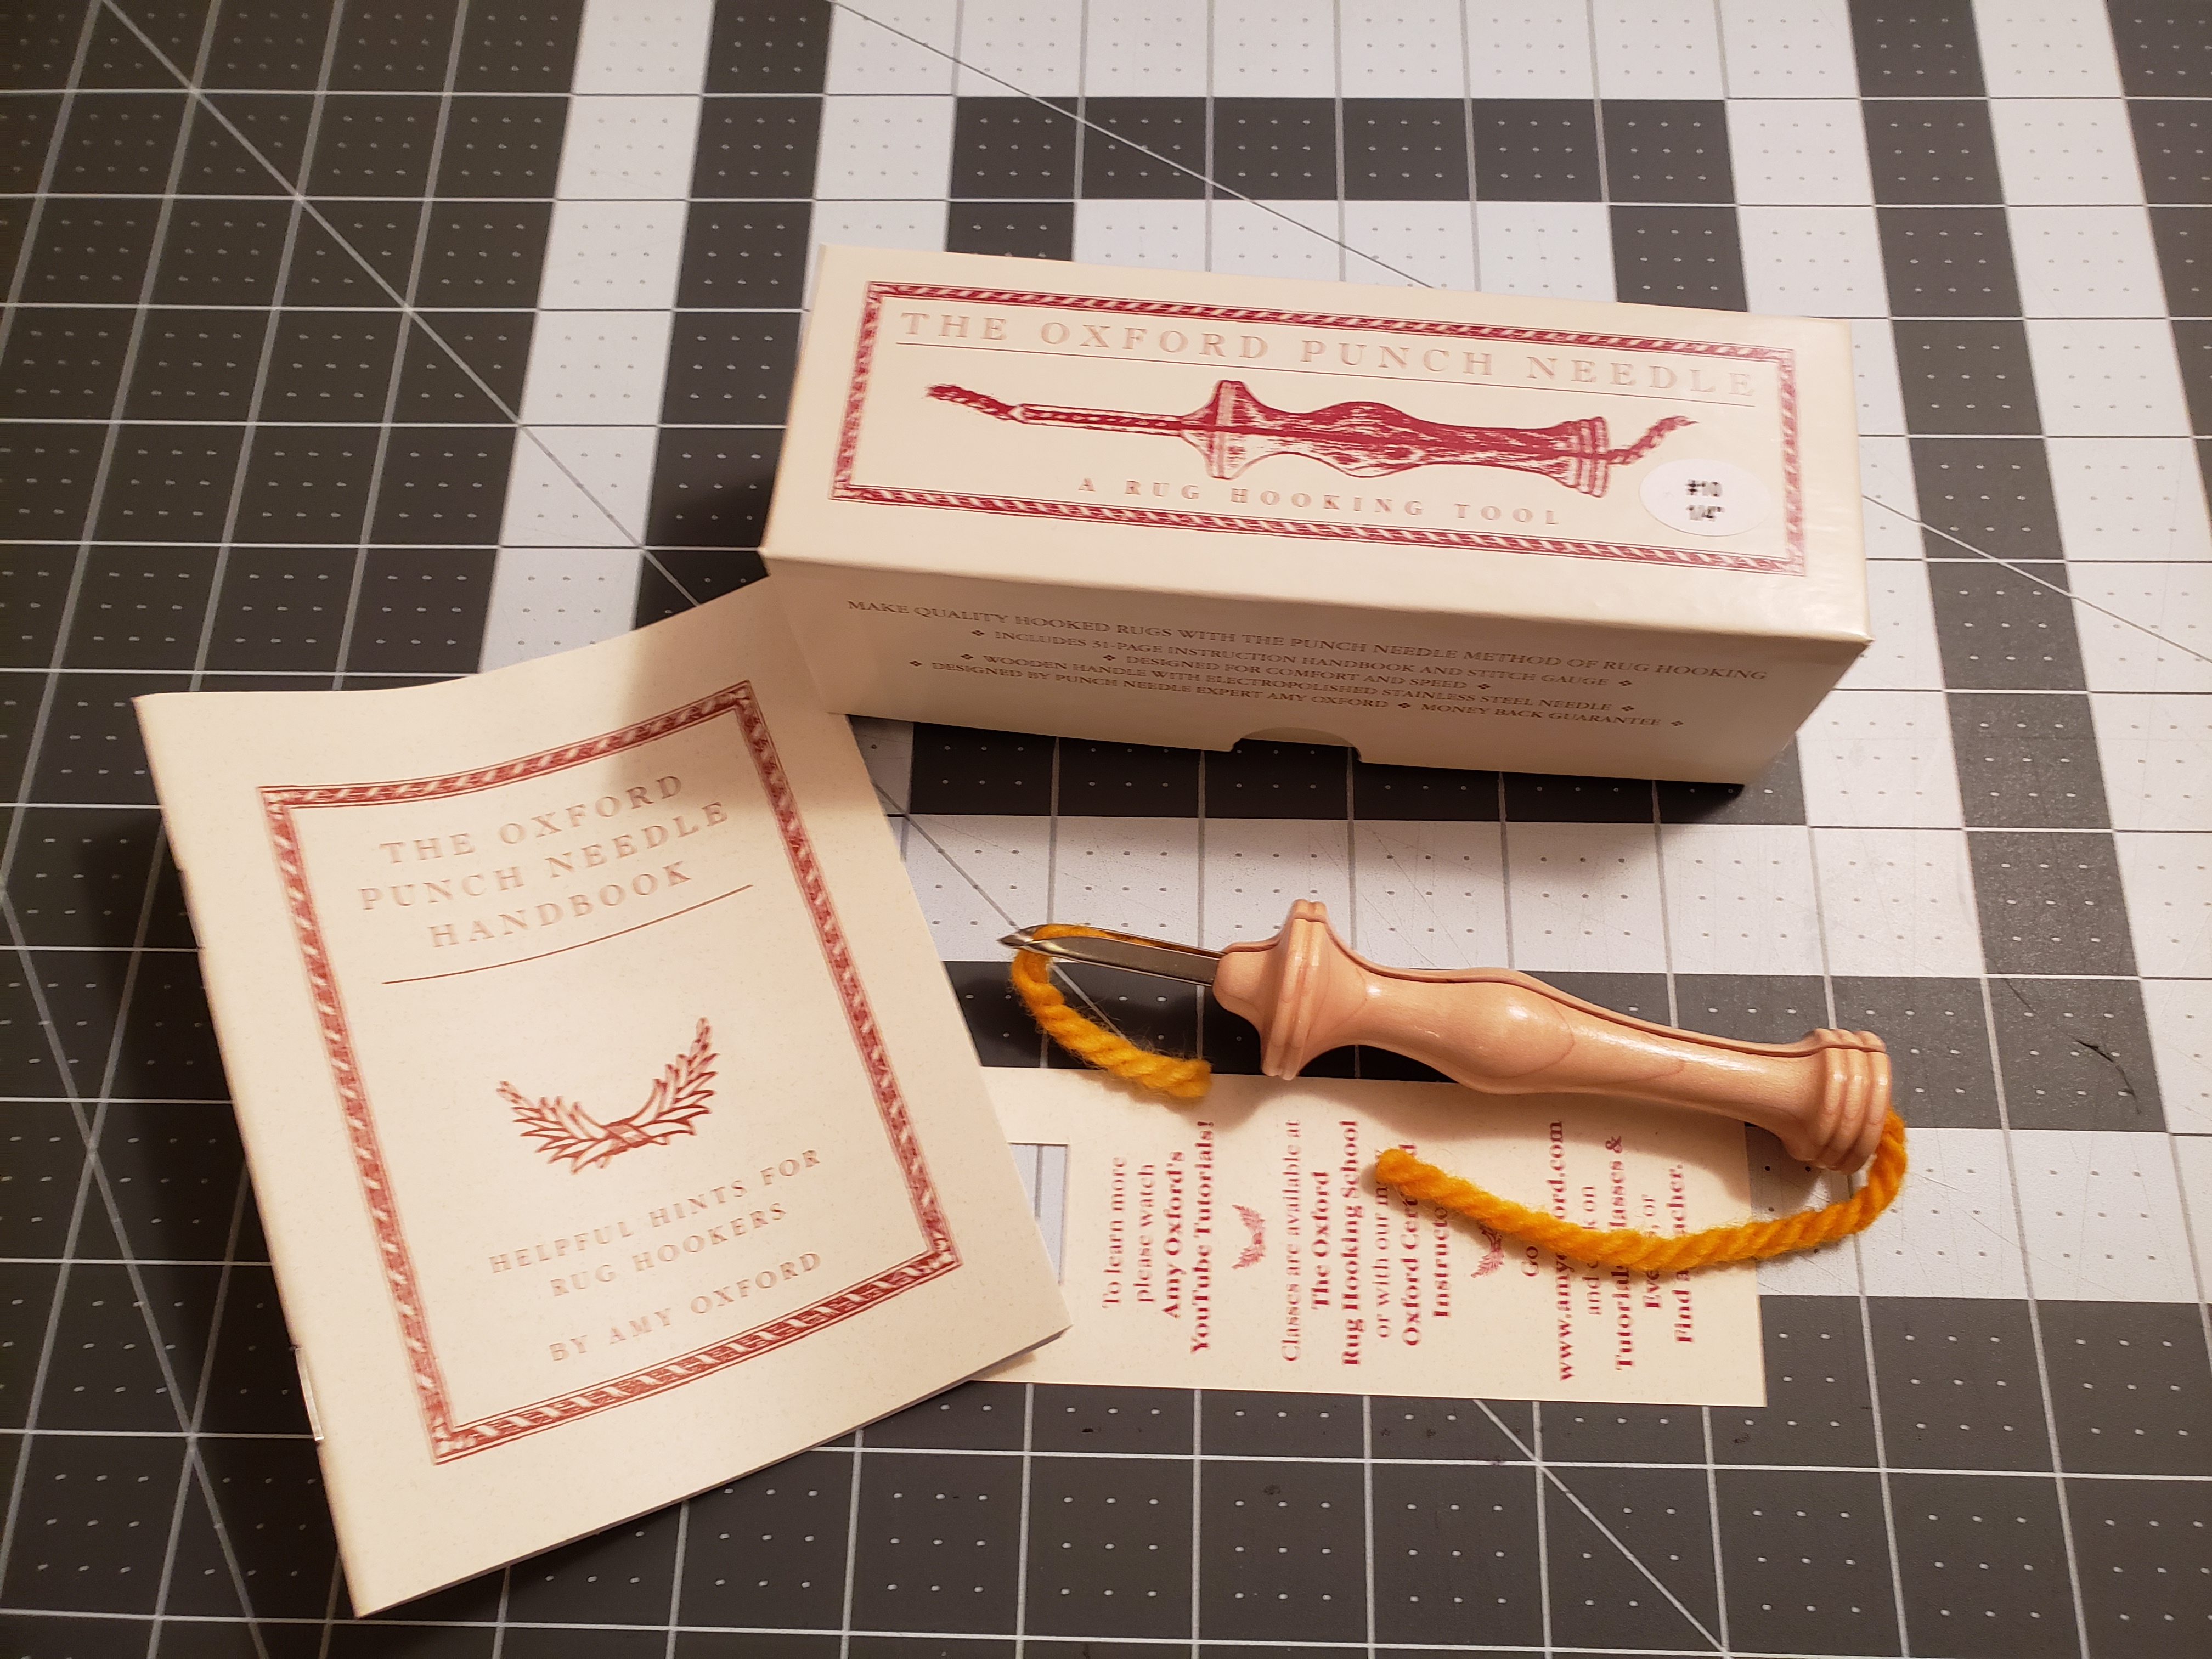
Before beginning, there was some prep involved. First, I had to get a punch needle. After watching most of Amy’s library of videos, I decided to buy her punch needle. To be honest, her needle is not the cheapest out there, but it’s simple, very easy to thread and solidly built to last a lifetime.
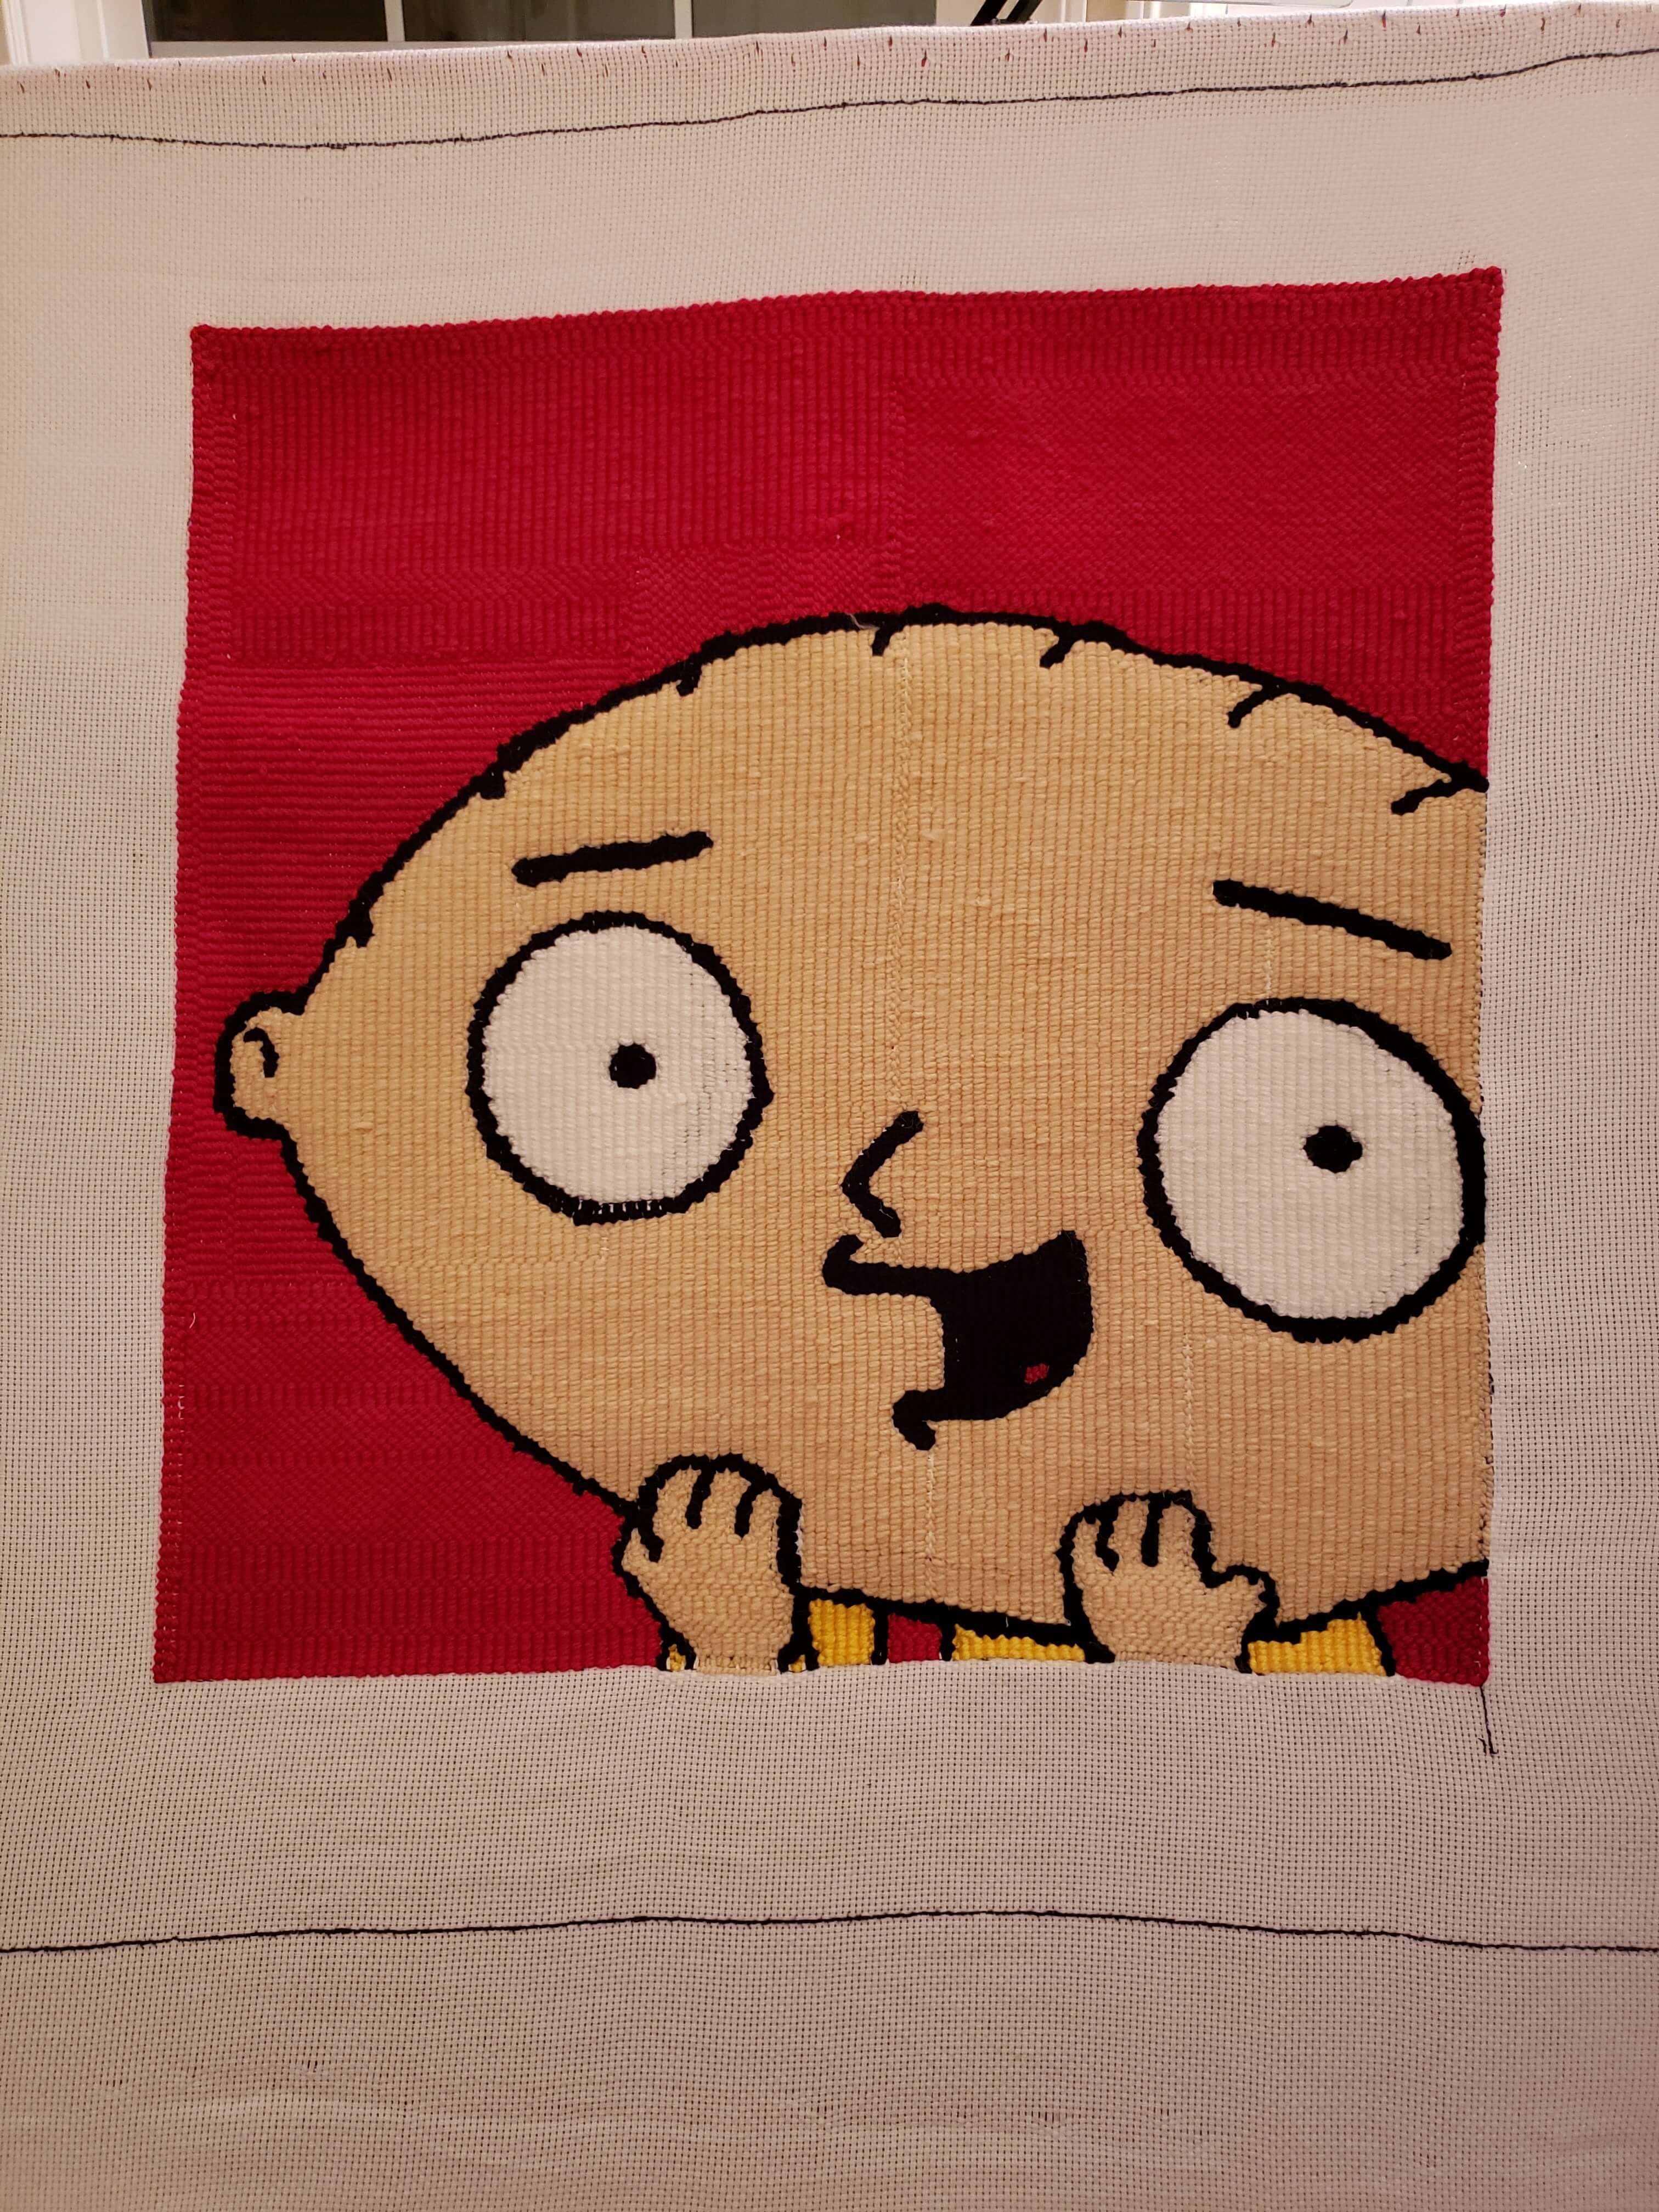
Next, I spent some time on Google Images looking for an idea for a project. Most of the artwork in my house is cartoon characters and I have yet to make anything from Family Guy, so I selected an image of Stewie. Once I had my image and knew what colors I needed, I headed to Joann’s to collect the yarn for the project.
Amy’s needles come in two types: regular and fine. I chose regular which meant I needed to pick out my yarn colors in bulky or super bulky. Amy recommends taking your needle with you so you can make sure the yarn slips through the needle easily and won’t jam. I also could use any cheap bulky yarns because this was eventually going on a wall and didn’t need to be wool or any specific type of yarn that would stand up to the wear and tear of walking on it.
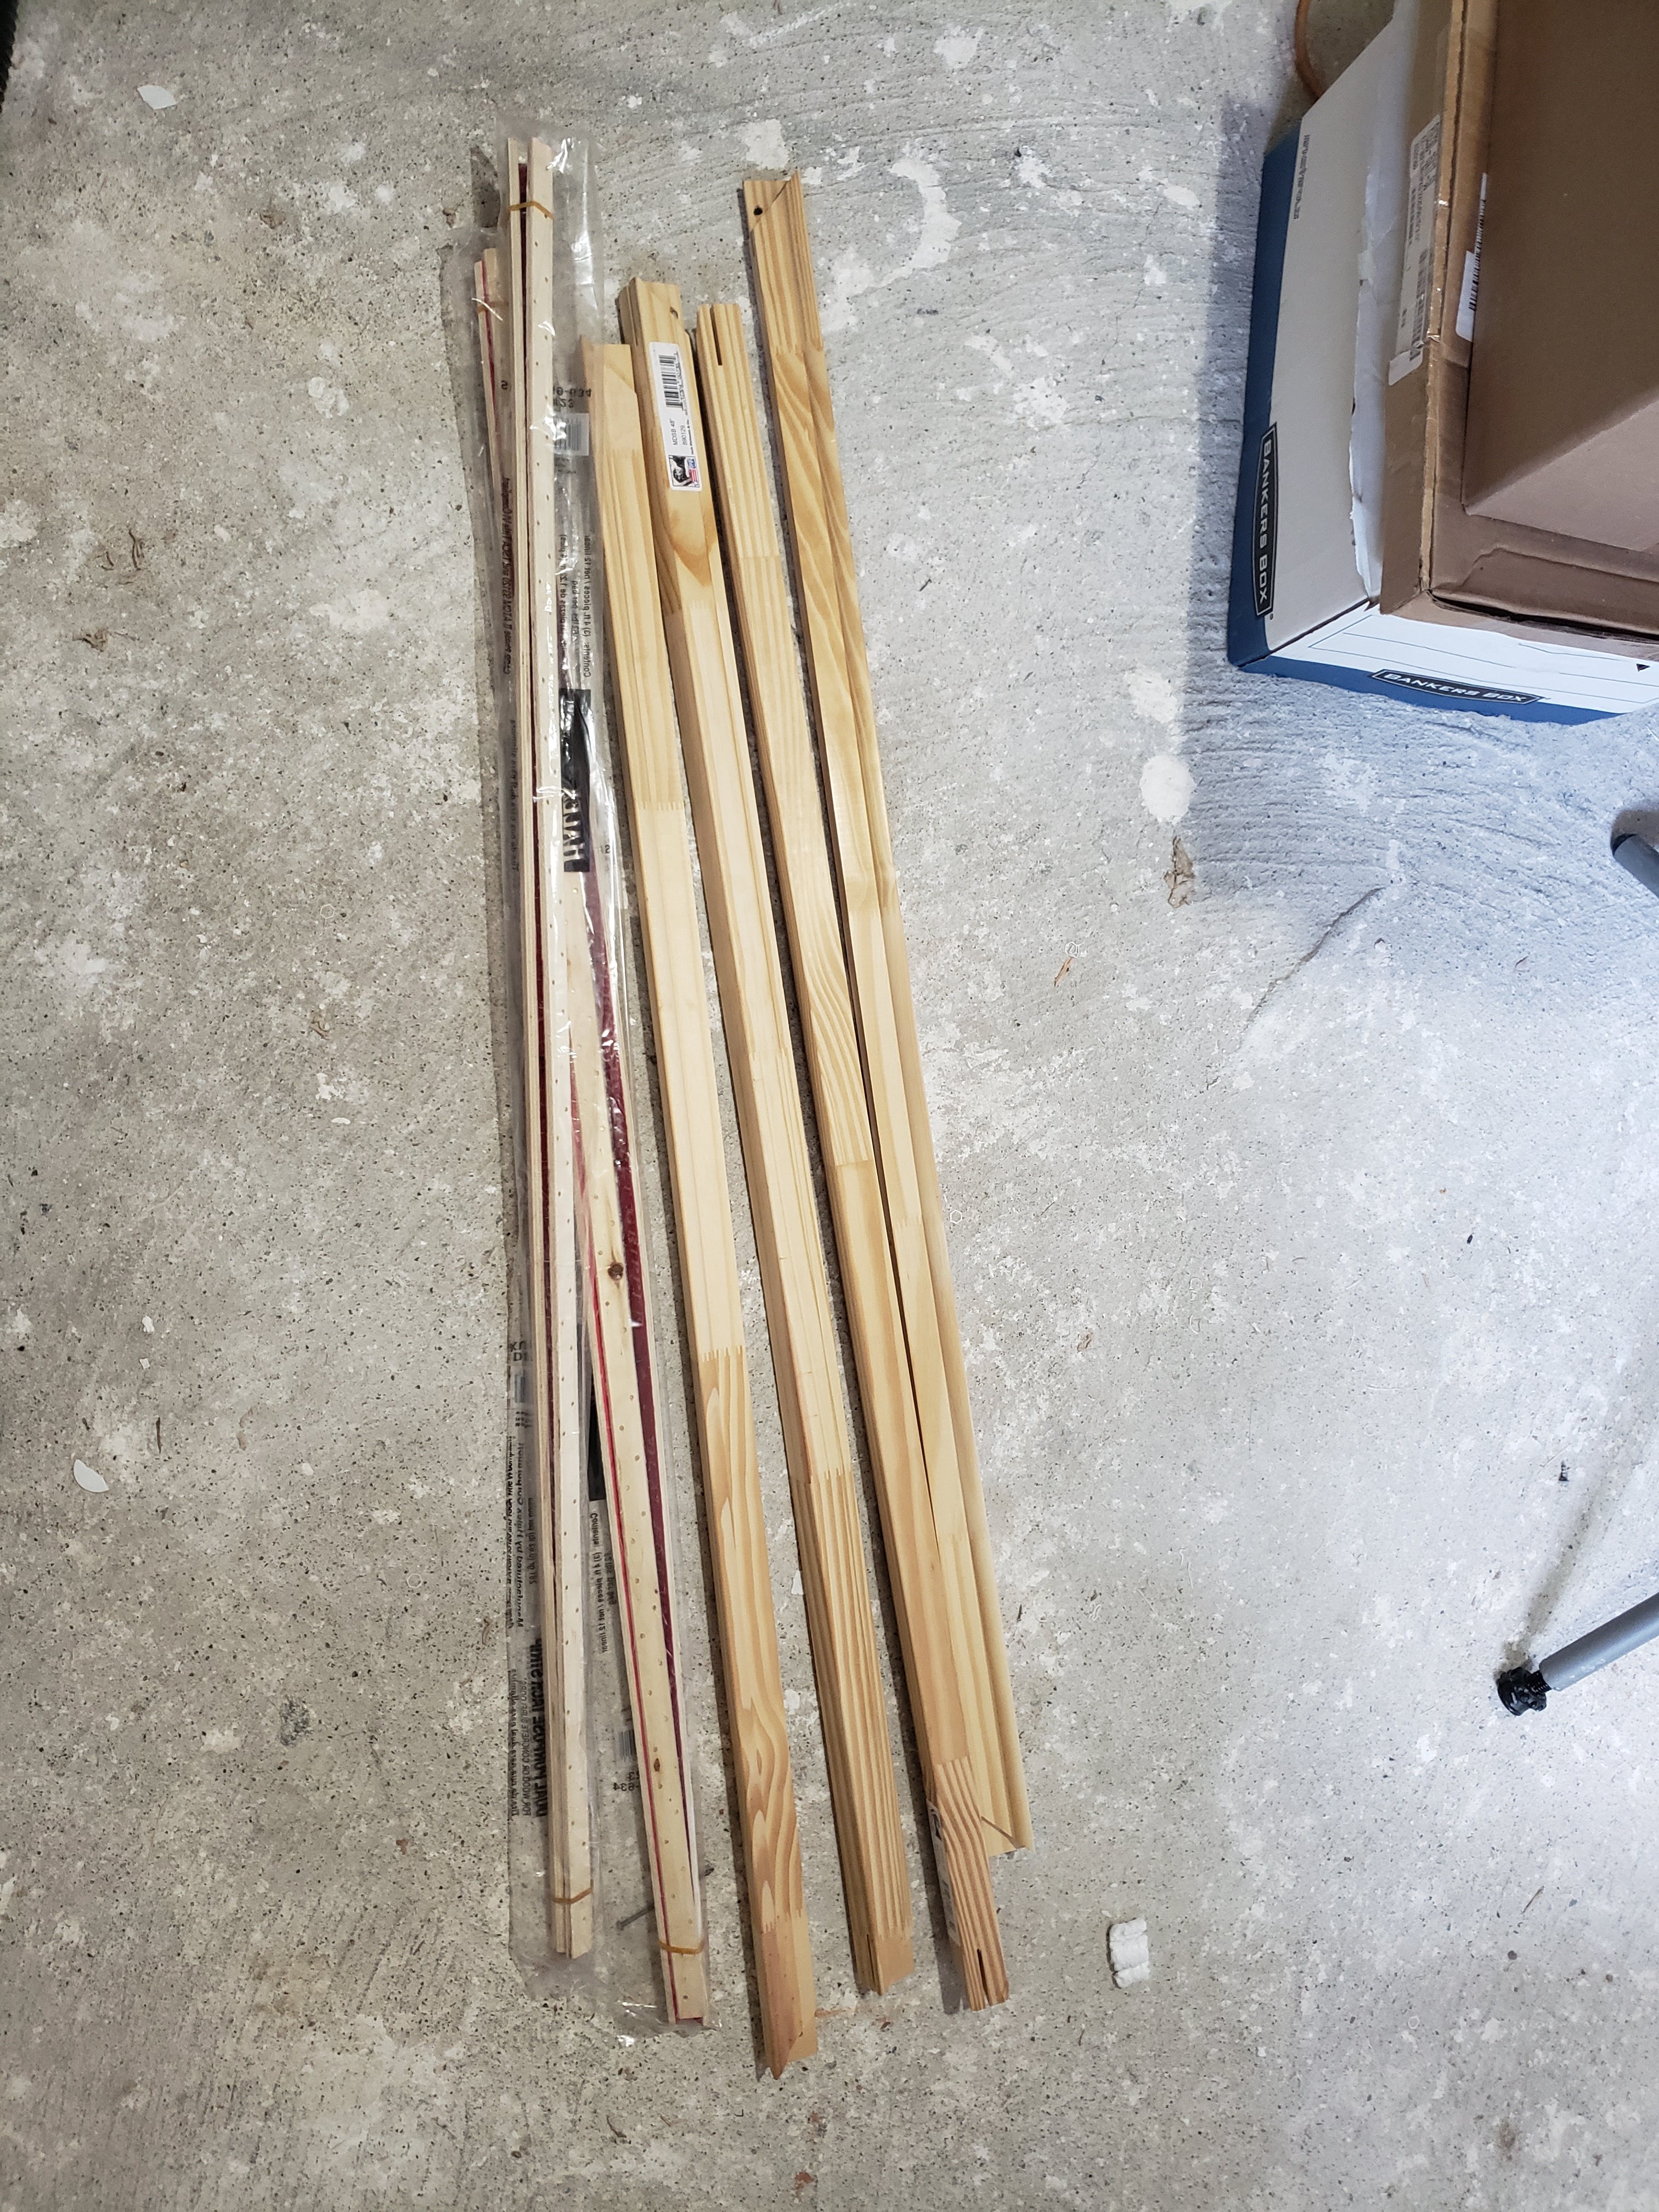
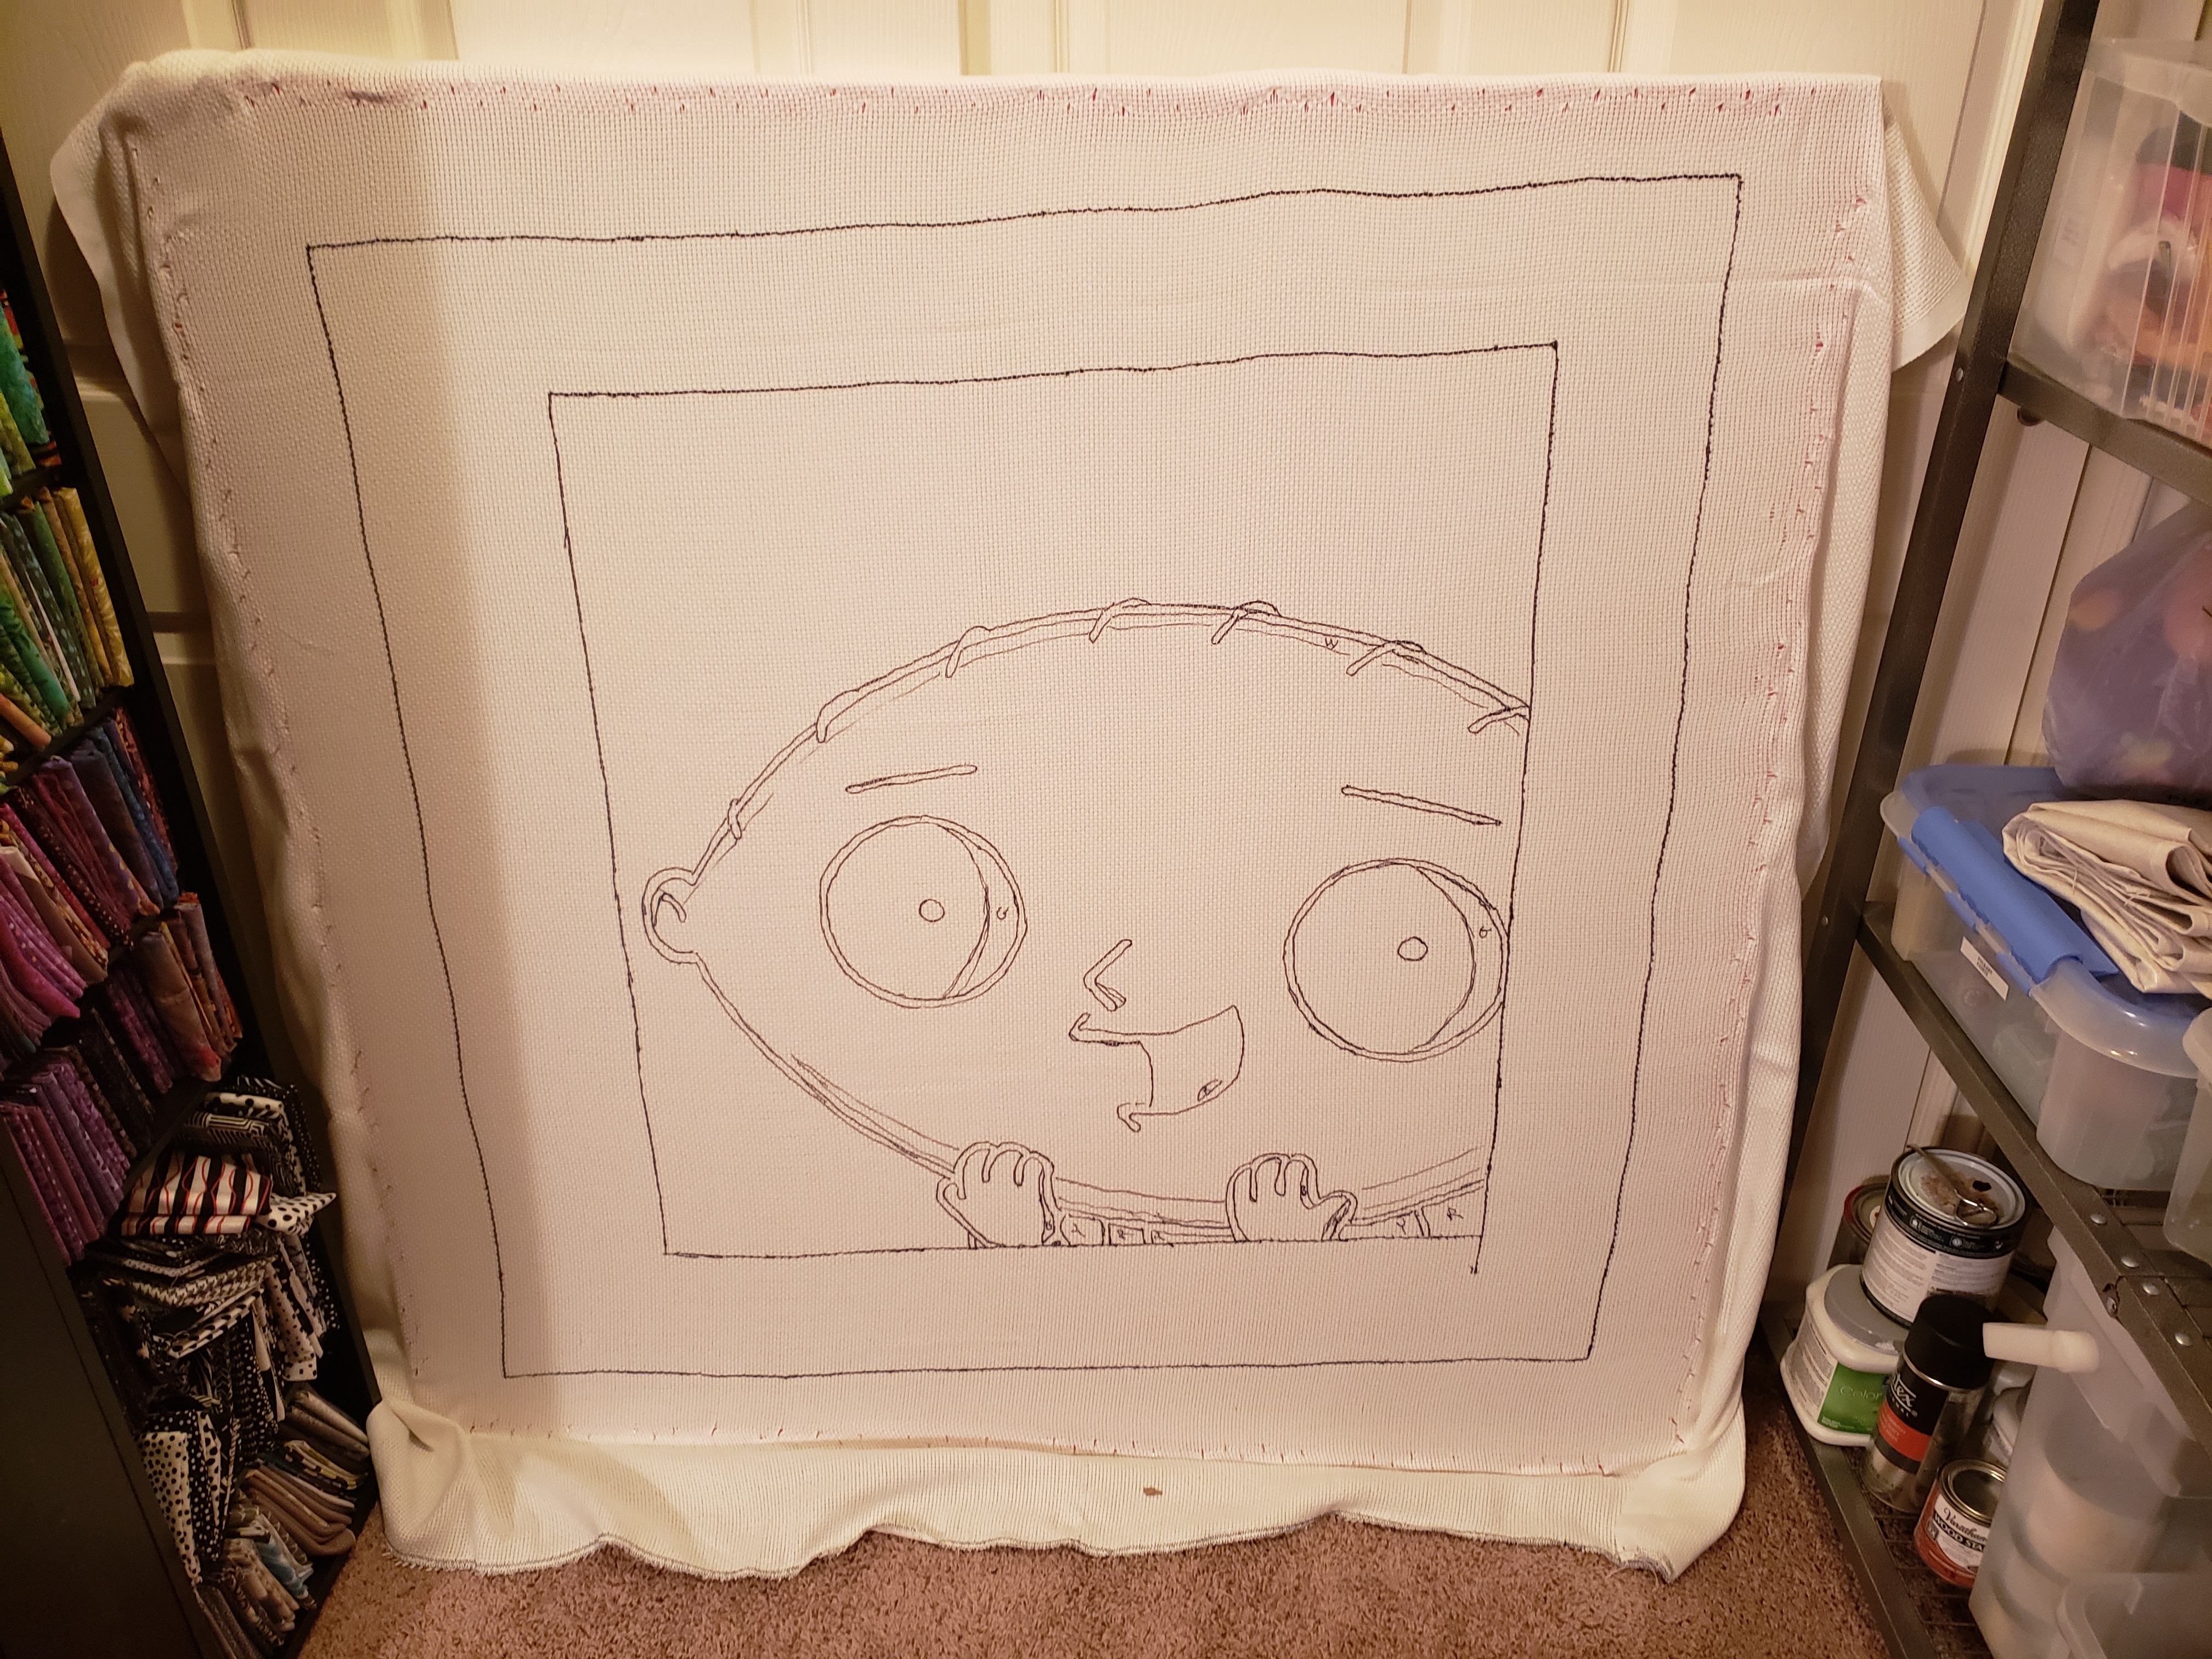
Next, I needed to make my frame. I’m going to try several methods, but the first one is to build a frame using stretcher bars from an art store. They snap together and you can interchange the pieces if you want different dimensions for other projects.
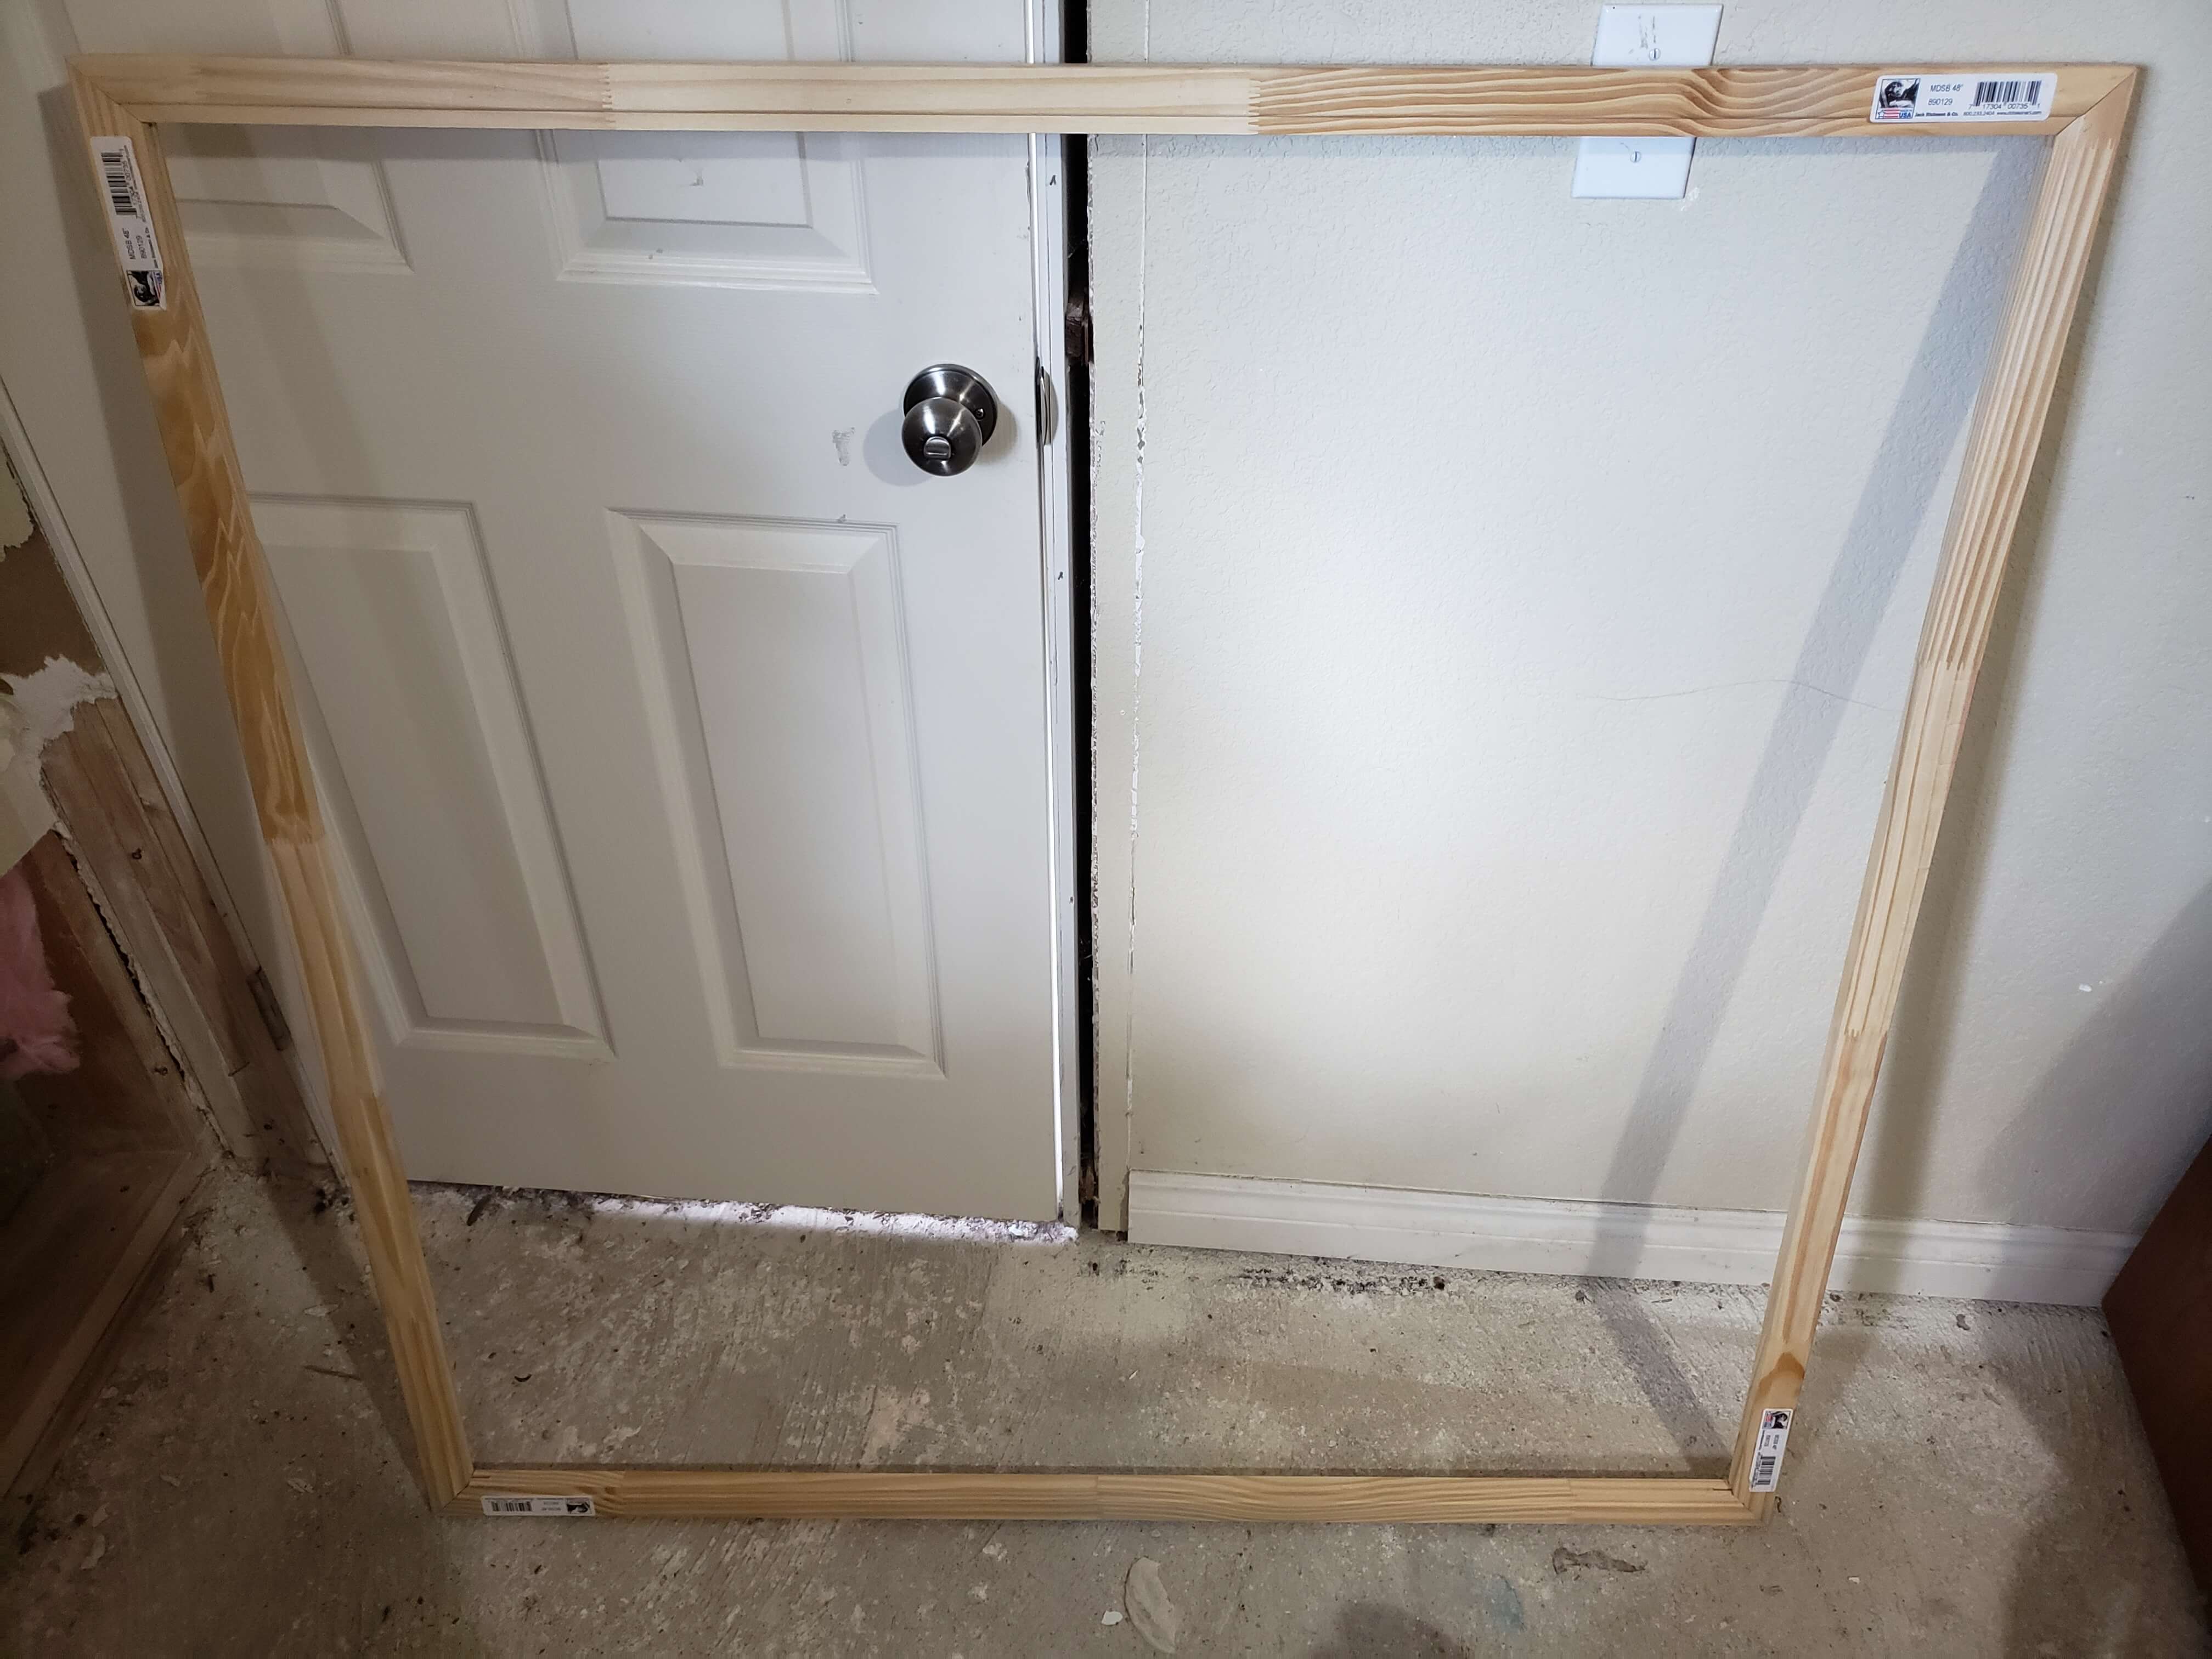
I used 48″ bars and I would not recommend doing this. Get smaller ones. Throughout the project, I ended up moving my frame quite a lot and one of the joints ended up snapping on me. Stretcher bars are meant to have canvas wrapped tightly around it and be hung on a wall, not constantly moved and manipulated. When it’s this large, you need braces placed in the middle to make it more sturdy, but that would get in the way of needle punching. Still, I wanted to try and get my whole project on the frame without having to move it around as I worked.
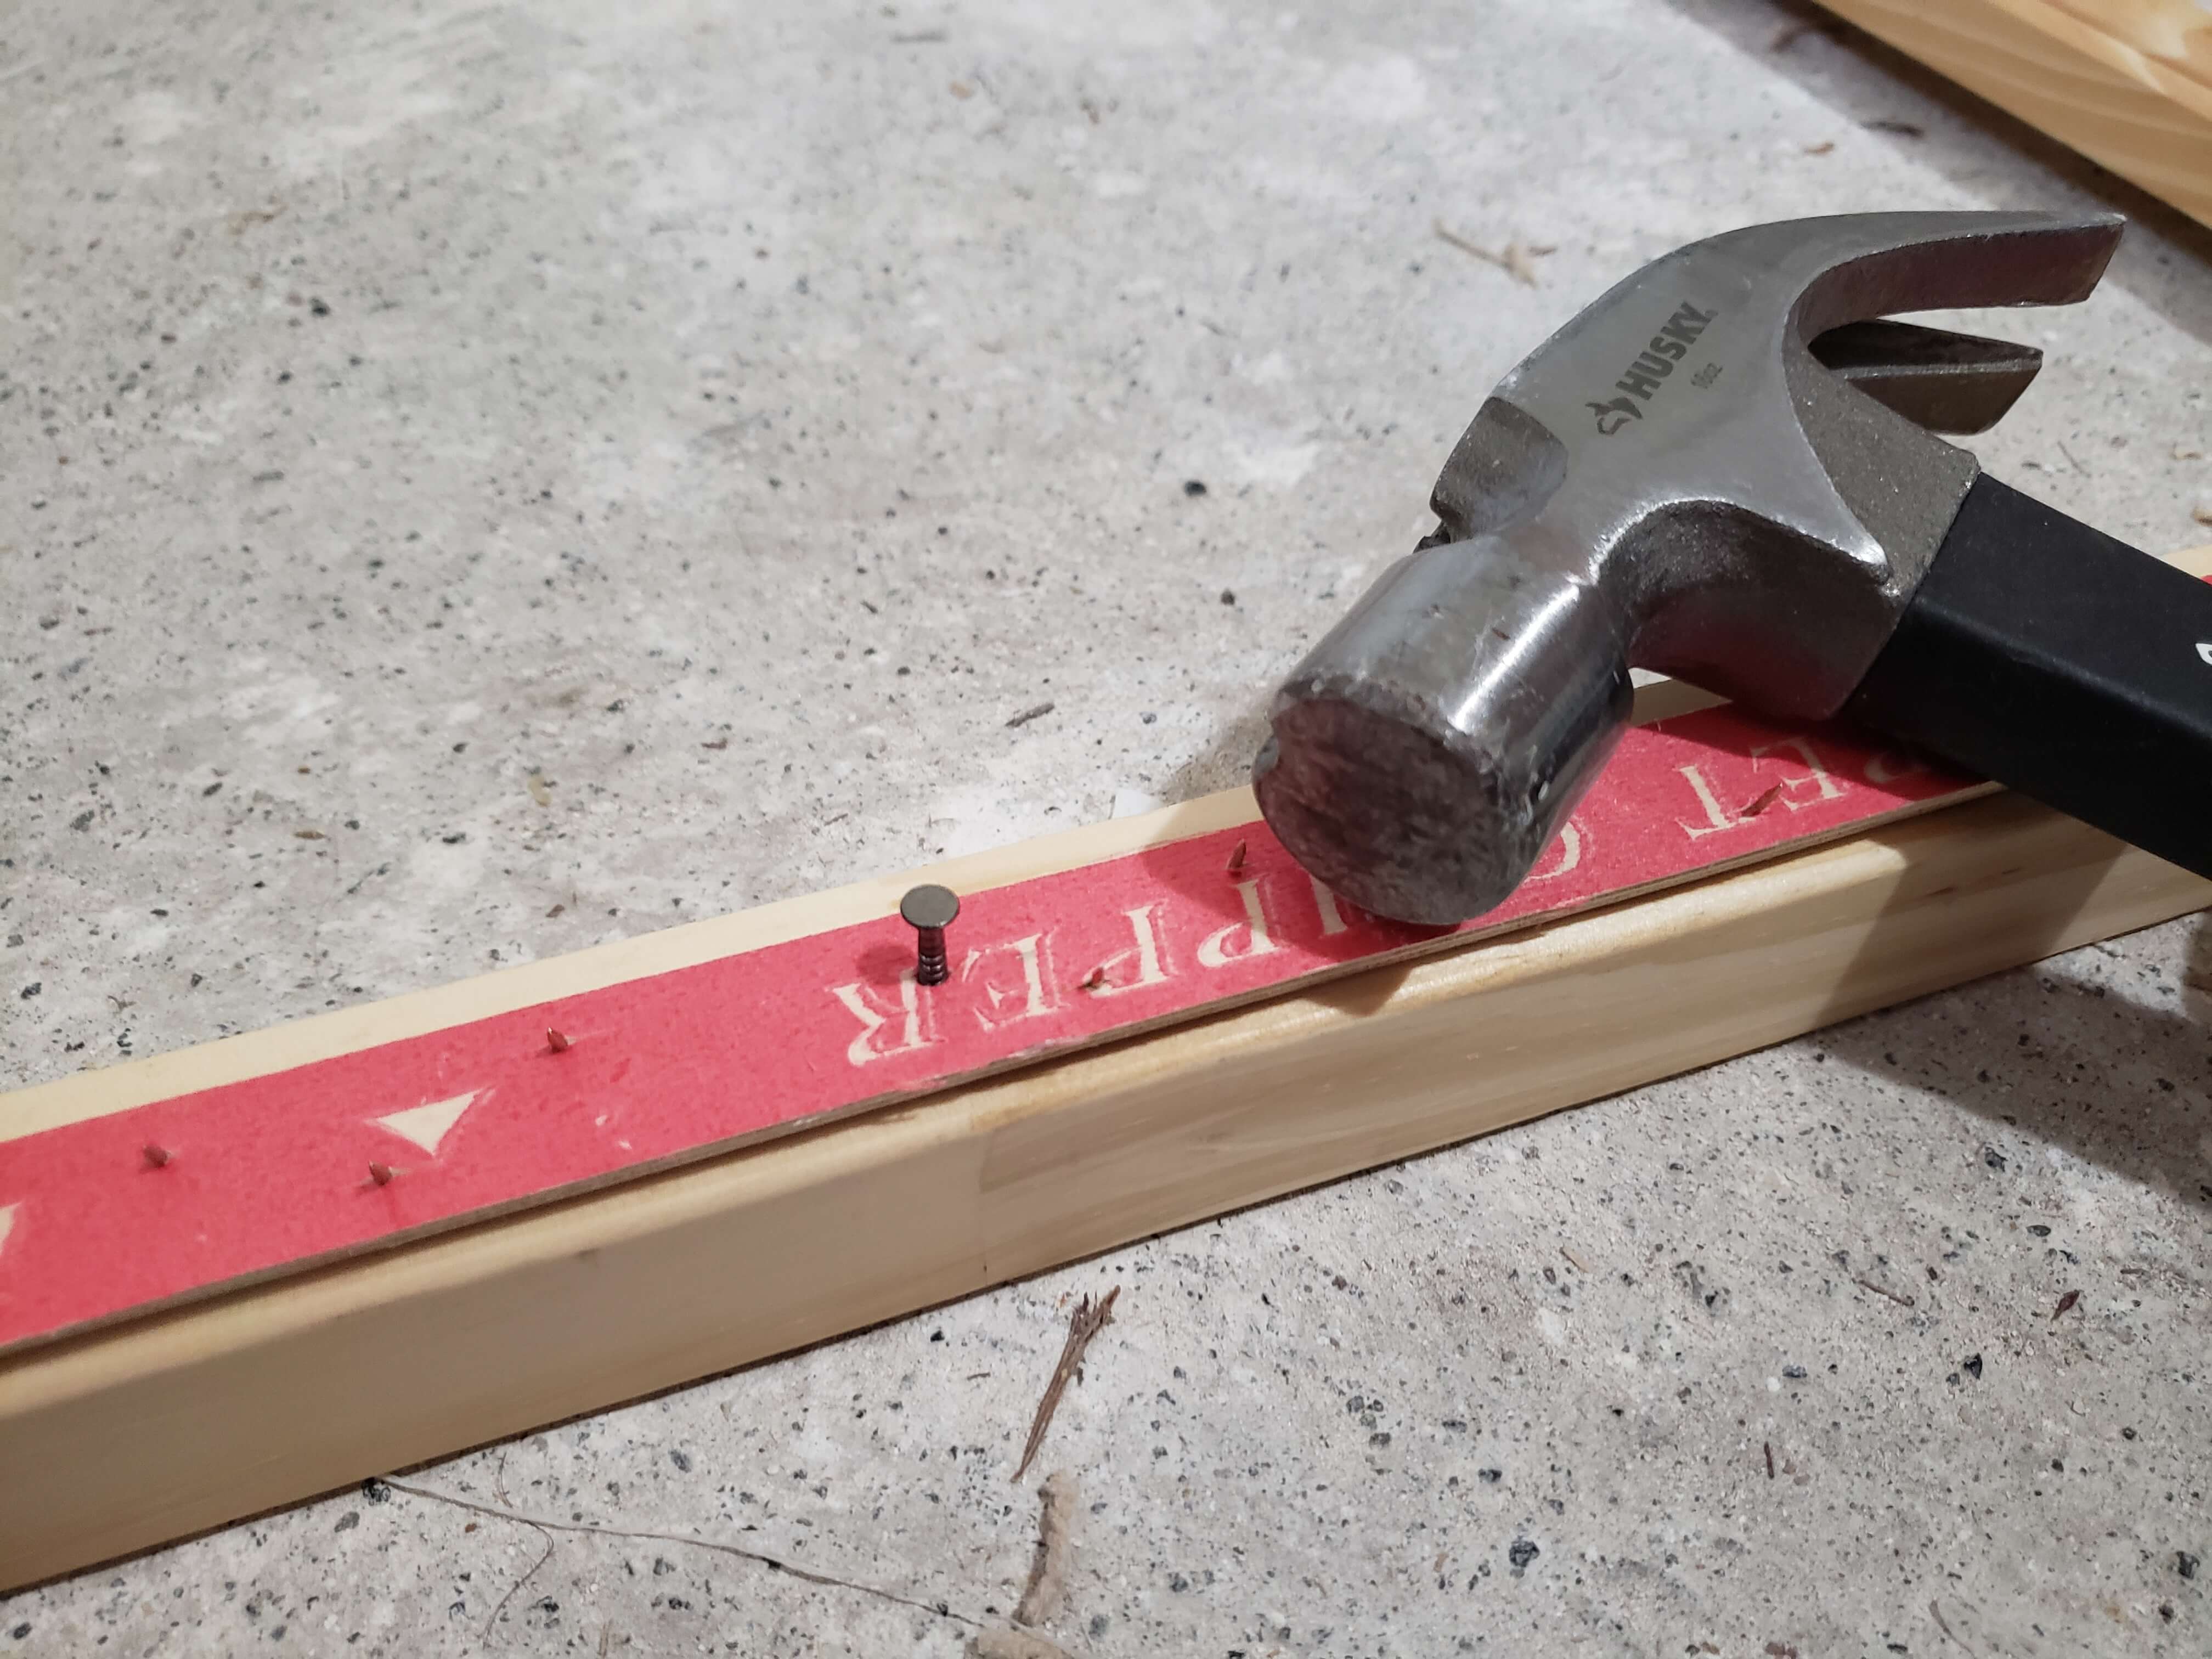
I also grabbed carpet tack strips from the local and nailed them to the flat side of the bars. This is what will hold your fabric onto the frame while you work. They come with nails already on them so you just need to cut them down to the size you want and smack it with a hammer. Just make sure the little tacks are pointed towards the outside of the frame or they won’t hold the fabric. If possible get the tack strips with 3 or more rows of tacks. My store only carried the strips with 2 rows.
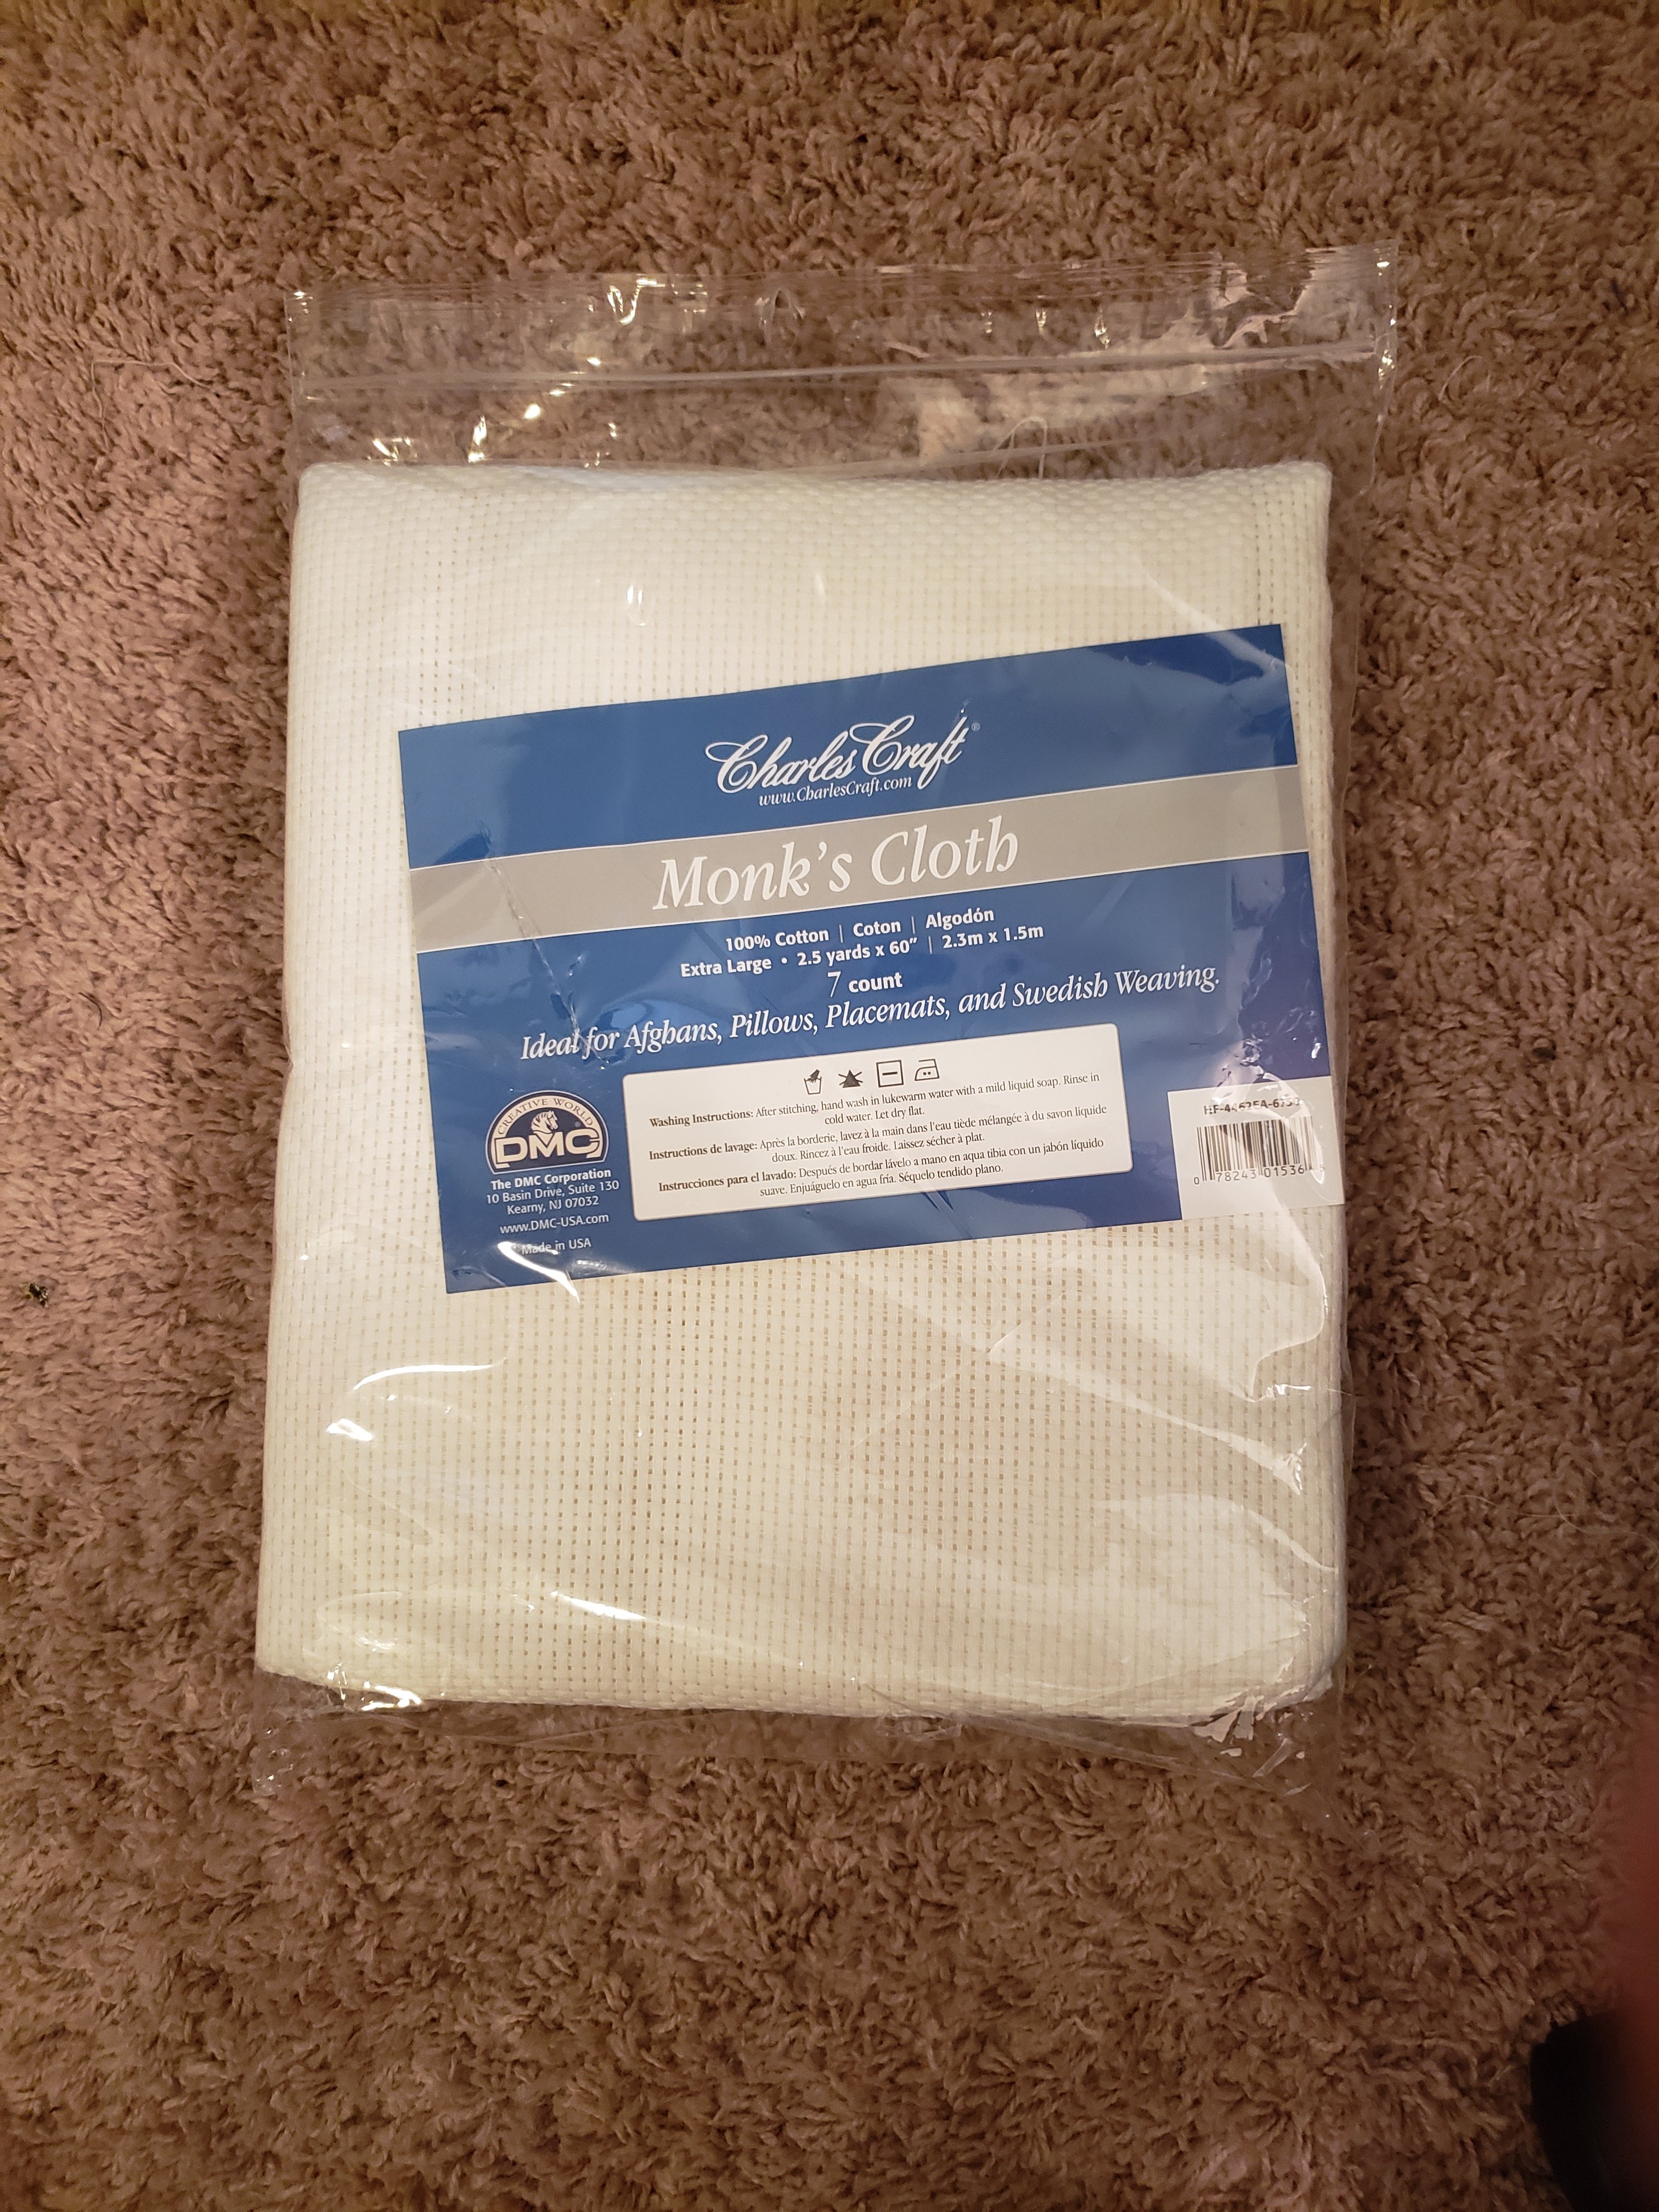
The last thing on my shopping list was the Monk’s Cloth. Monk’s Cloth is your carpet backing and can be found at your local fabric store. I just grabbed some at Joann Fabrics. This particular pack usually runs around $25 or $30 but the fabric is 2.5 yards x 60″. Depending on what you make, you should be able to get several projects out of this unless you’re making an area rug.
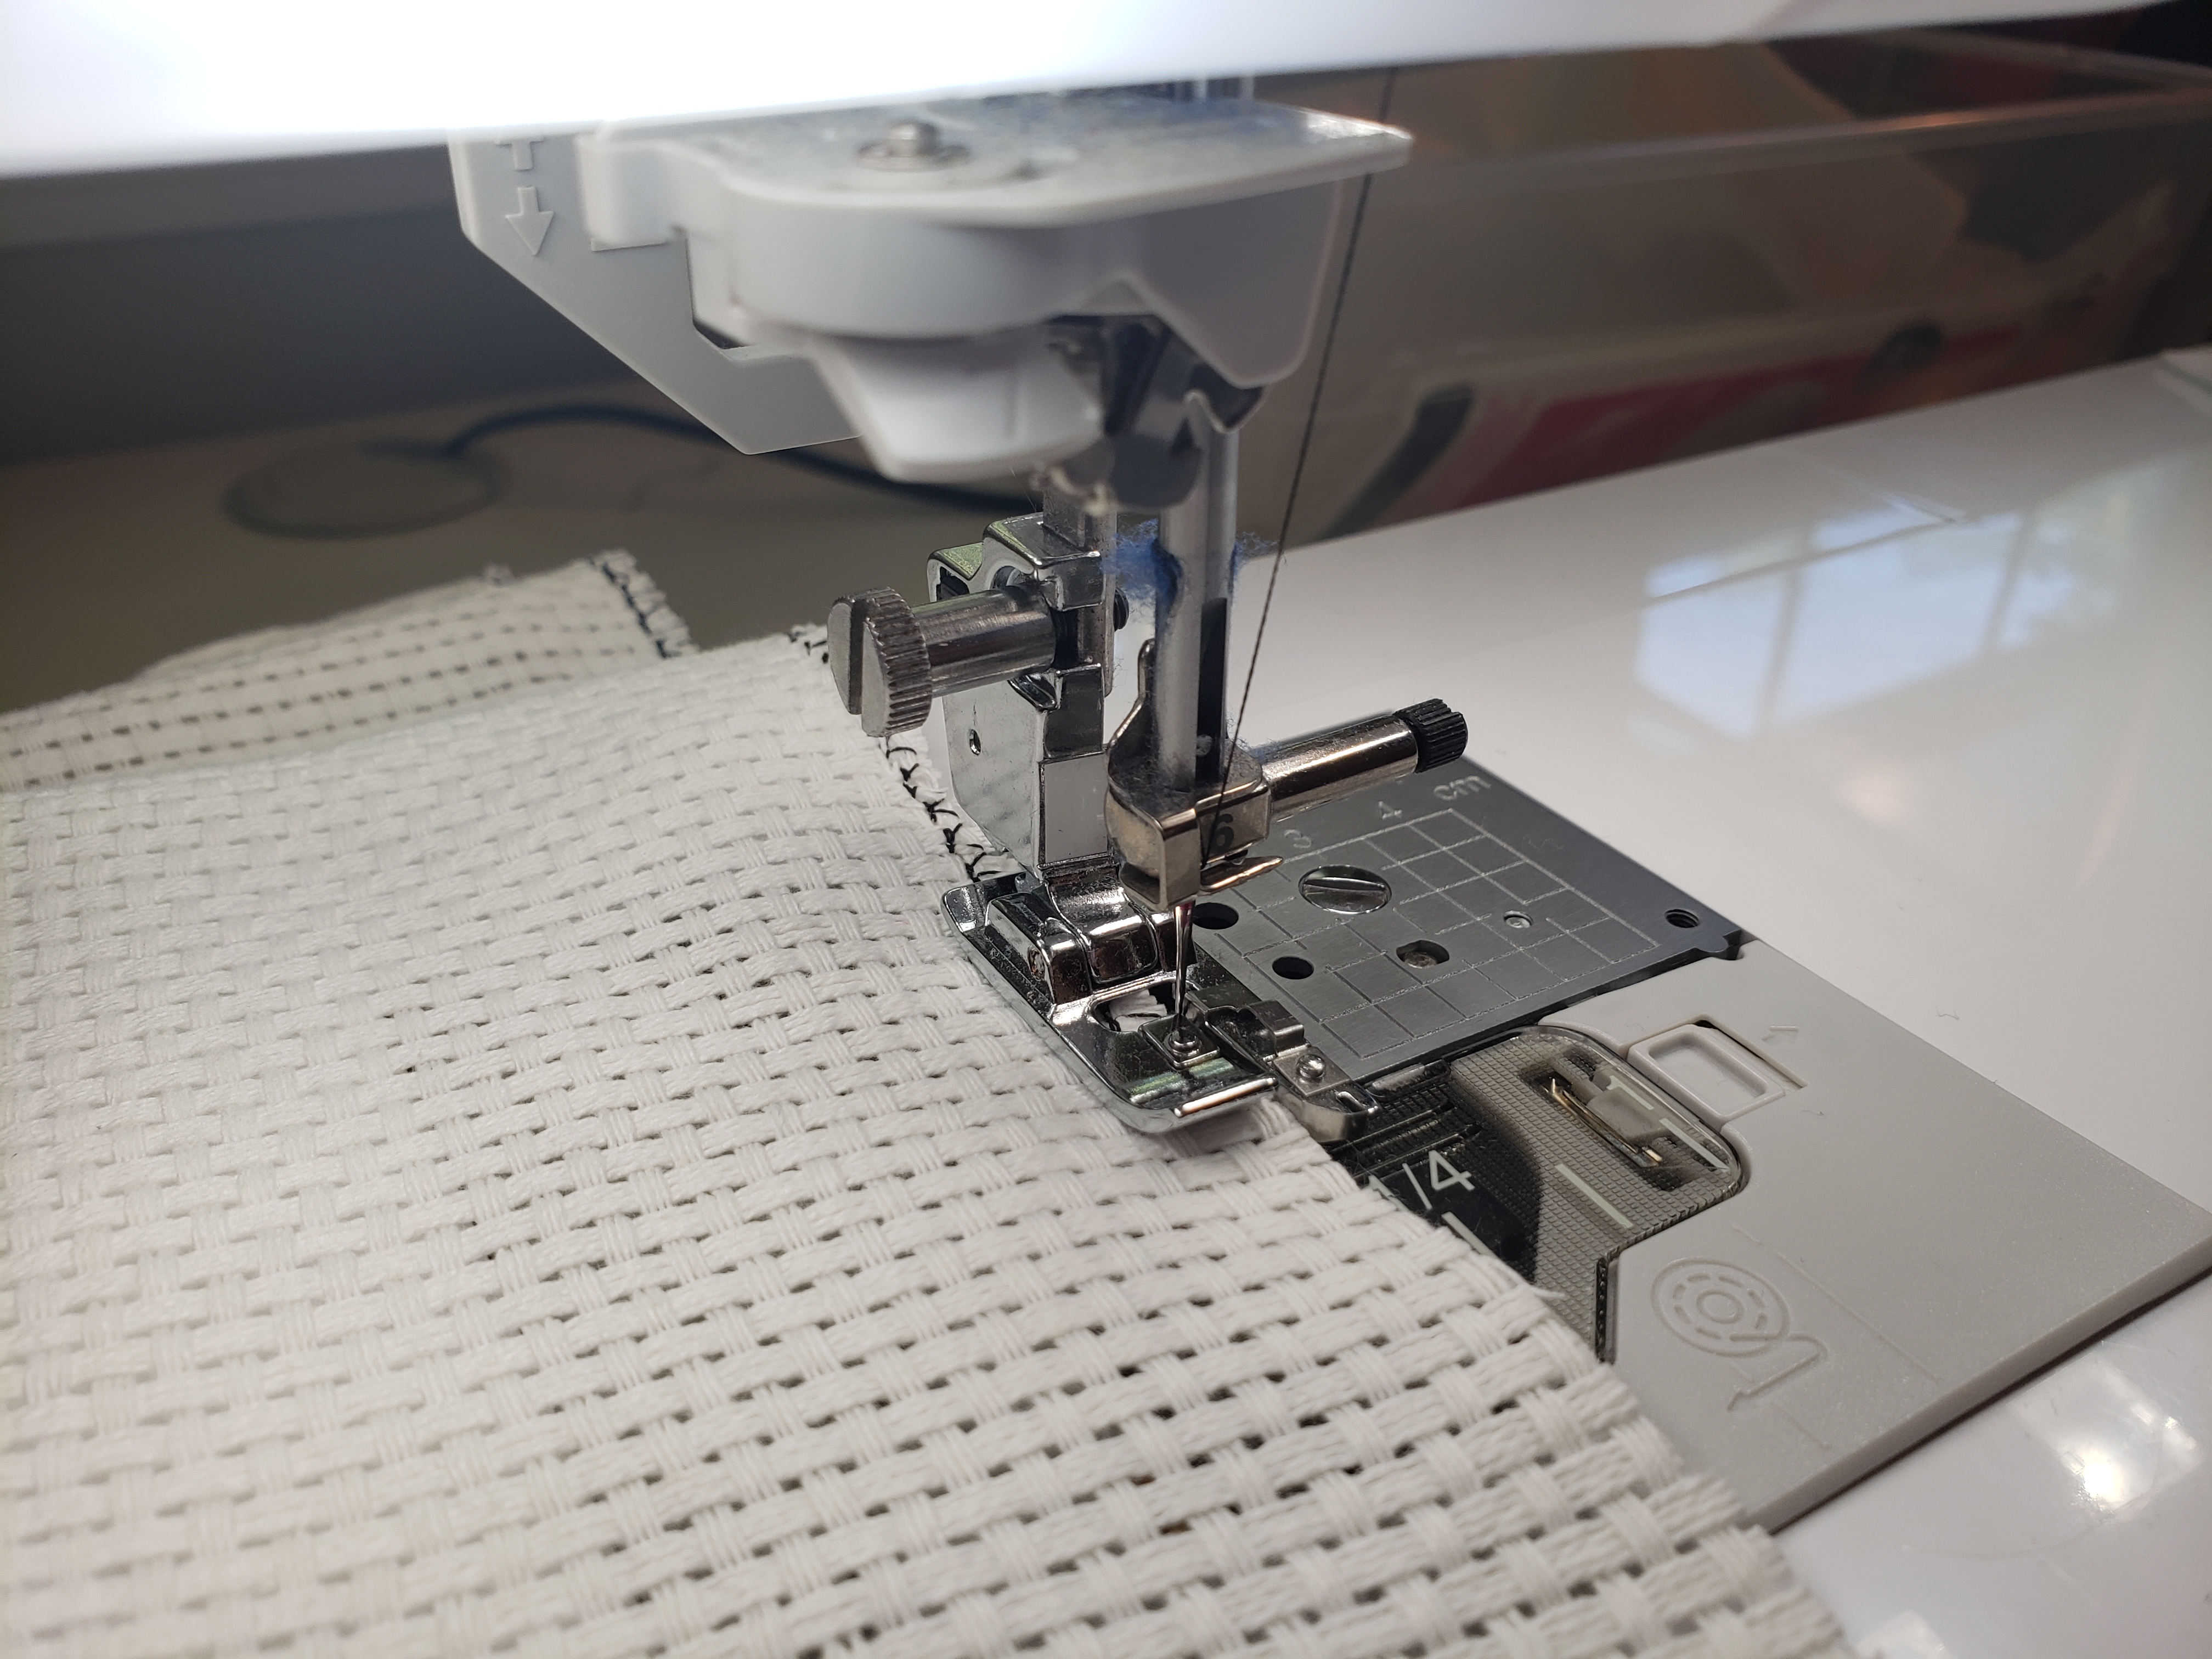
I cut off a portion of the monk’s cloth making sure to leave myself an extra foot (for 6 inches on all sides of my design) and then took it to my sewing machine to sew the edges so the cloth wouldn’t start coming apart. Use an overcast or a zigzag stitch to bind the edges. You can also run it through your serger if you have one. In the end, you will trim this off, so don’t concern yourself with how it looks.
Pattern
There are lots of ways to transfer a pattern to the cloth. You can print your pattern and then draw on it with transfer pencils, which will transfer when you iron the paper onto the cloth. You can also use a lightbox or window to trace the pattern.
Whichever method you chose, make sure your pattern is drawn in reverse (if it matters). You will be working on the backside of your project and the final product will be a mirror image.
My pattern is quite large and no window that large was easily accessible in my house. While I do have a lightbox, I didn’t want to trace my pattern out in several segments and hope they all lined up. I decided to just freehand it like I would if I was doing a painting on a large canvas. Before putting the cloth on my frame, I drew the border. Using a sharpie, you can drag the tip through the weave quite easily giving you a nice straight line. Make sure your project is positioned so there are several inches of the border you can use in the end to bind your backing.

I stretched my fabric over the border and started drawing. I realized I had drawn my pattern too small, so I ended up redrawing the border smaller to fit my drawing.
Punch Needle
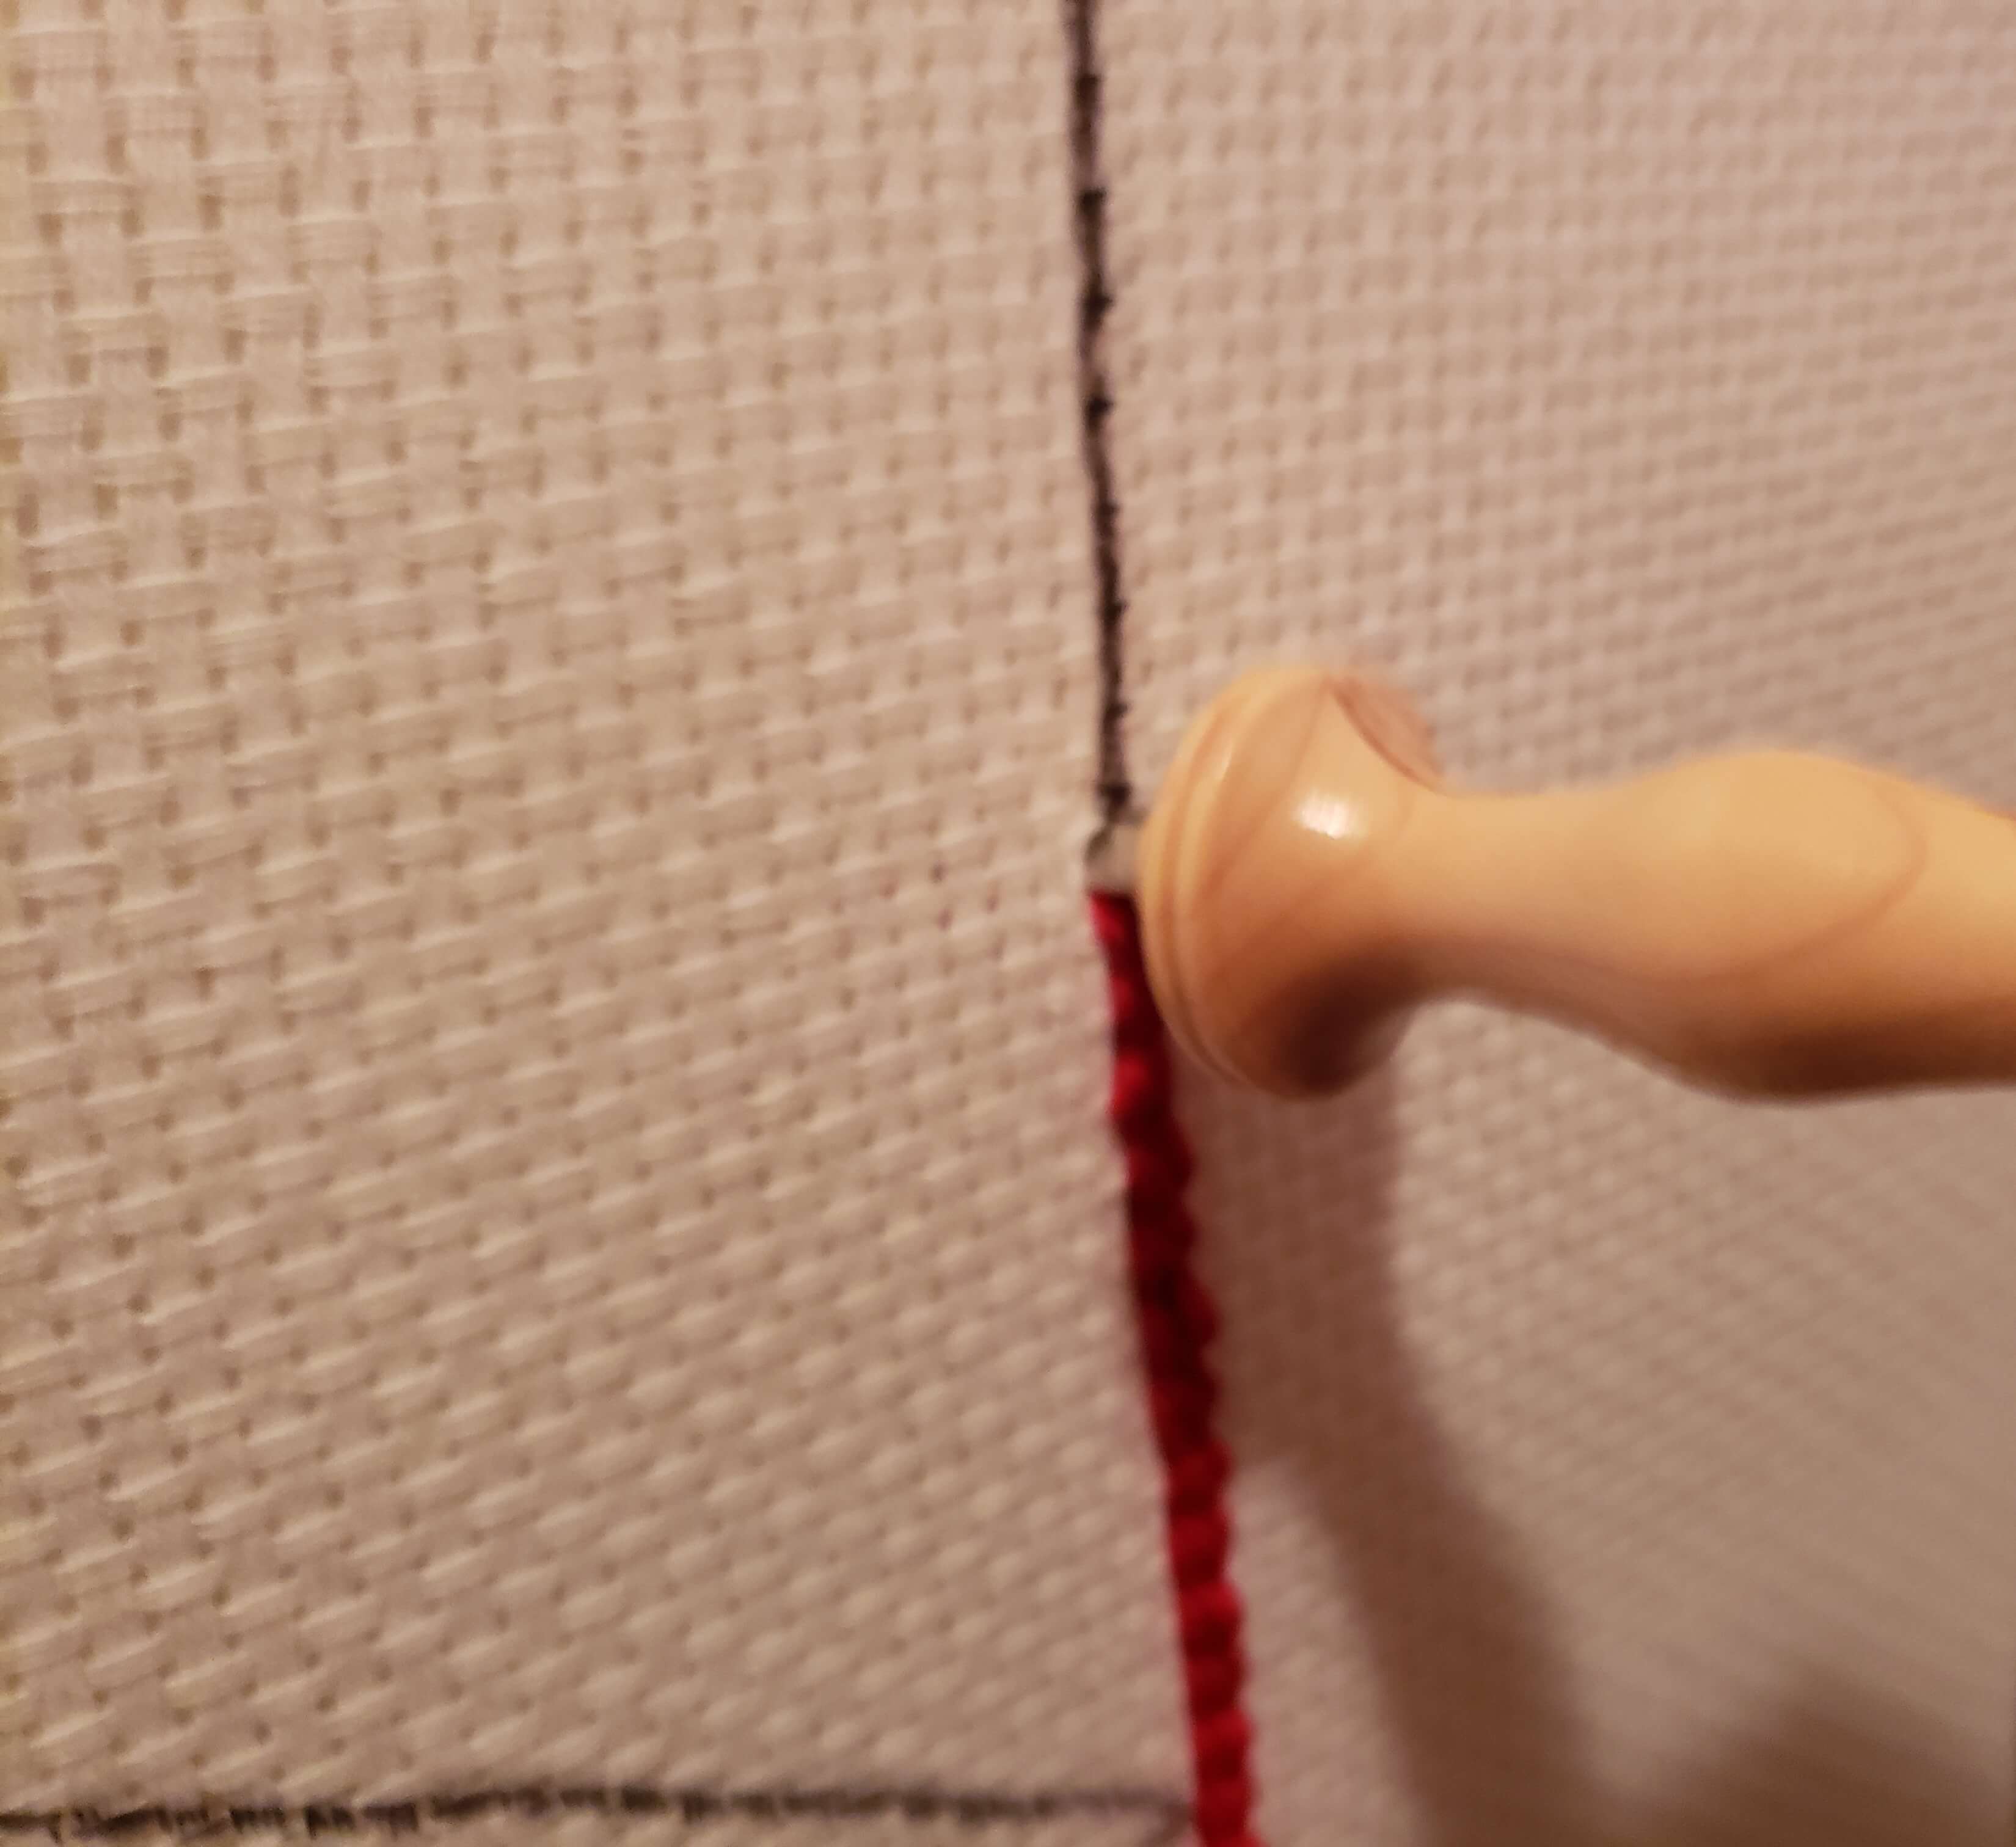
Now, the fun part begins. I threaded my needle with some red bulky yarn and began punching the border. The needle worked far more smoothly than I expected. Normally, this is when the struggle in a project would begin, but I had no issues at all. Just punch straight in and all the way down to the wood handle.
Borders and lining elements in your design are usually done in every hole of the fabric so that you get about 6 stitches per inch. This monk’s fabric has 7 holes per inch, so I will get slightly more than that.
When you fill in an area, you can reduce the number of punches to about 4 stitches per inch. So I punched every other hole in the fabric.
Once I filled in the outer edges of my design I realized it was becoming tedious to work on the center elements with such a large frame. To reach the middle of the image, I was either hunching over the frame or working up against a wall, so it was time to try another method of framing my fabric.
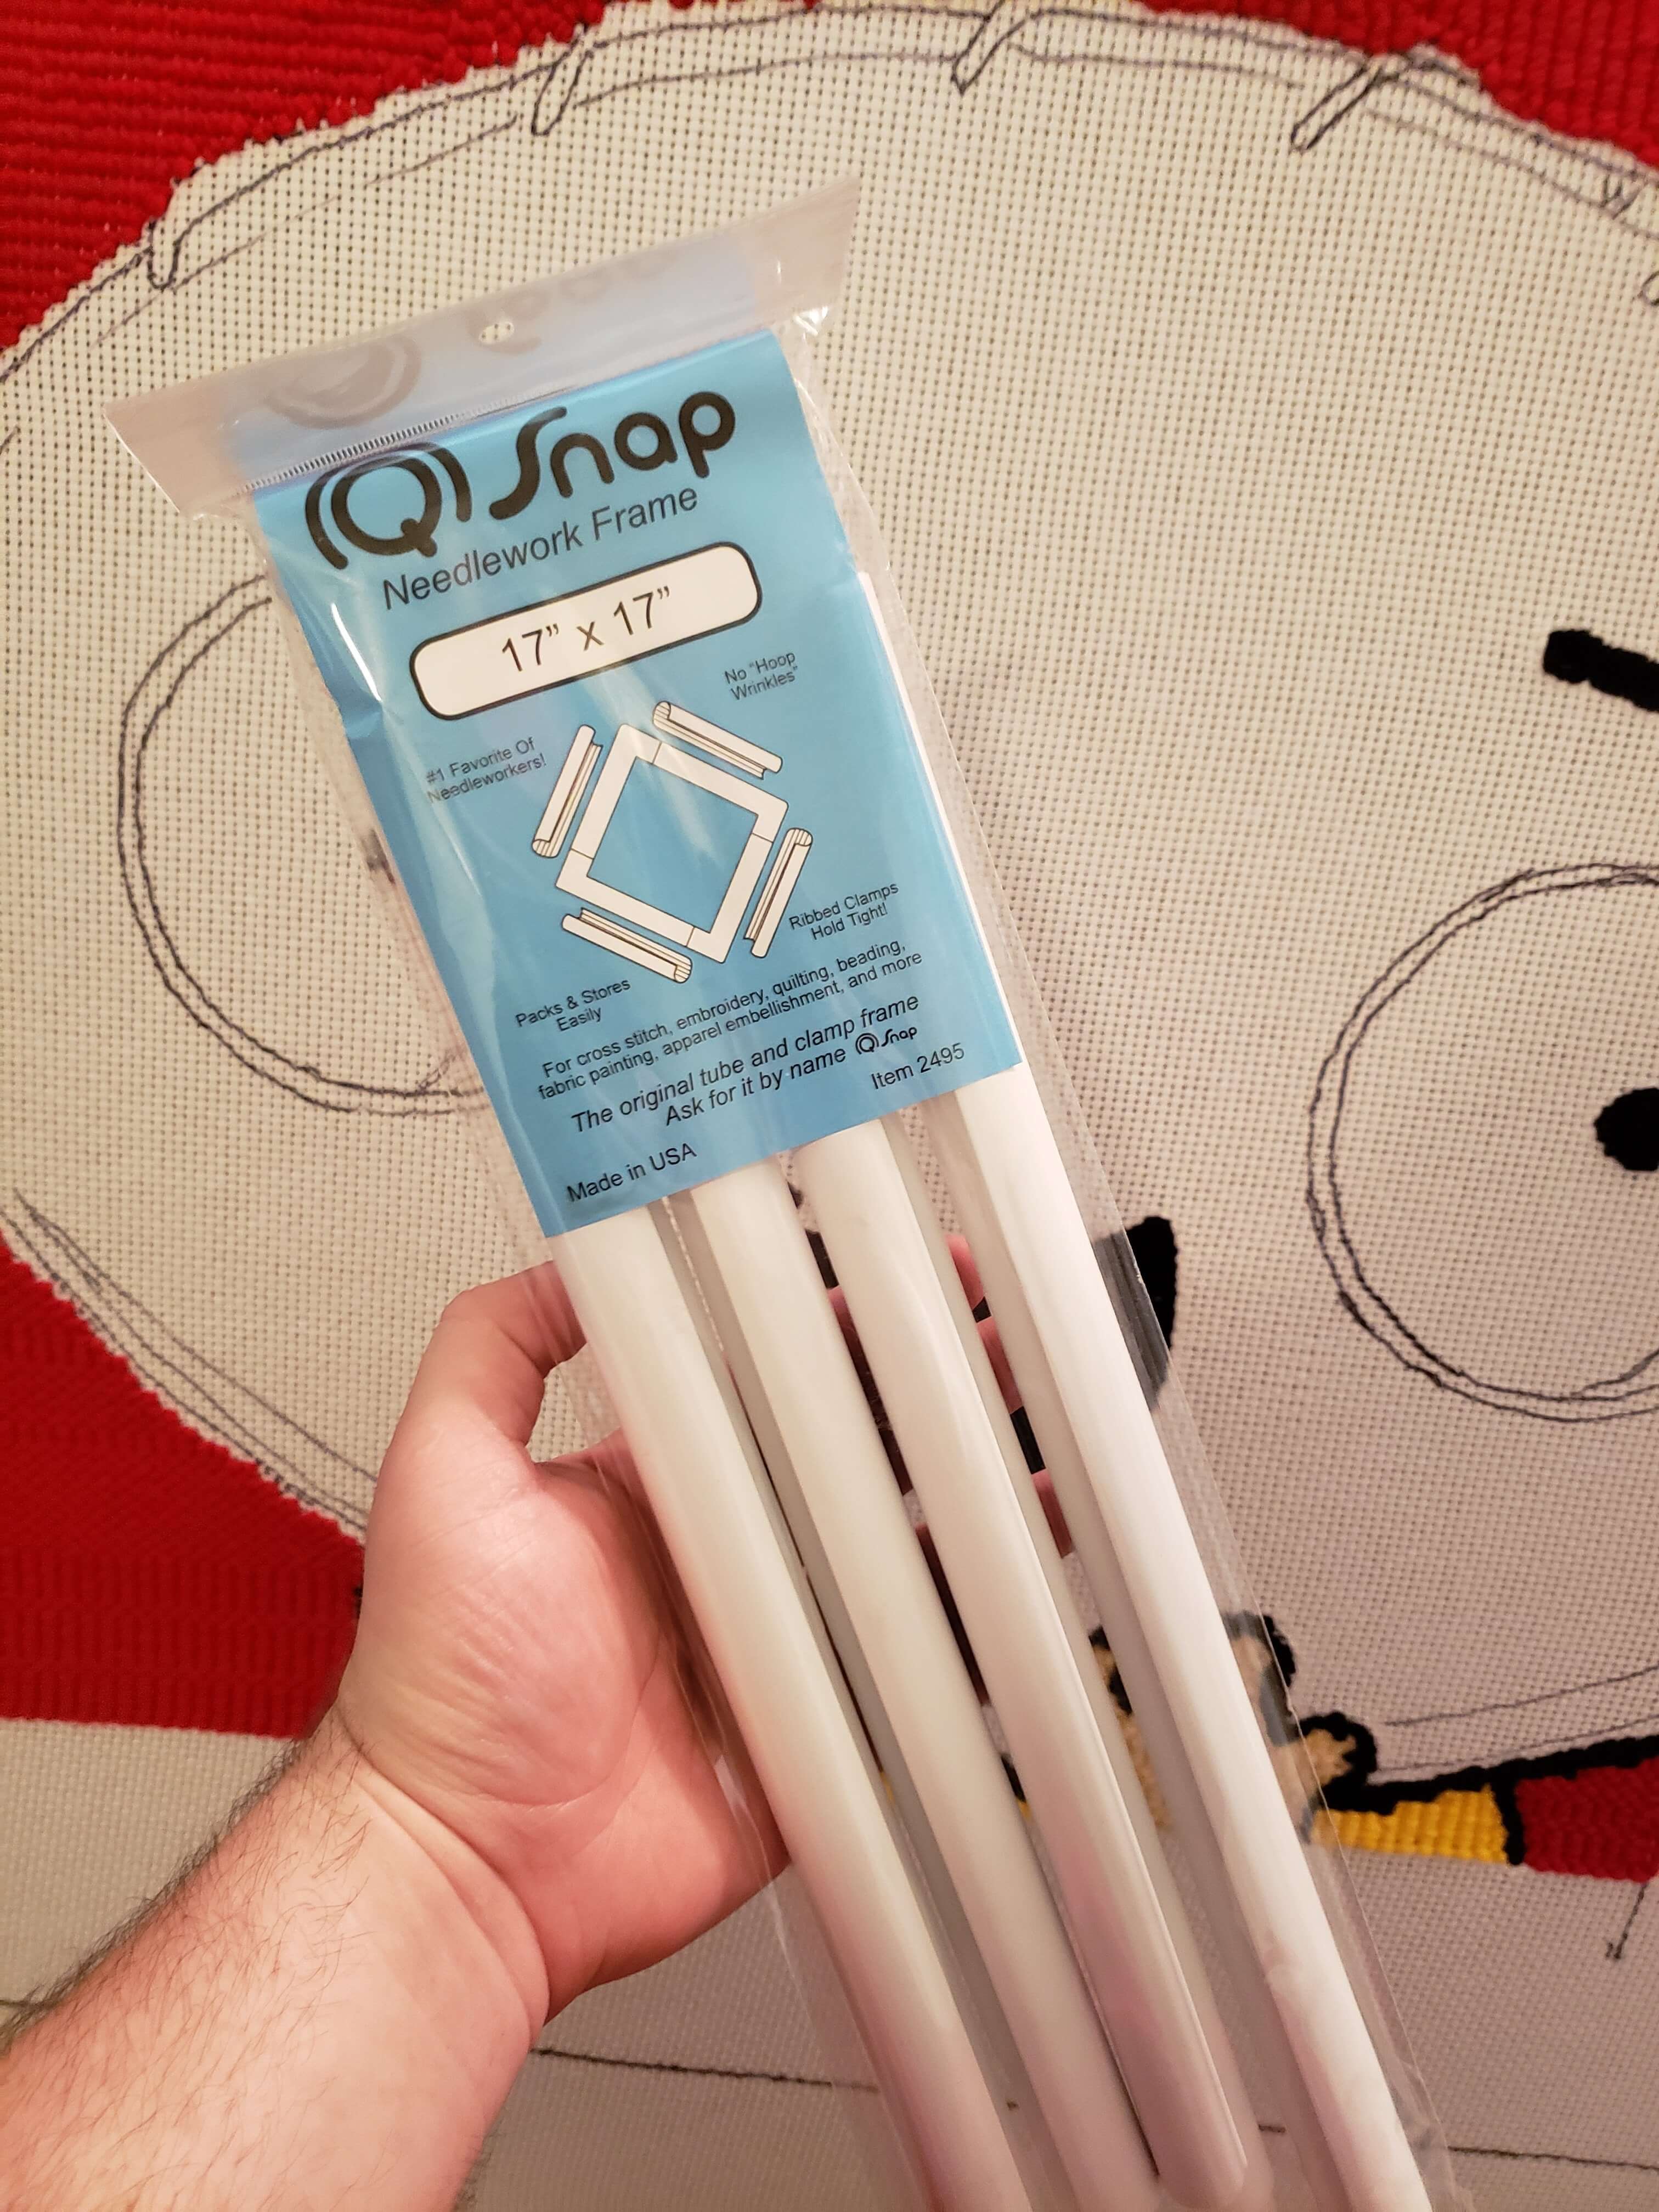
I remembered I had this needlework frame stashed away in a closet. I dug it out and put it together. You could easily make one of these with PVC pipe from the hardware store as well.
The clips that come with the frame will only work on the cloth and you won’t be able to clip your cloth if there is yarn punched through it. I tried large binder clips from the stationary store, but those would just barely clip on and would randomly fly off. I went down to the hardware store and found a bag of assorted hand clamps that would work just fine for this.
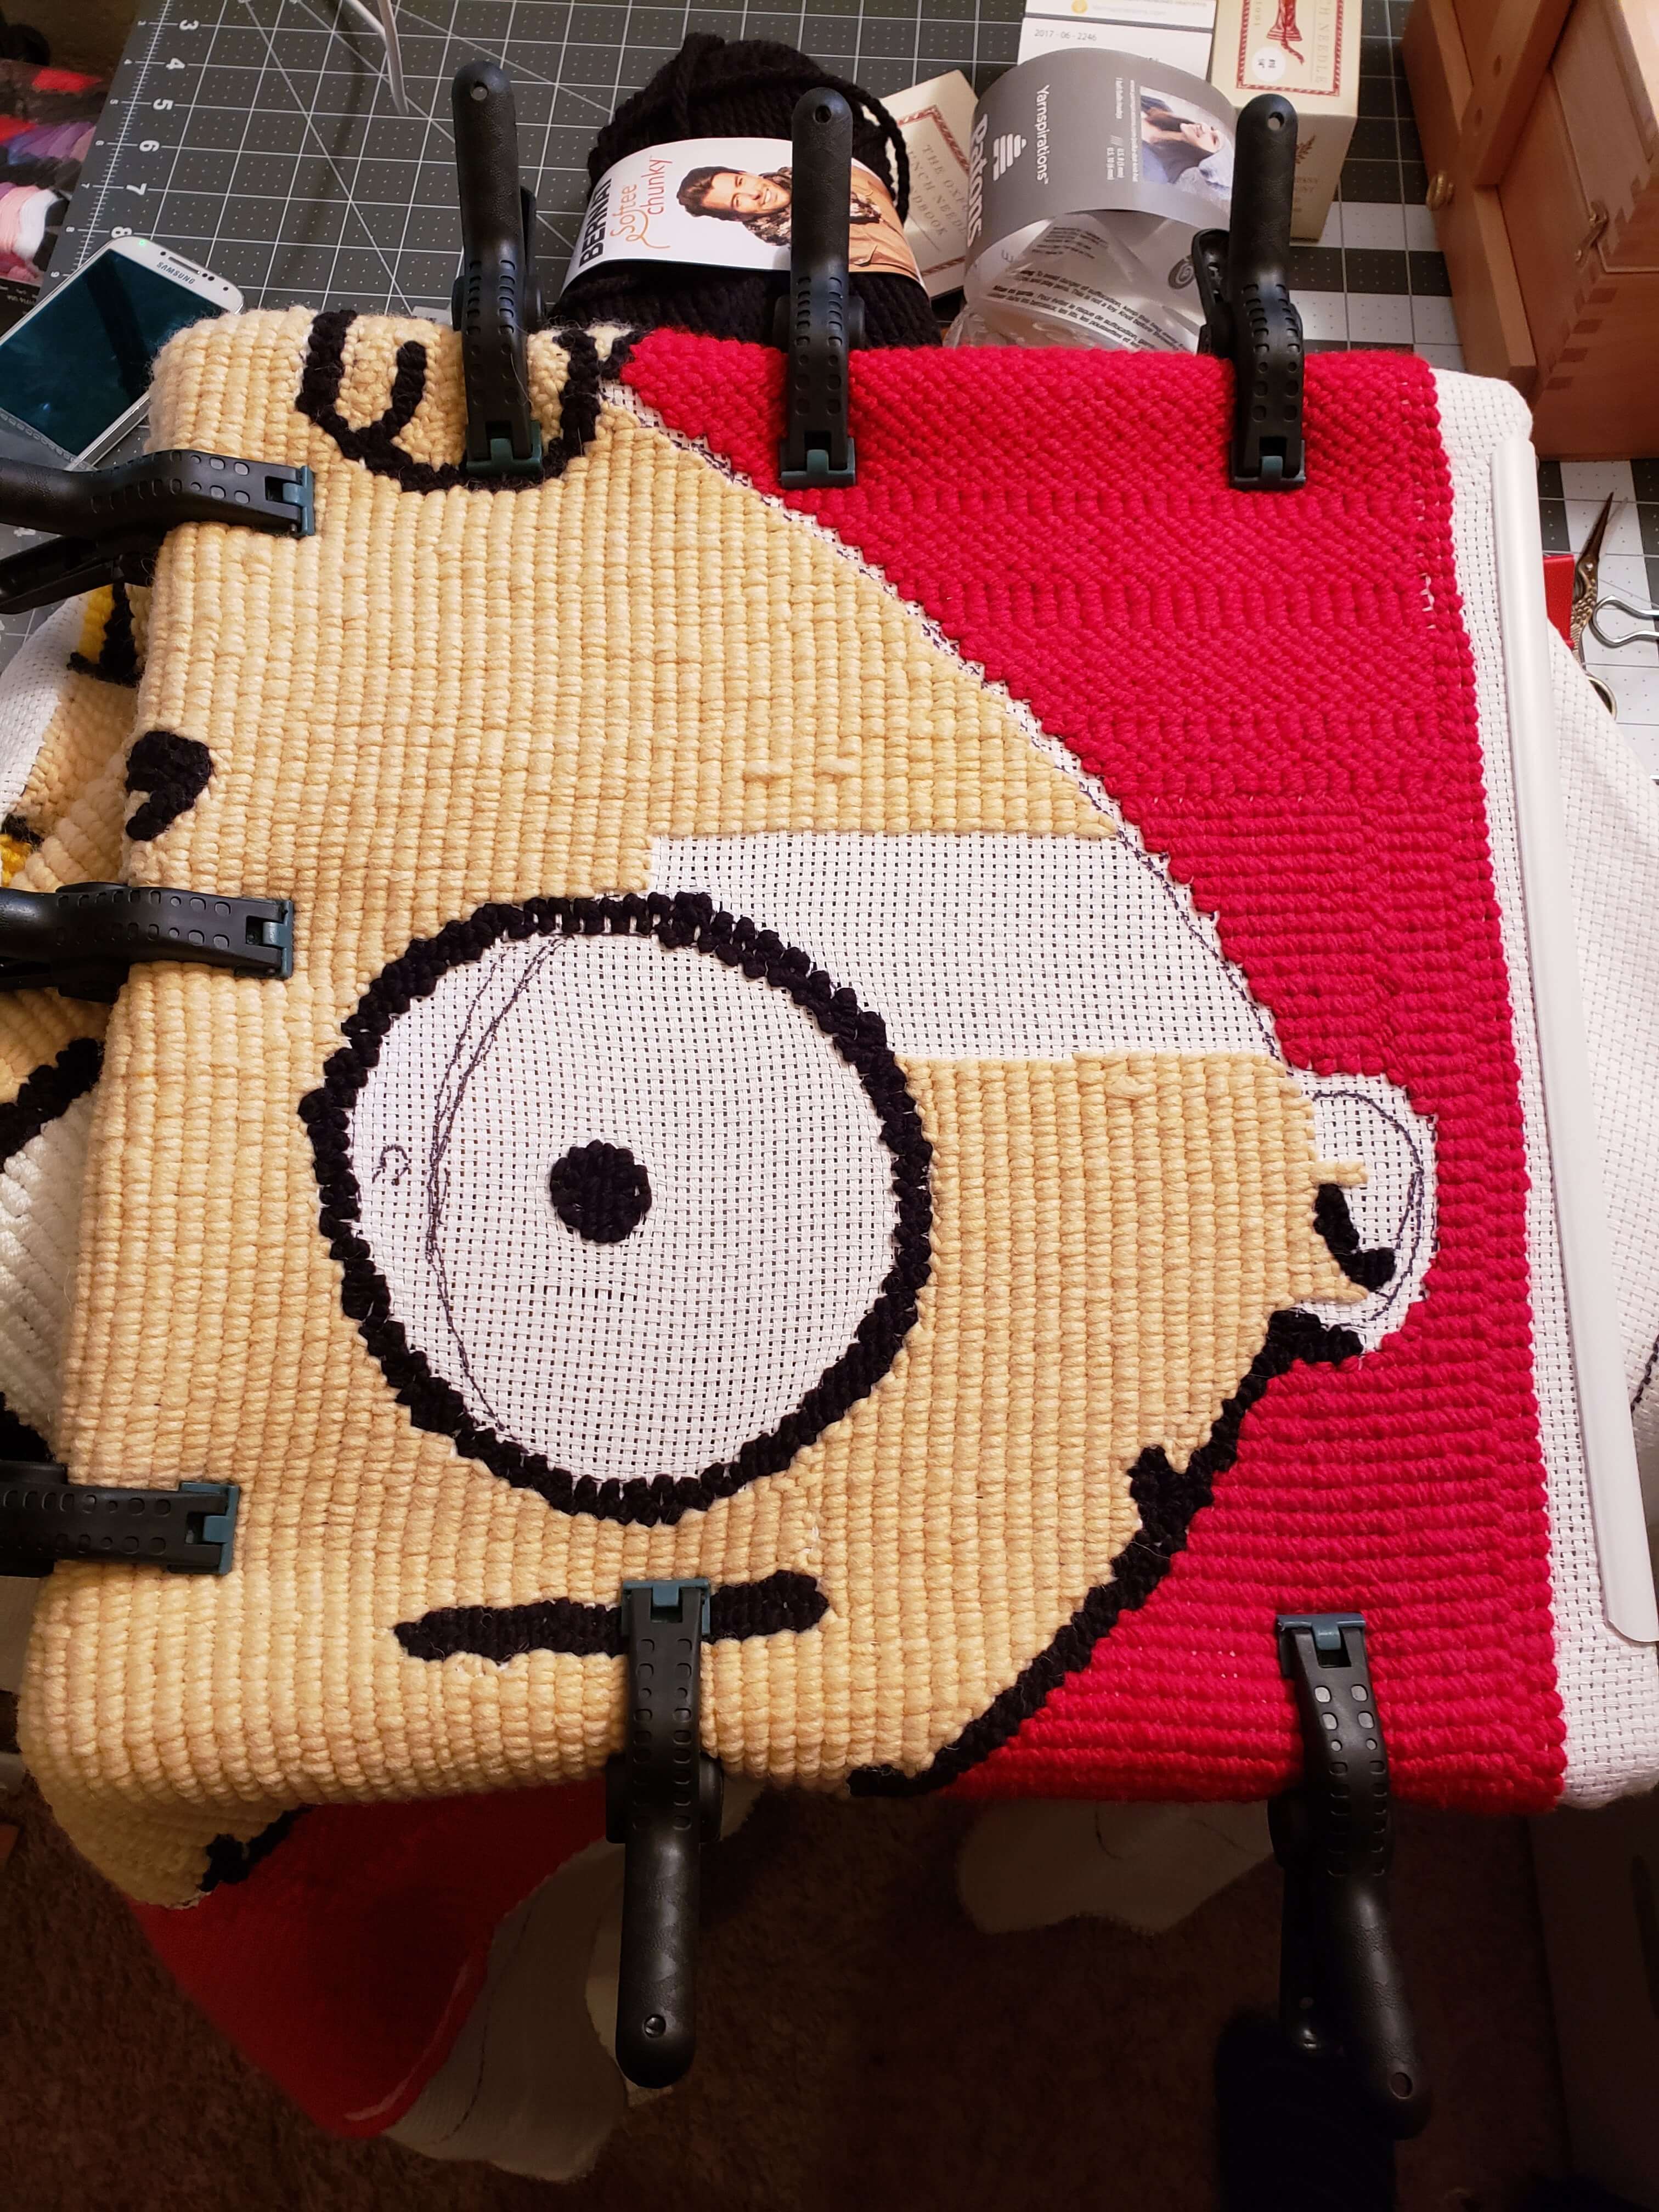
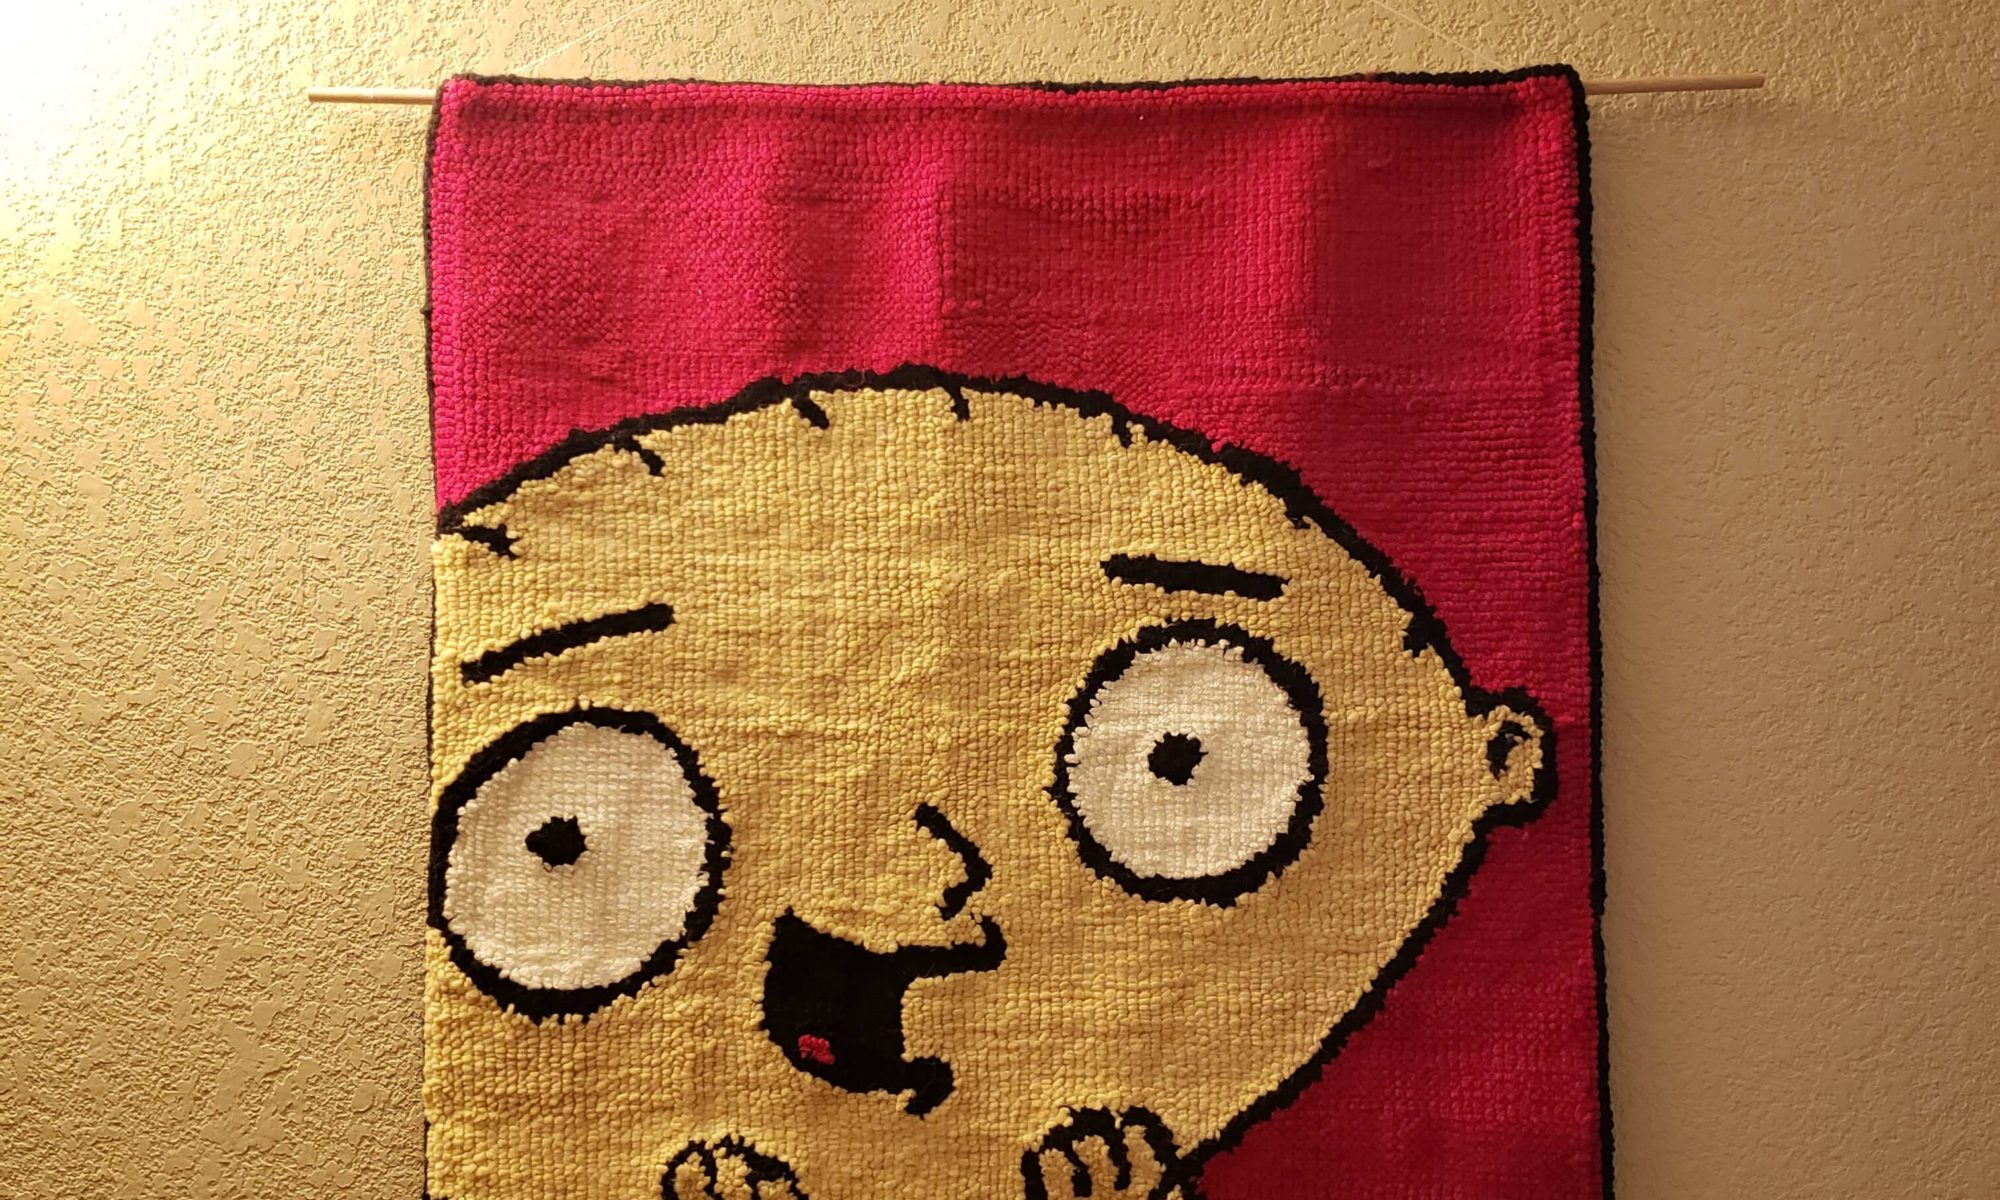
It took many, many nights to punch the whole design. Muscle memory eventually kicks in, especially after filling in the large areas, and you’ll be punching yarn into the fabric at a pretty quick pace. After a week of stabbing the cloth with the punch needle, I had this:
Then, when you turn it around to see the front, it can be a bit disappointing. The back is really clean and the front will be a mess because you’ll be pushing all the loose ends through to the front as you go.
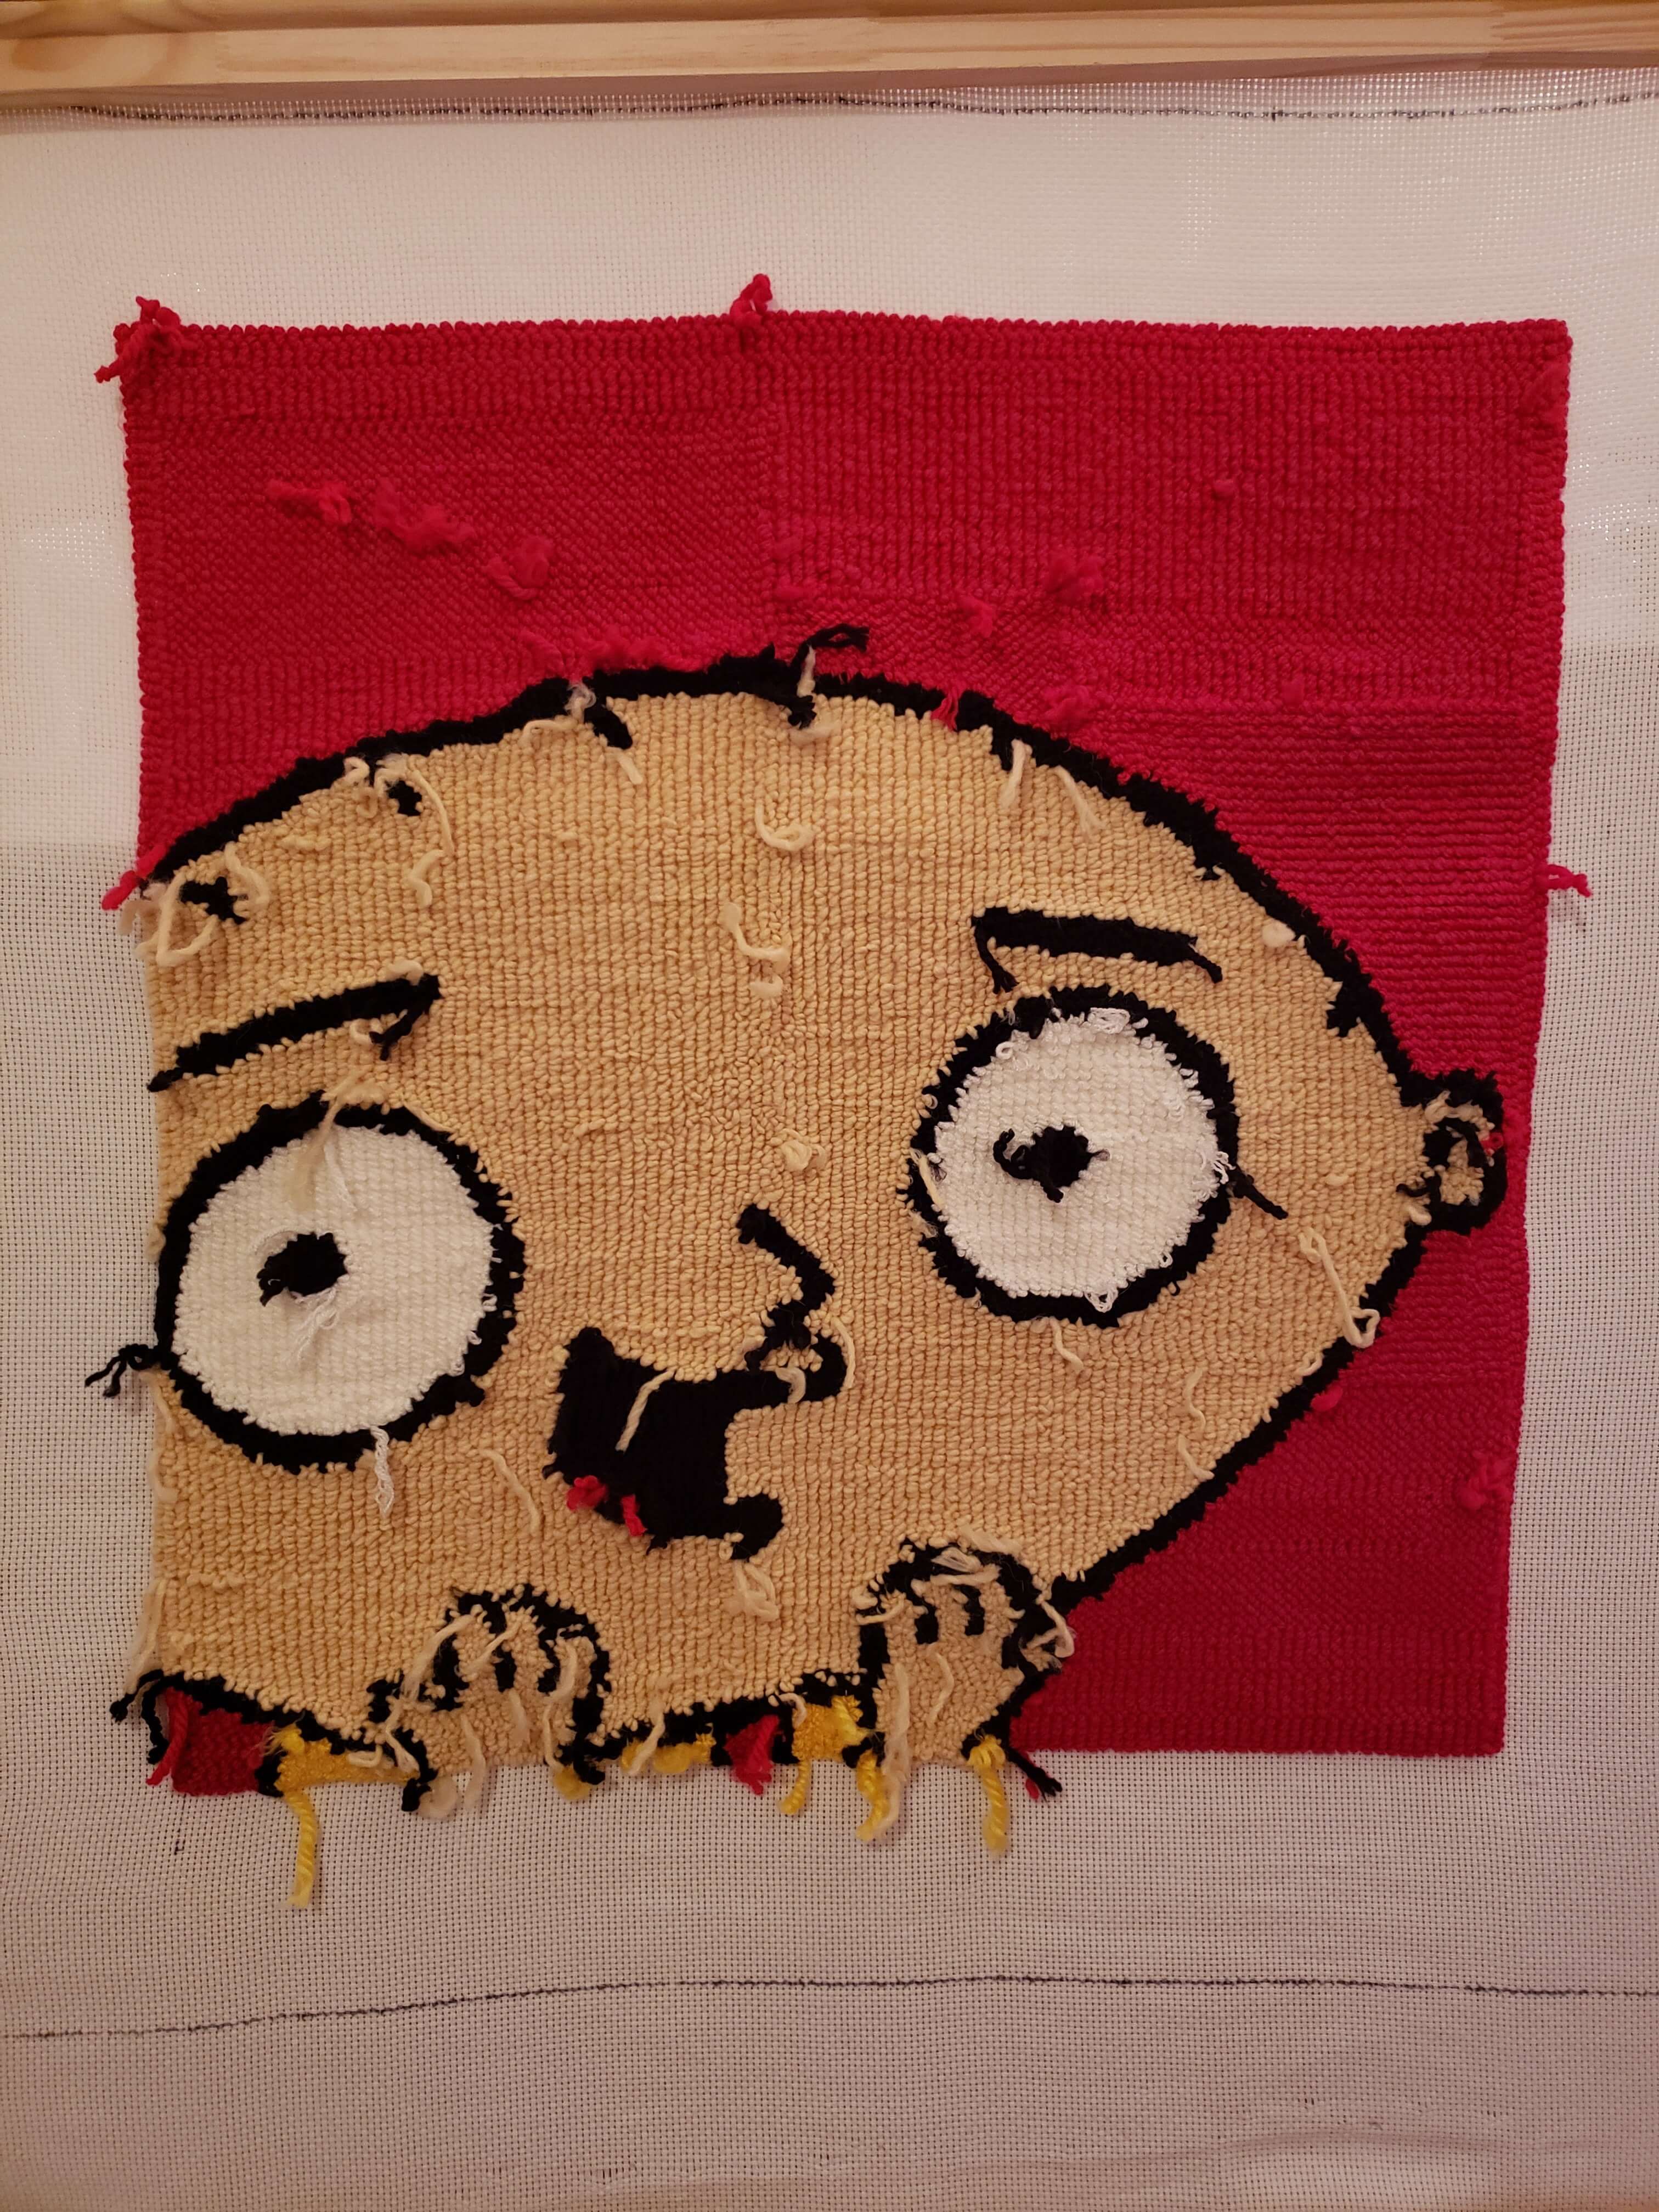
All that is needed is a quick snip of all those ends with some scissors. Afterwards, things will start to look much better!
Binding
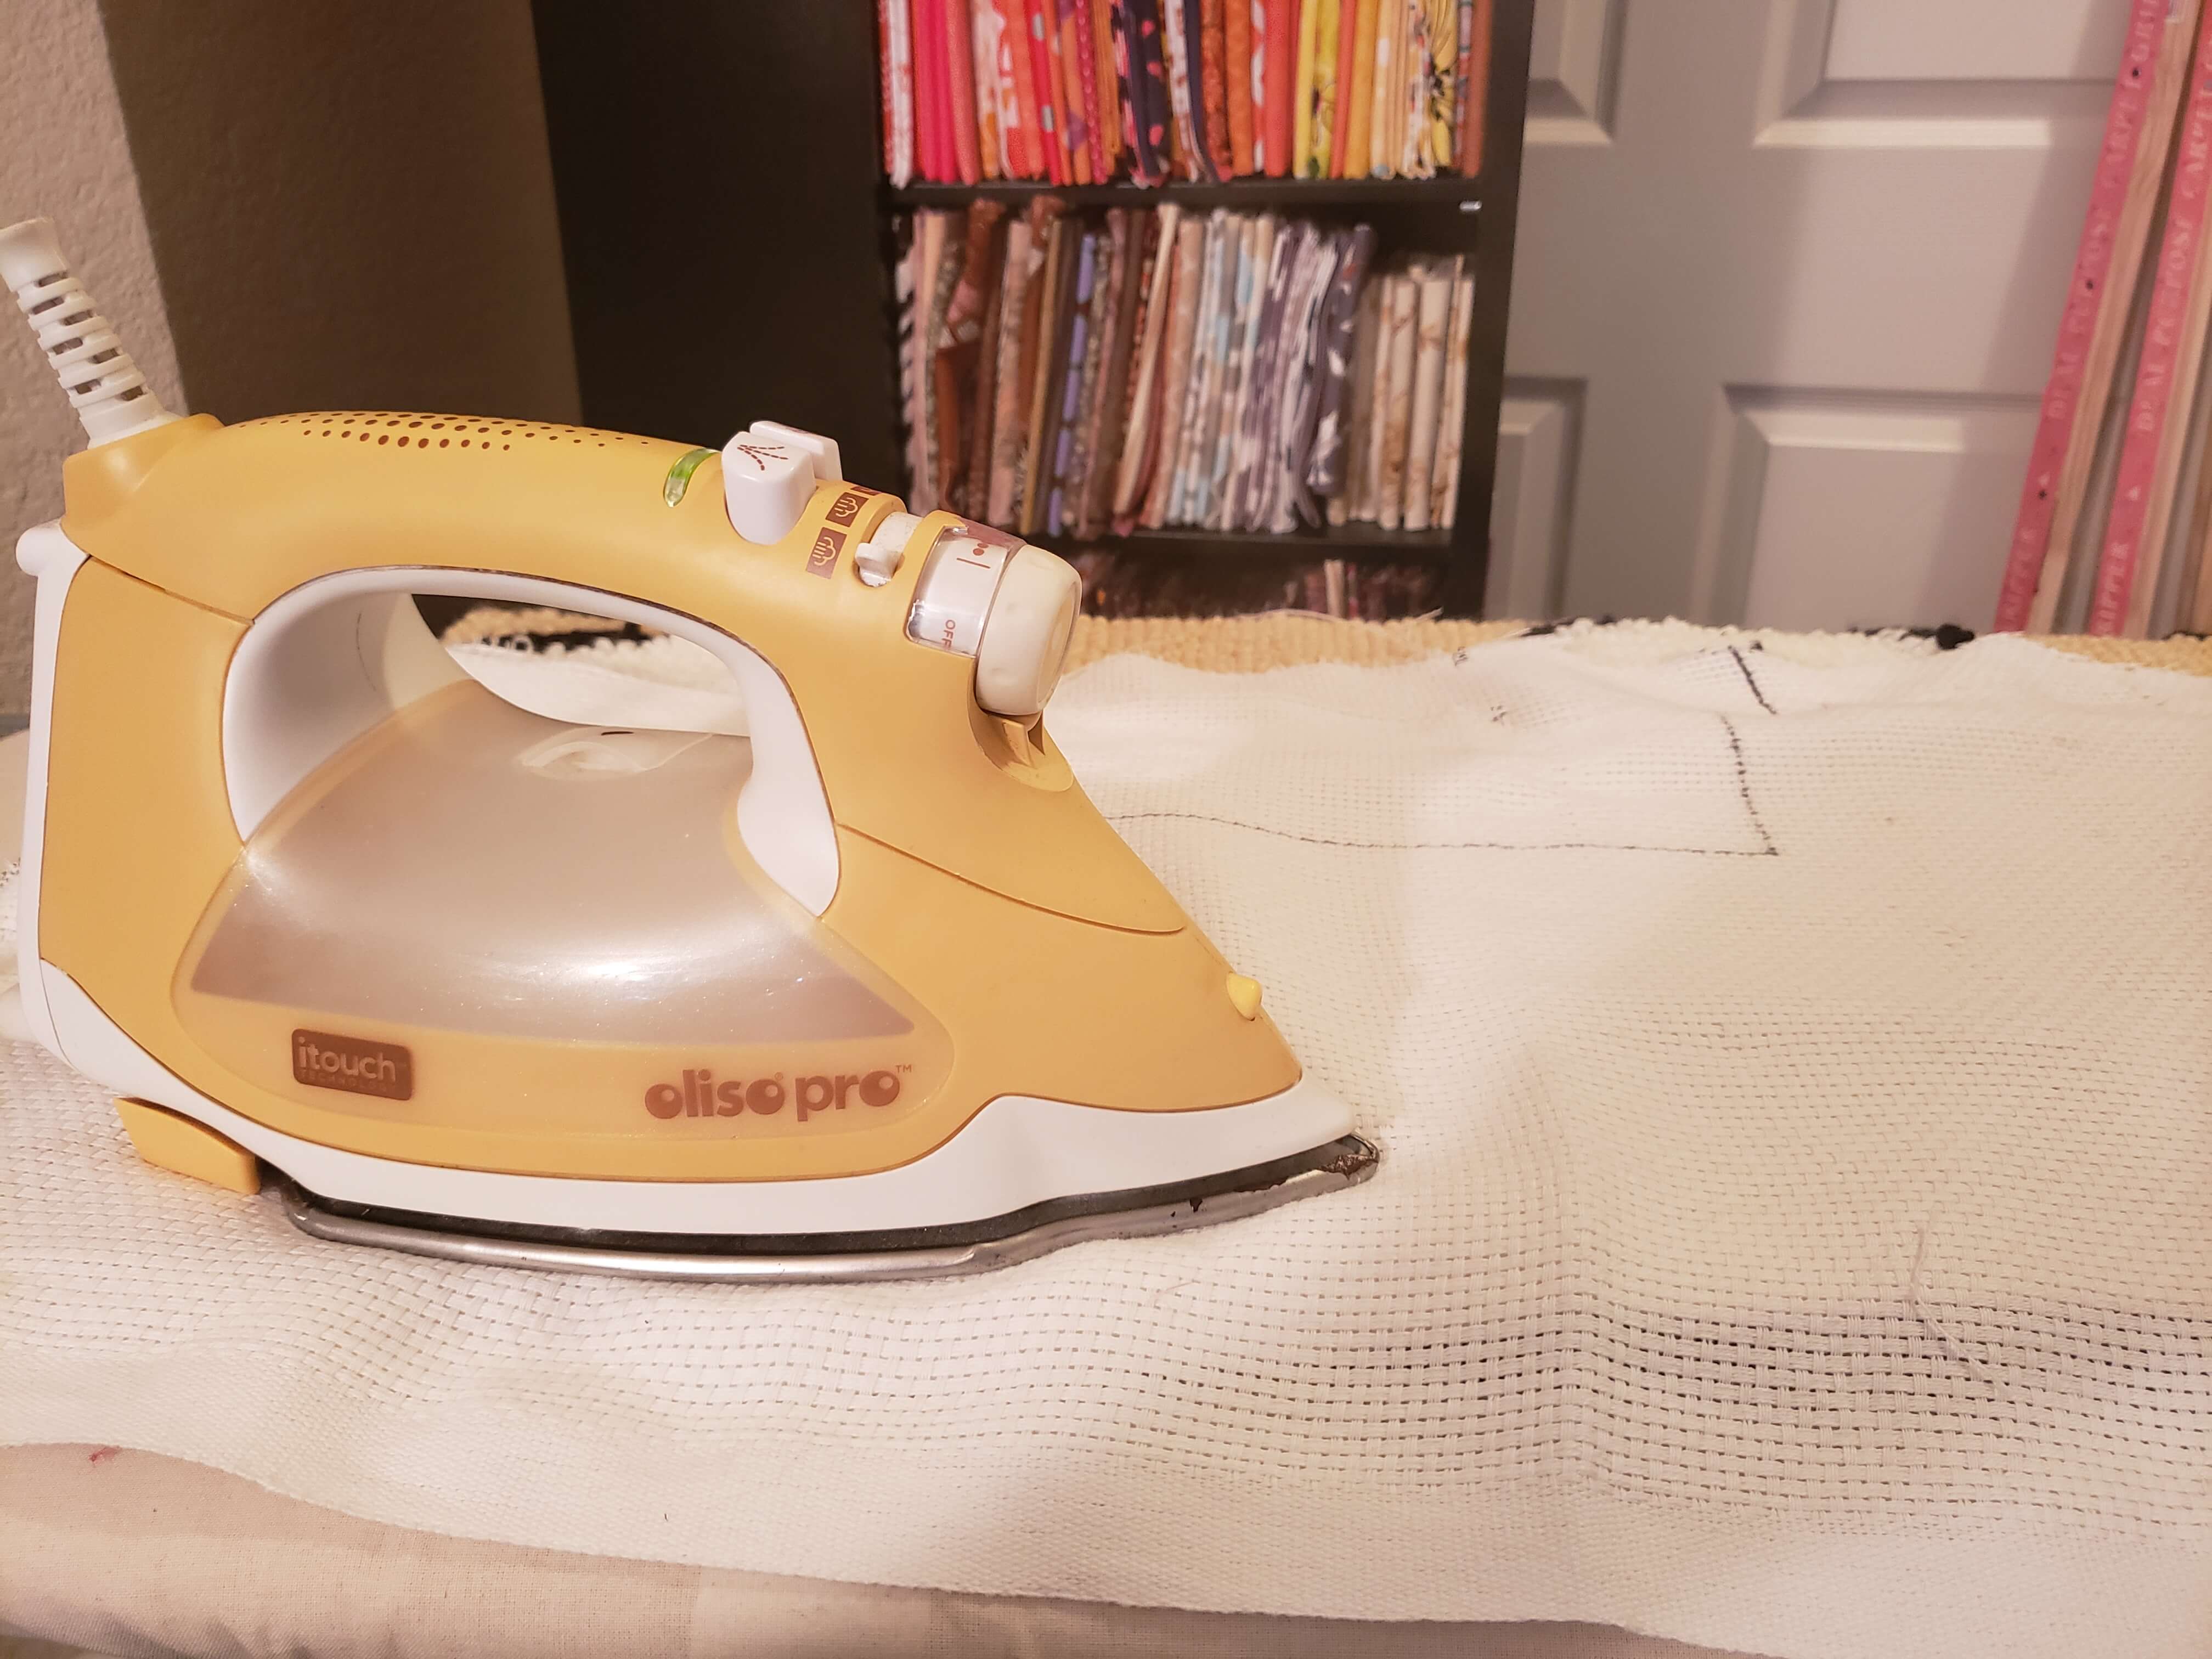
When you take the rug off your frame, it’ll be pretty warped or curly. It’s recommended to iron your rug with a cloth and plenty of steam. Or you could use a wet cloth and a hot iron. You’ll want to keep plenty of pressure on the iron and hit every area for 15-20 seconds.
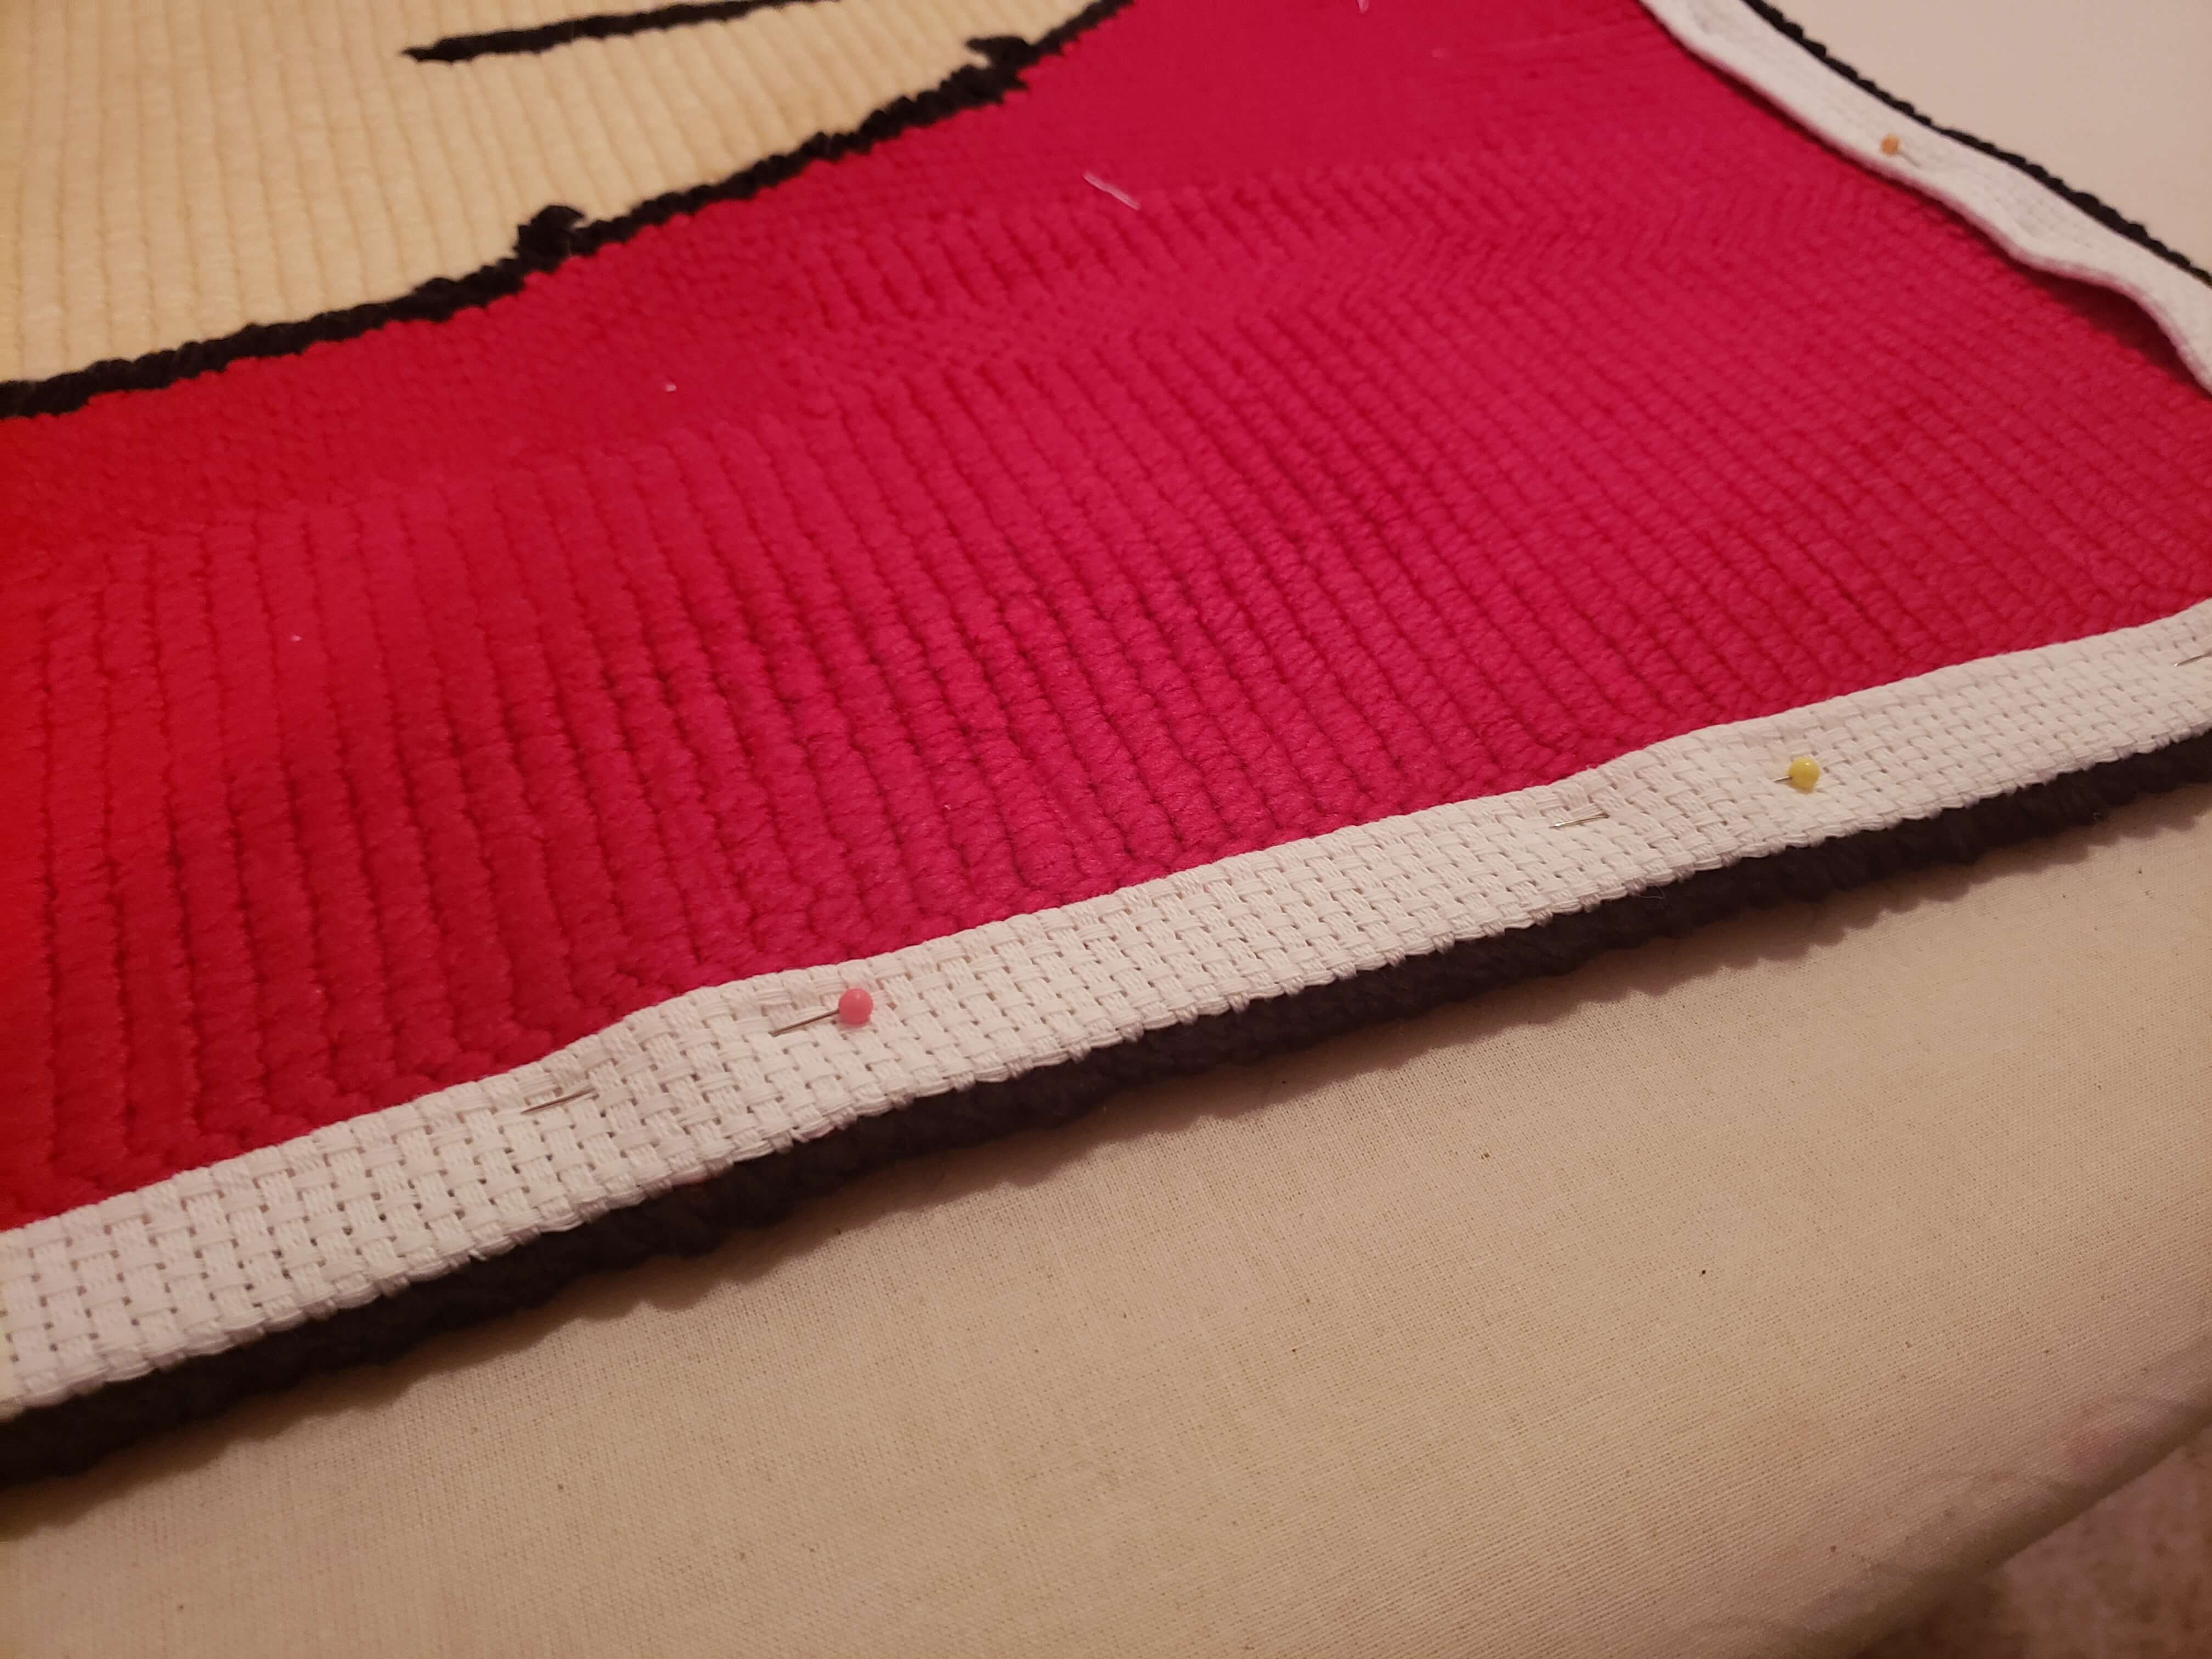
Then we need to bind the backing. I trimmed the outside cloth down to 2 inches all the way around the rug. Then, folding the cloth onto the back so that’s about a 1″ border around the whole back. I pinned it in place and began stitching the back down with a whip stitch.
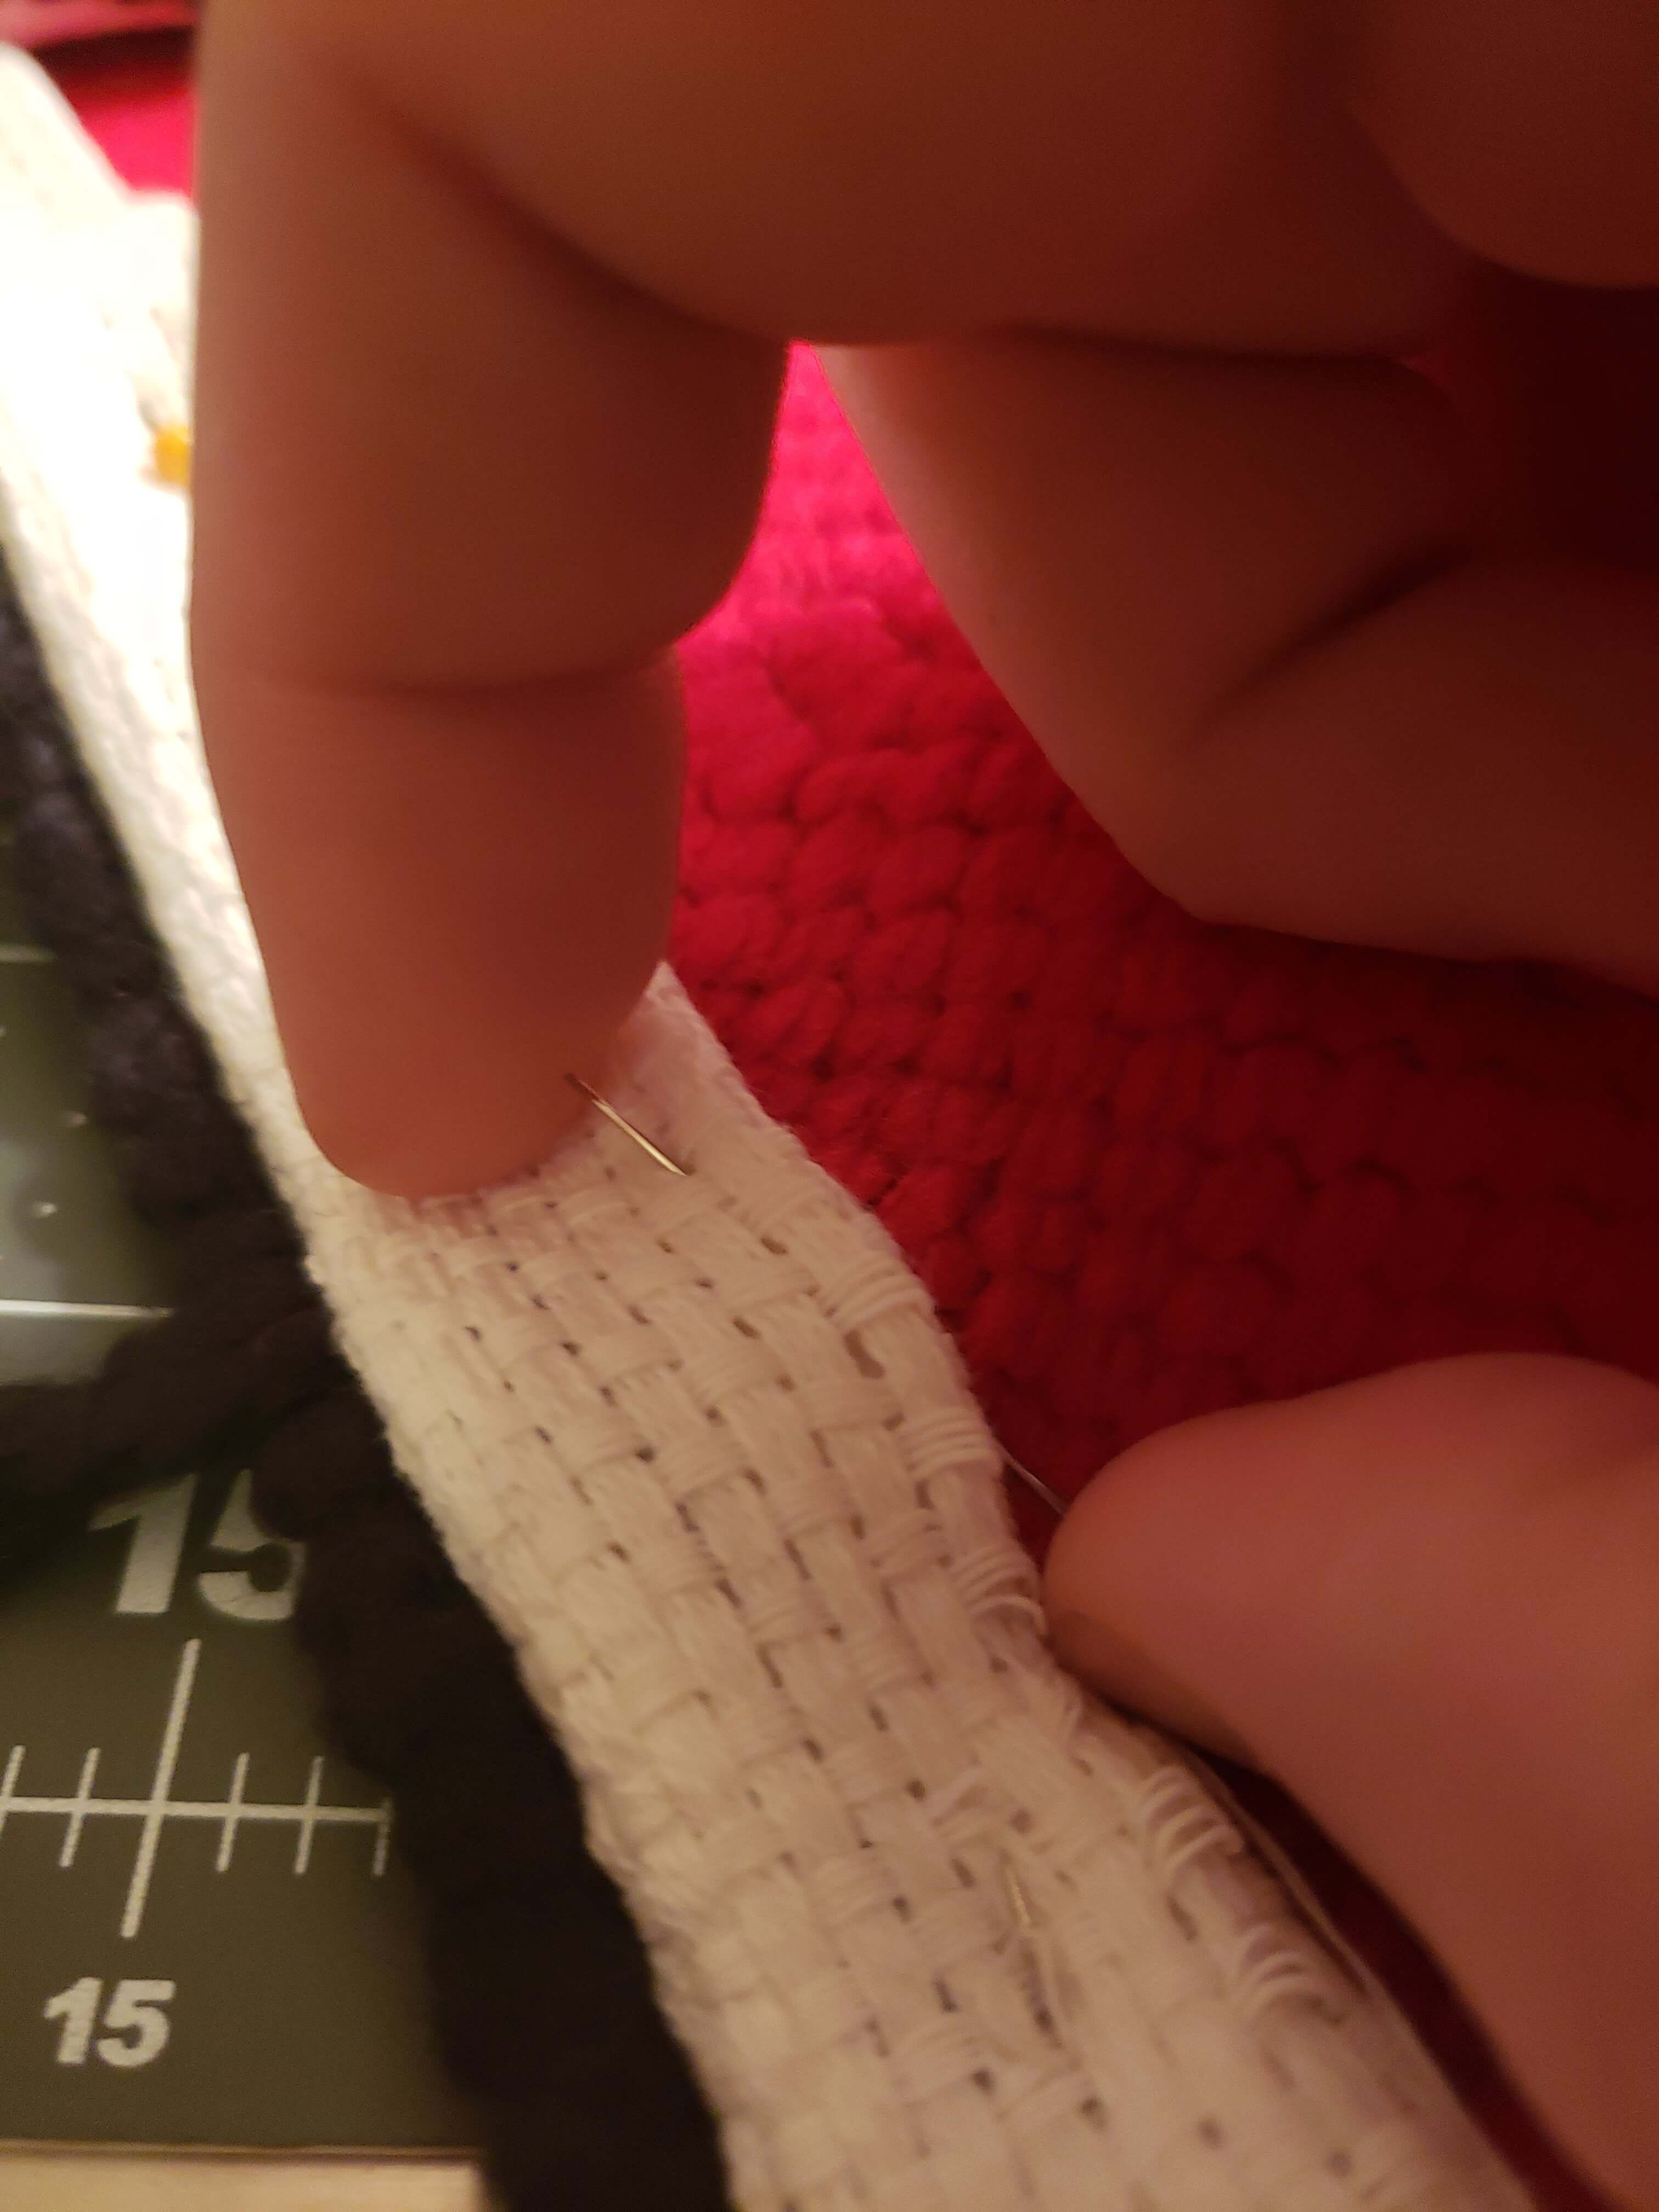
This was my least favorite part. It wasn’t hard, but very slow to do. I never cared for manual sewing, that’s why I have a sewing machine. There is a method that uses fusible cloth strips. But, I didn’t want to make another trip to the fabric store. I also wanted to follow Amy’s videos as closely as possible.
I left the corners of the backing alone so that there was a pocket,. Later, I could stick a dowel through the cloth and hang it up later.
Finishing Touches
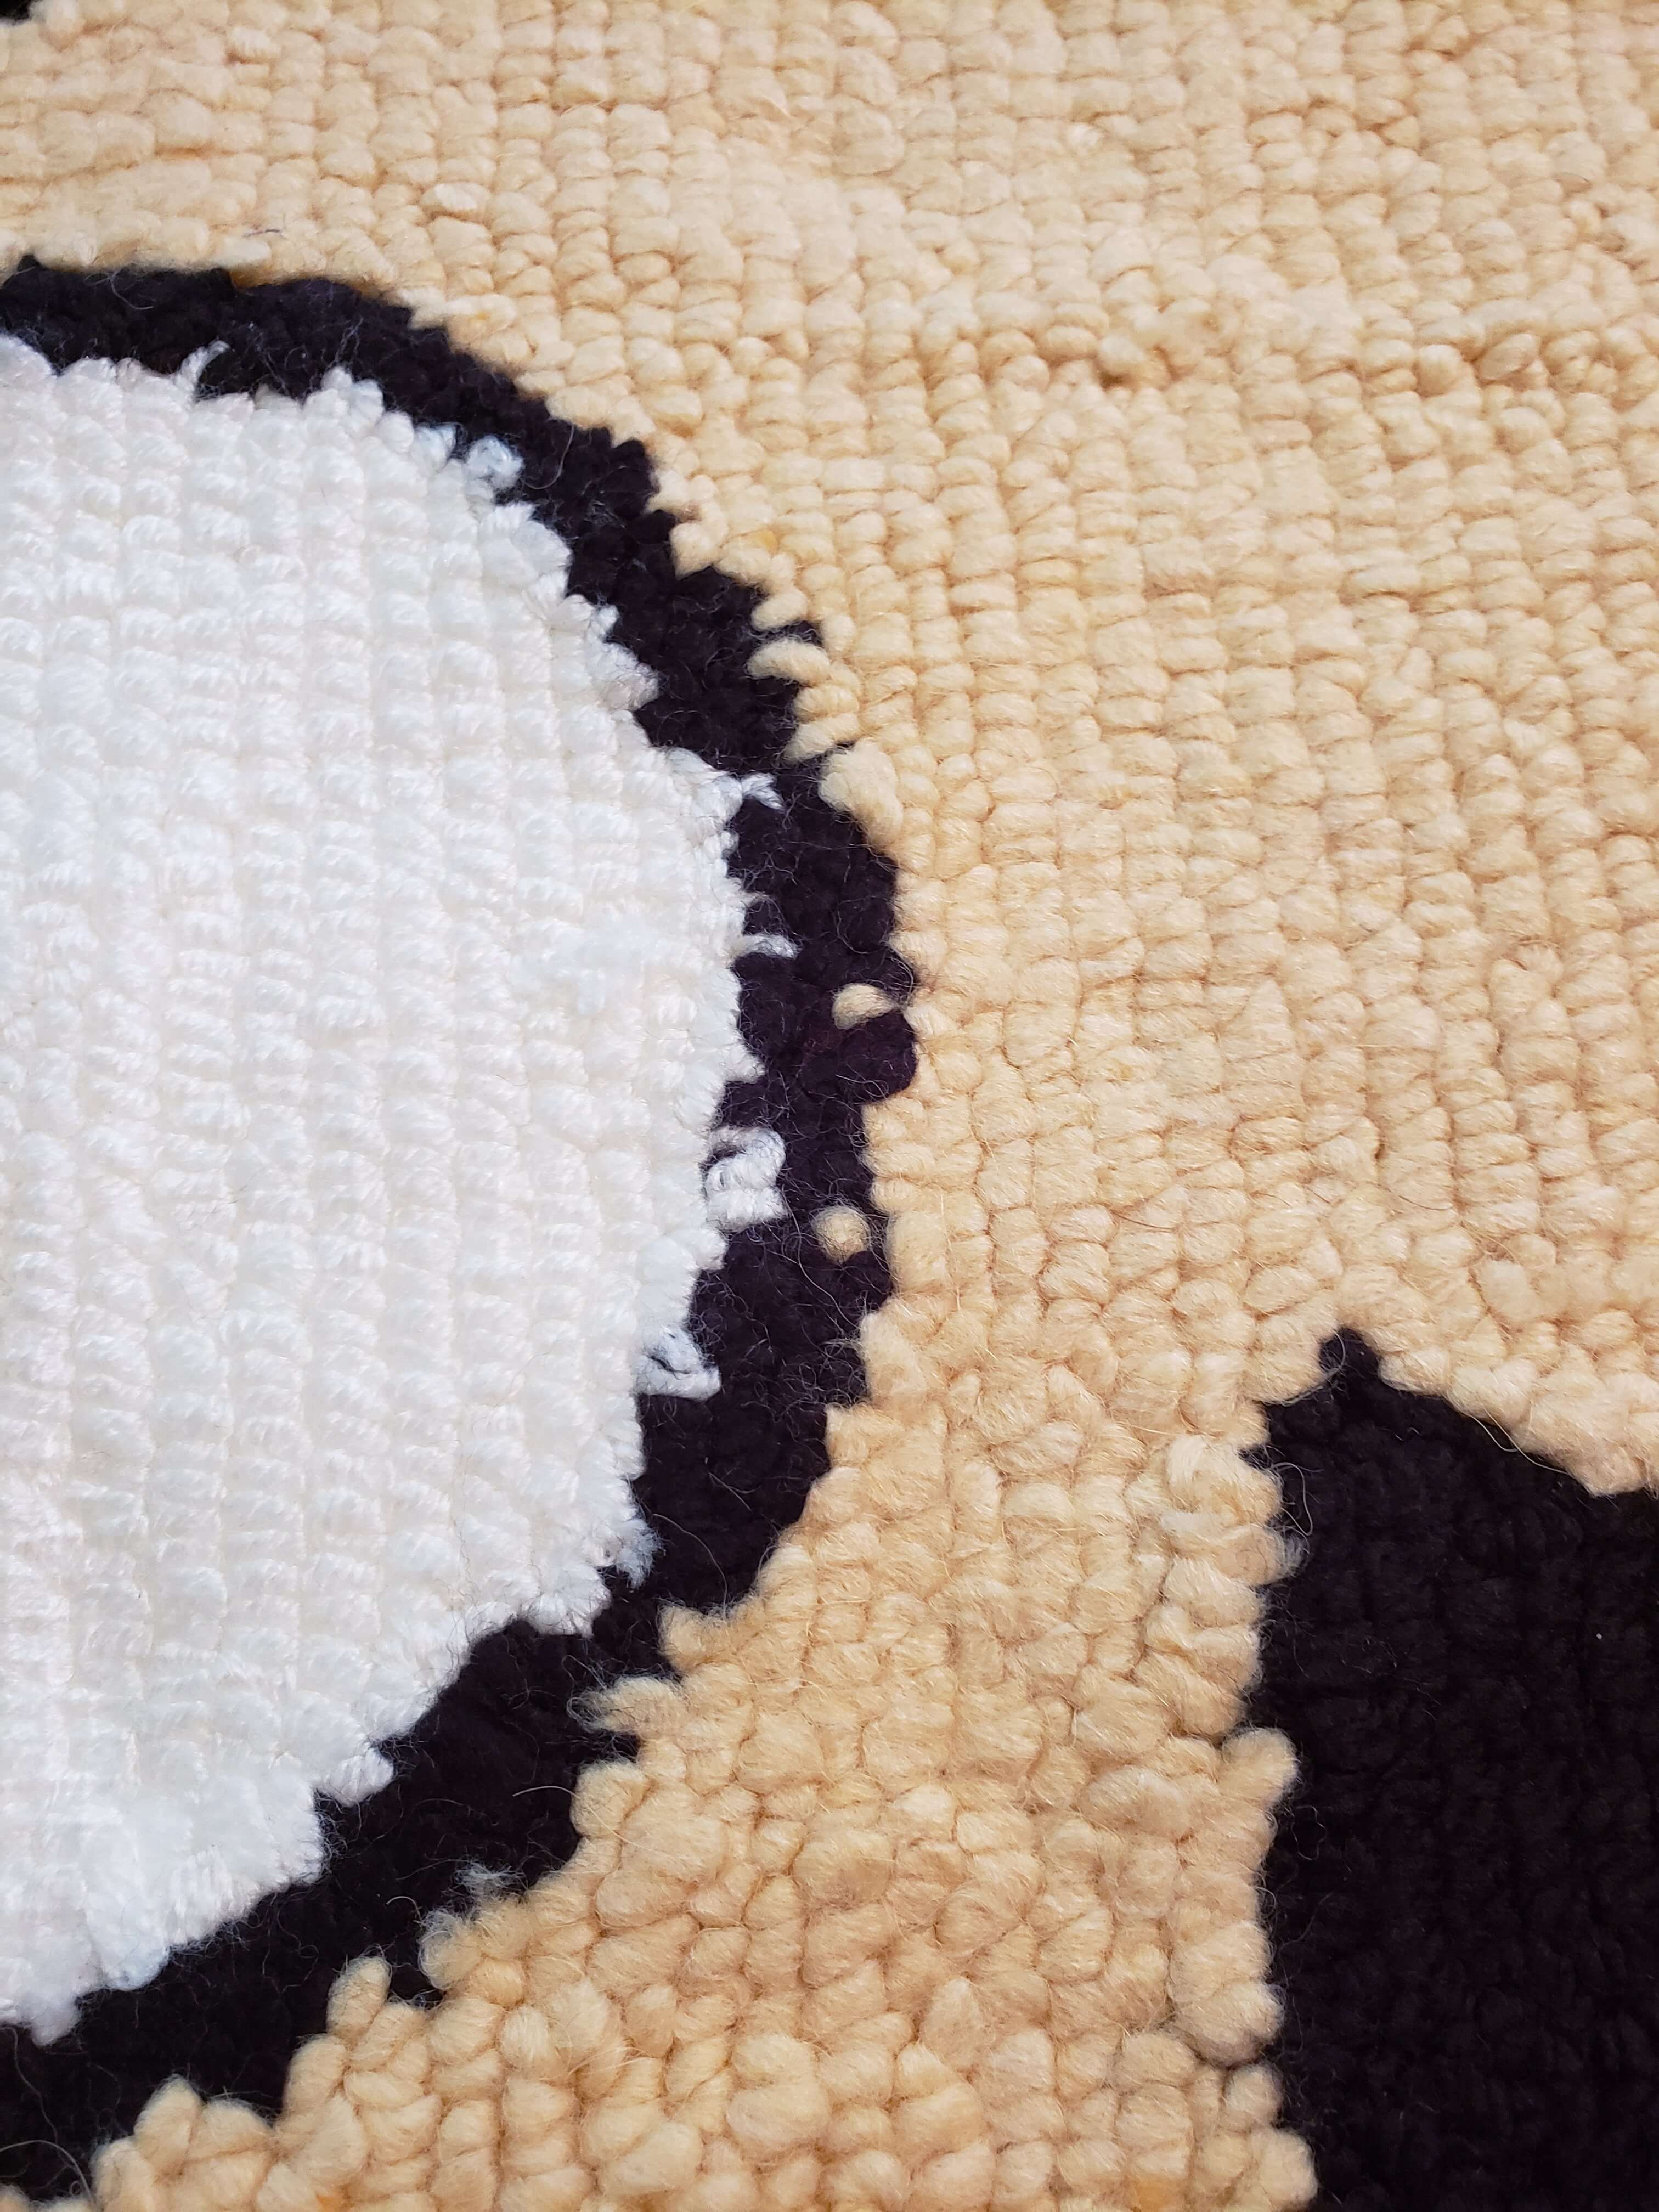
Before you’re done, you’ll want to nudge some of the yarn into the right places. I wasn’t always punching straight down in the cloth. Some of the yarn isn’t sitting where it should be because the needle went in at an angle. For instance, the 2 flesh-toned loops sitting in the black border. Or some of those white loops leaking into the black border. Just take the end of your scissors and push the yarn where it should be. The yarn is pretty packed in there, so it really isn’t going to go anywhere once it’s pushed into place.
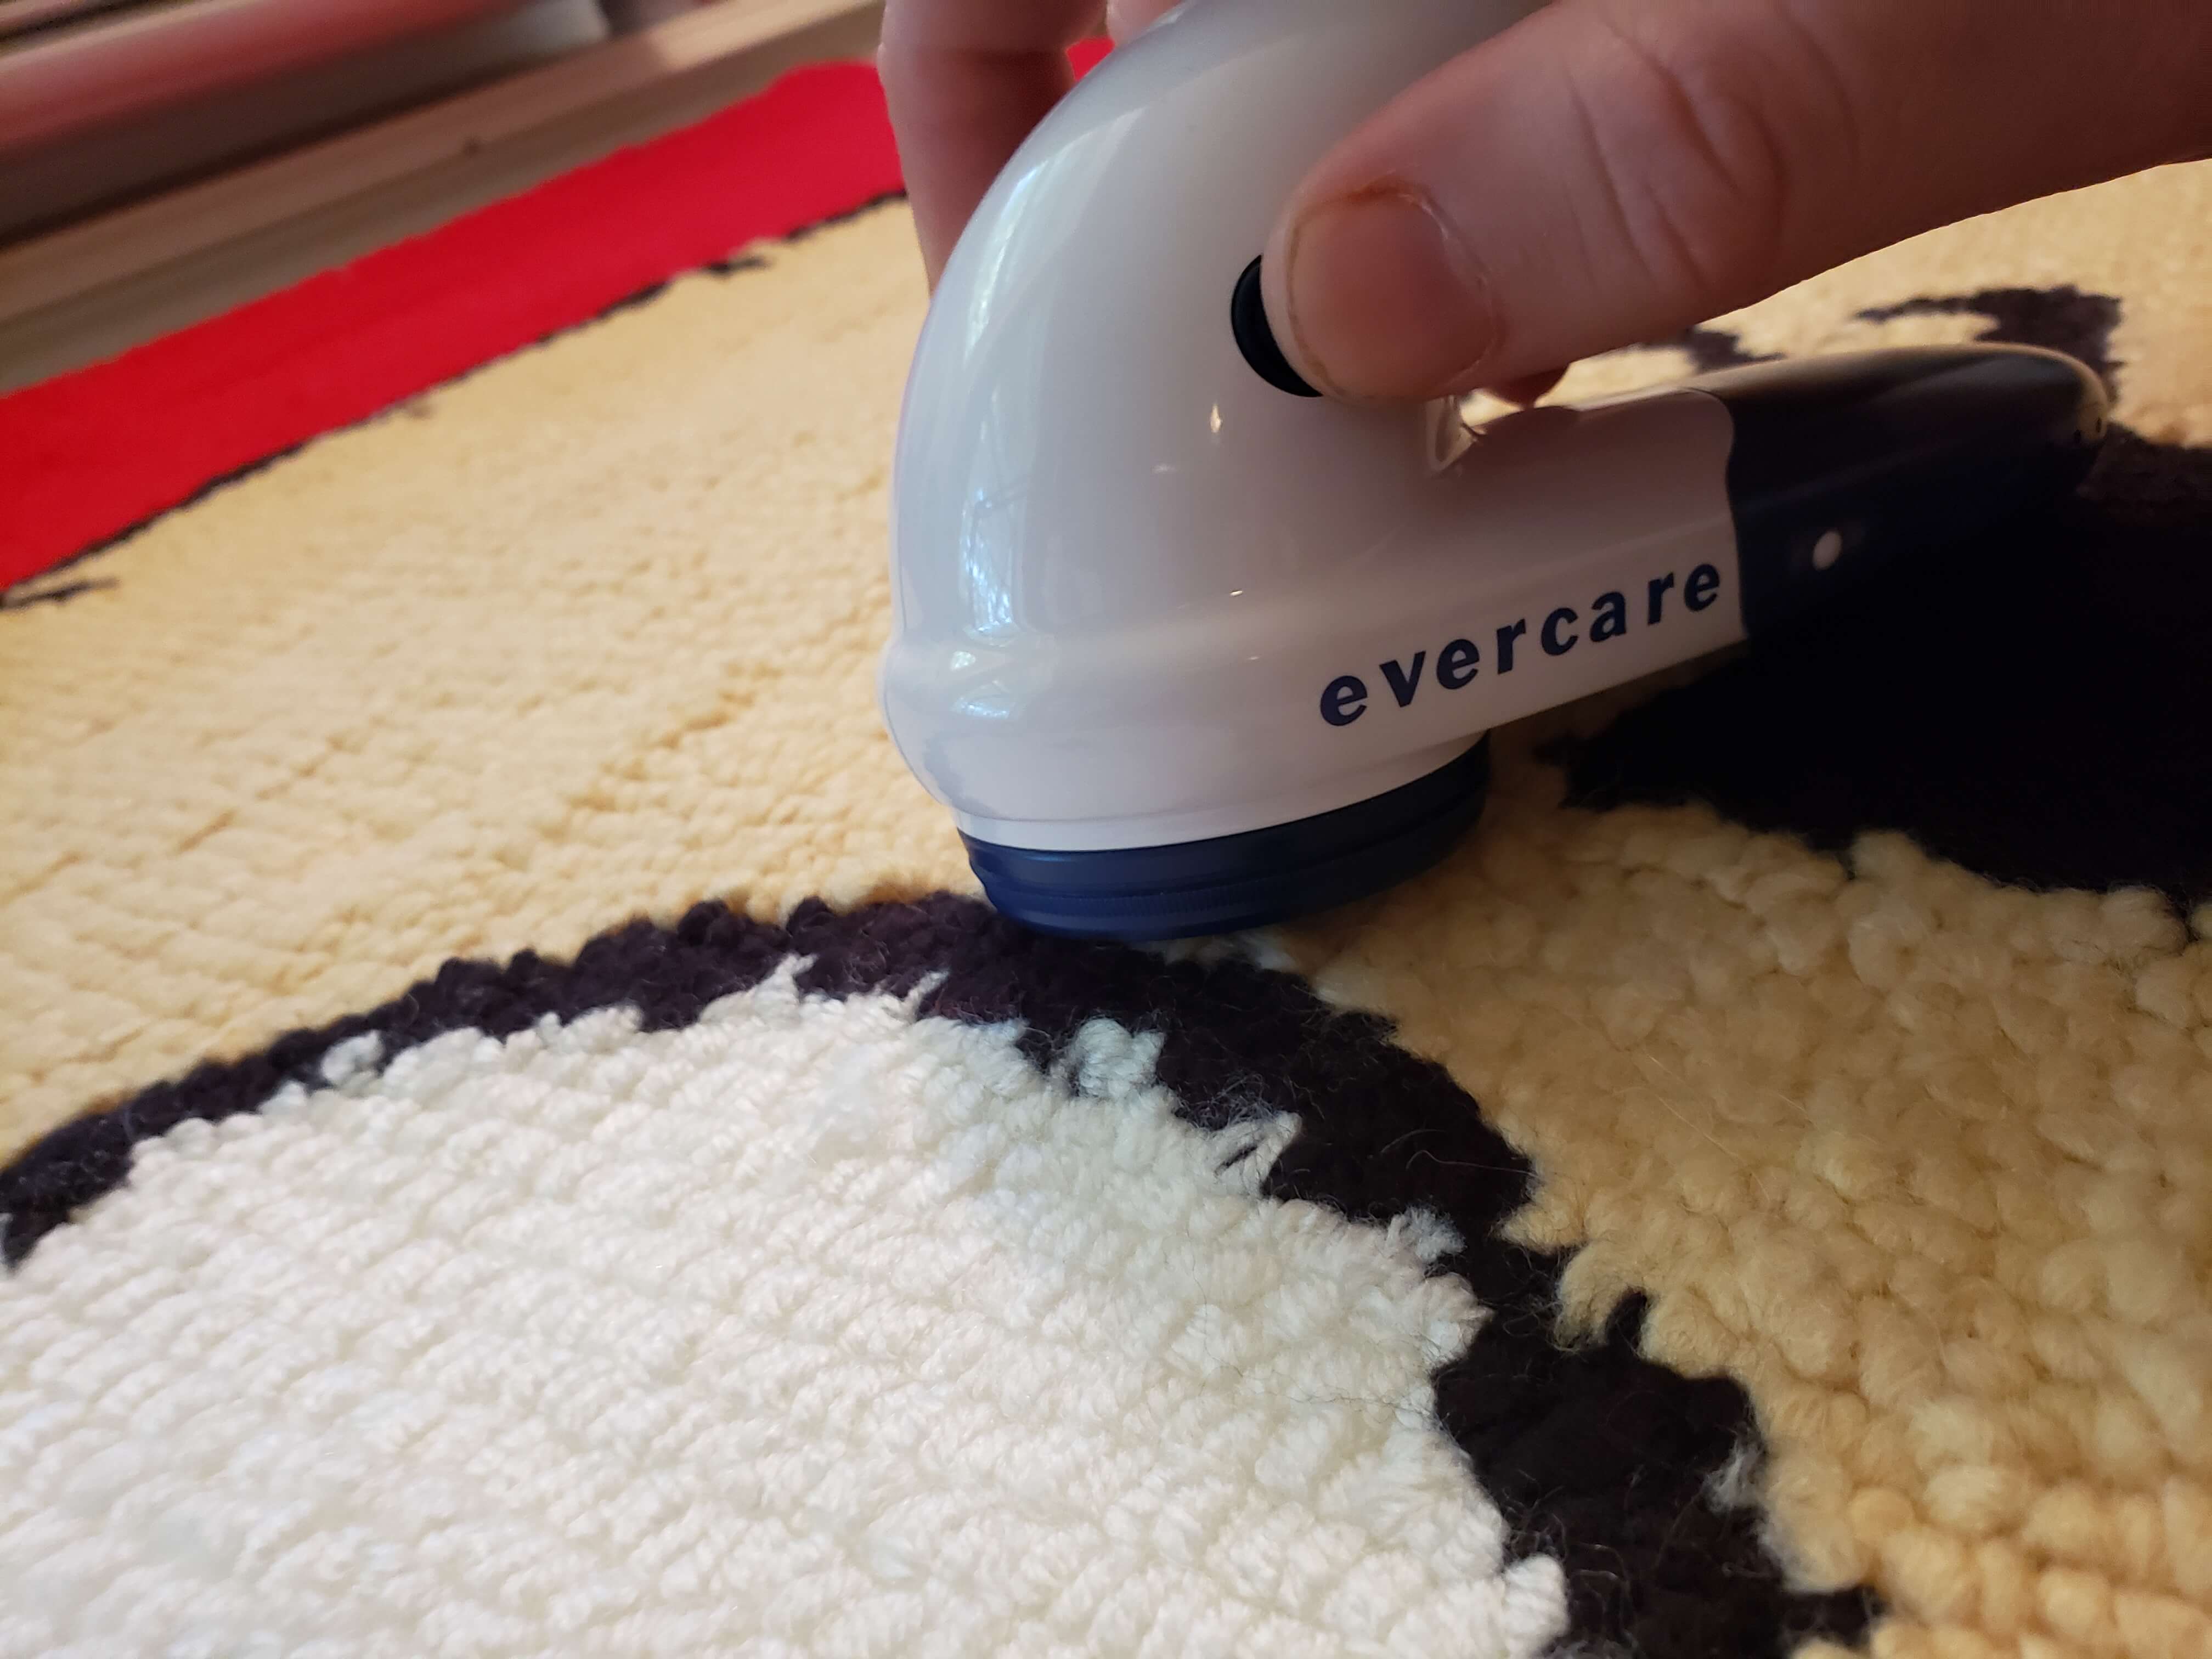
Using a clothes shaver, you can trim away all the little wispy pieces of fuzz on top. Since I used acrylic yarn the fuzz levels weren’t too bad. Had I picked a wool yarn, this would probably make a more drastic difference.
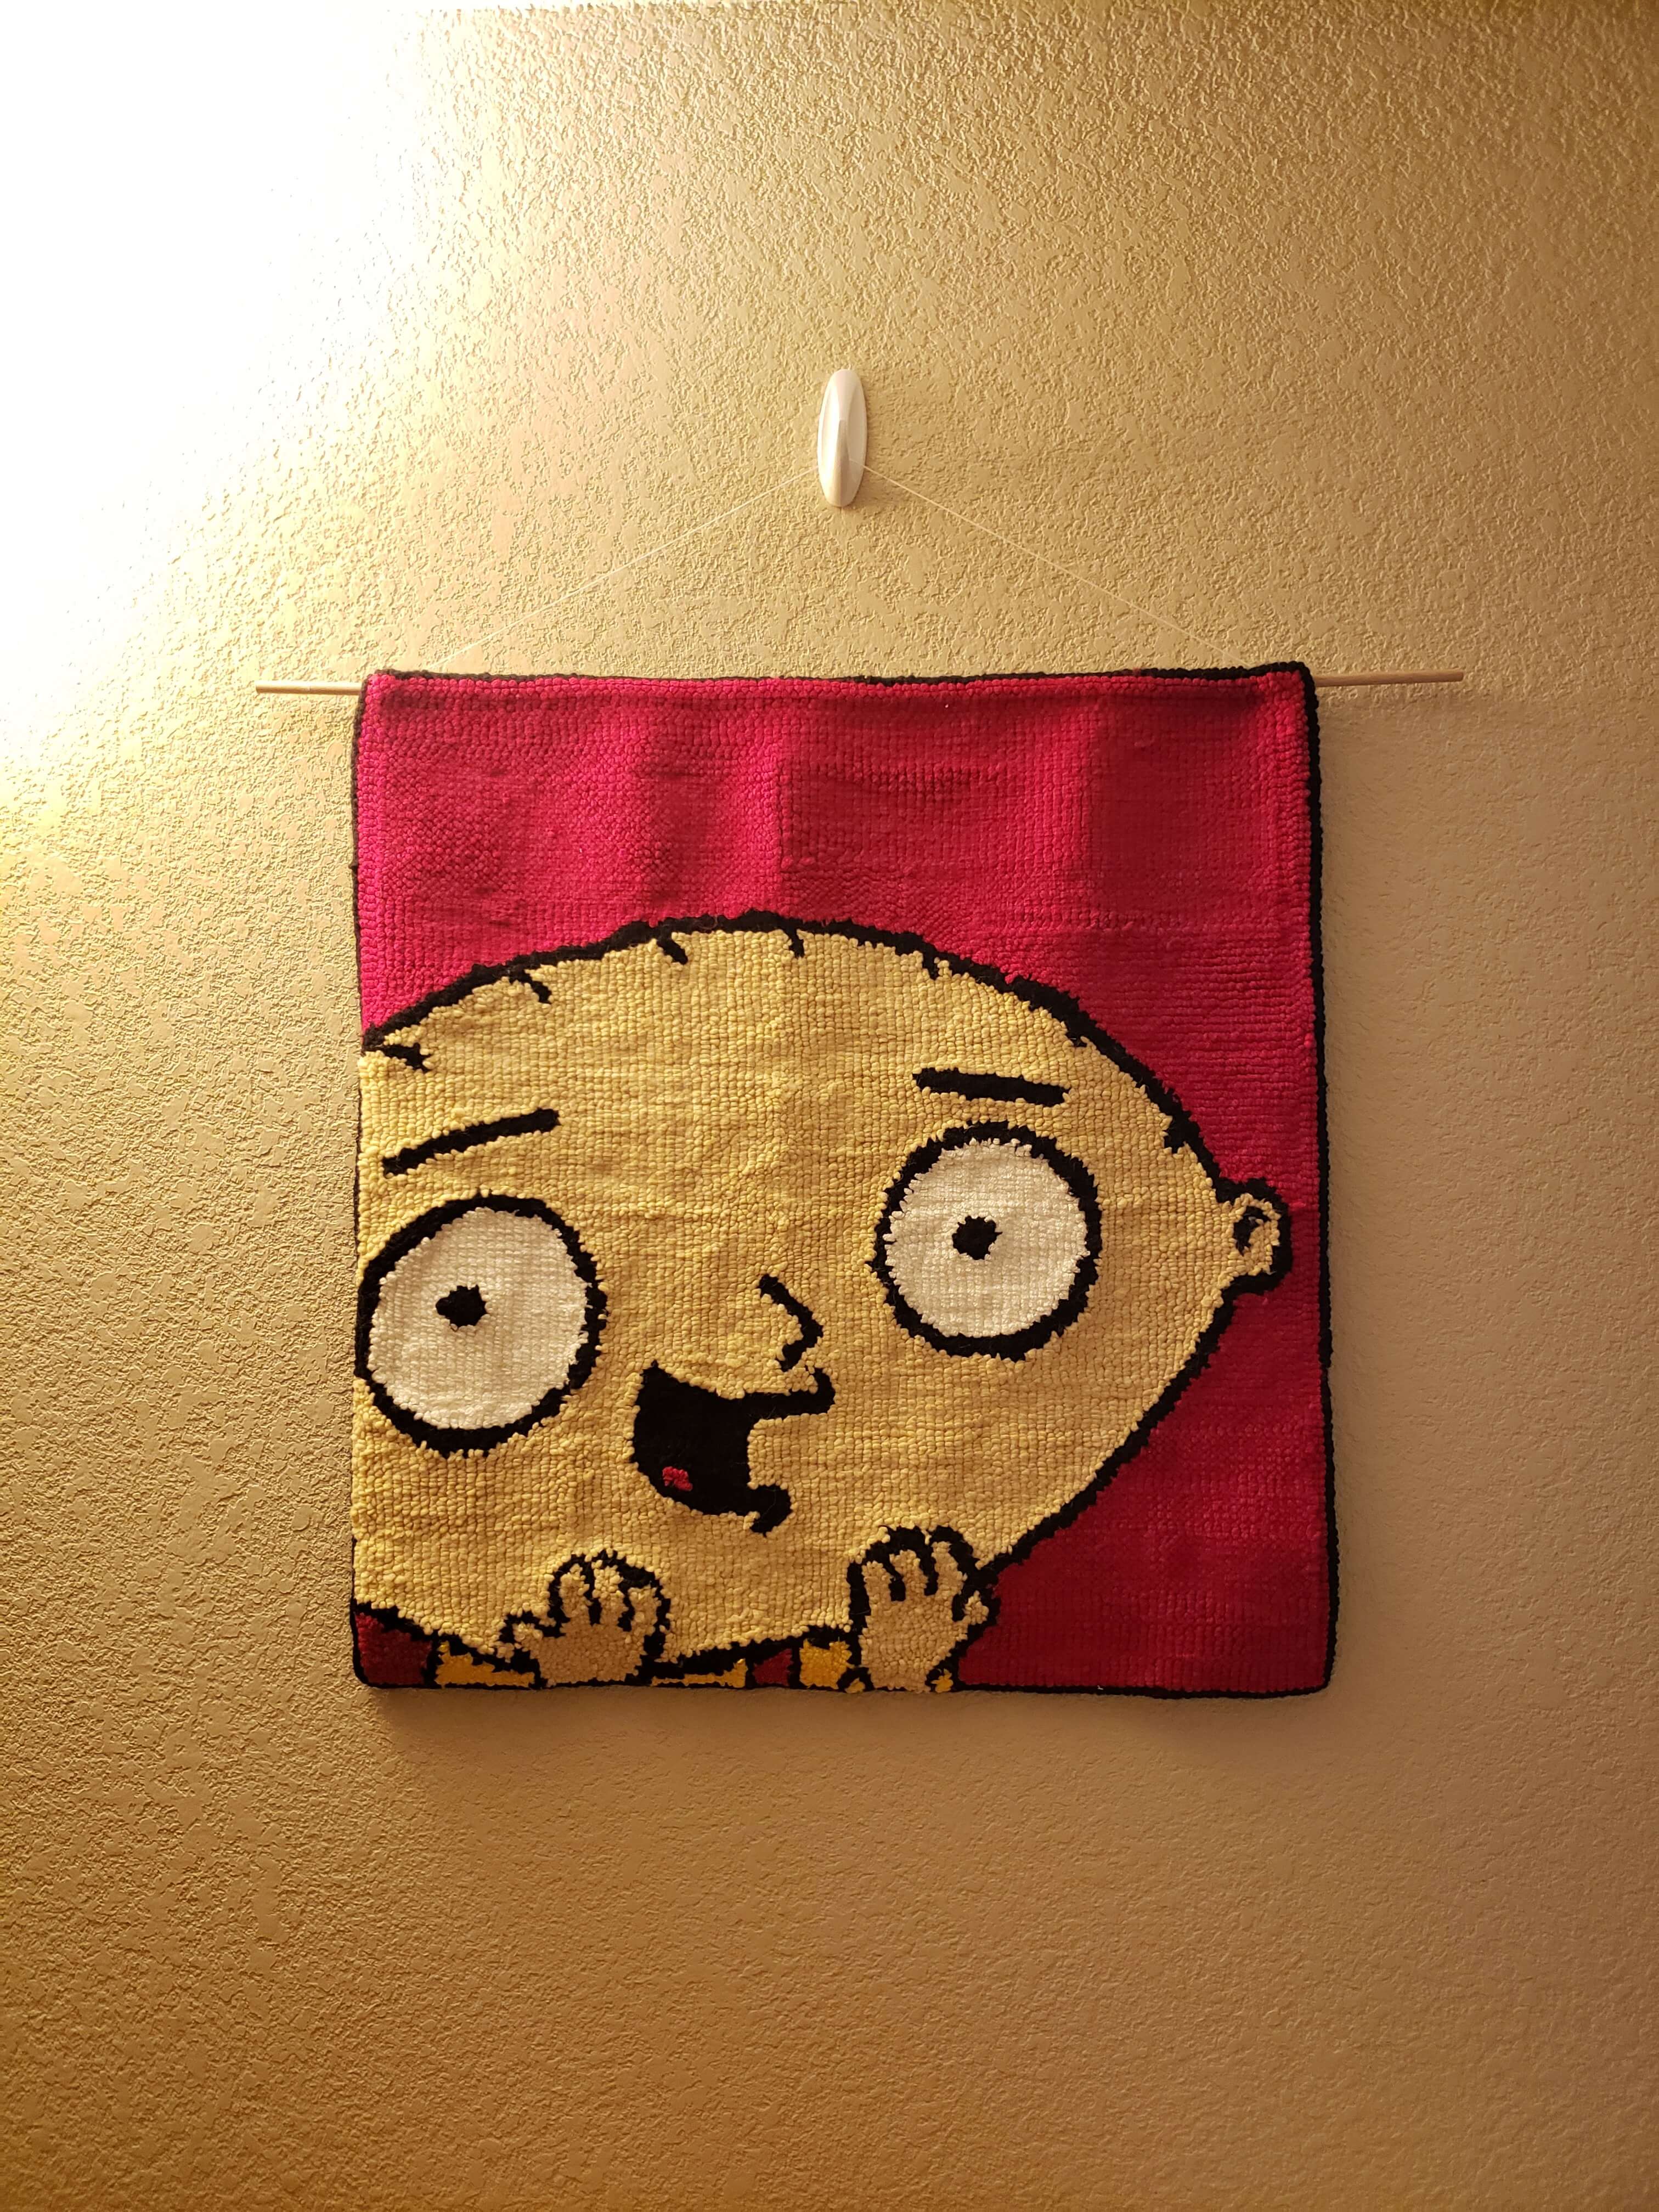
And finally, I stuck a dowel through the binding fabric and hung it up. The picture makes it look really small, but my rug came out to be about 3′ x 3′.