After a couple of posts on making stamps, I started to wonder how you would clone a stamp? Do mass producers of stamps really go through this process for each stamp? After seeing some of the stamps on the shelves I would guess that they would make a mold and fill it with photopolymers and then zap it with UV light. Some photopolymer stamps have two colors of resin in them (black and clear) and you could do that if you had a mold.
I decided to try and make a mold of my last stamp, the panda from my post, Testing 3D Printed Stamps. There are many methods and products that can make molds and I’m going to start by trying one of the least expensive methods: silicone caulk molds.
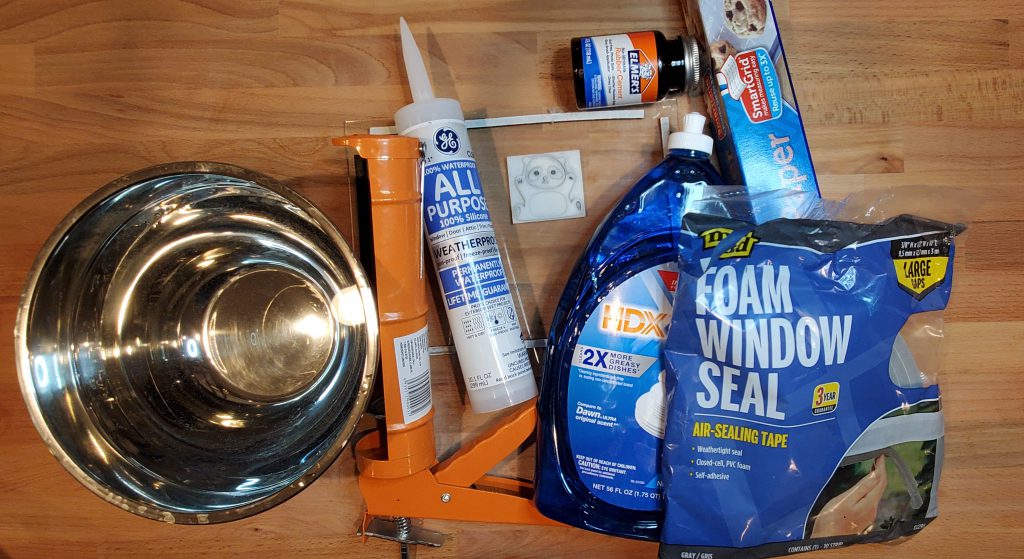
First, I gathered most of the materials I’d need:
- Mixing bowl or bucket (something you can dedicate to crafts only)
- 100% silicone Type 1 Caulk
- Caulk Gun
- Blue dish soap & water
- Parchment paper
- A box cutter or nippers to cut off the tip of the caulking tube.
Then there were some optional materials I used that I thought might help achieve better results, specifically for stamps:
- Two sheets of glass
- Foam window seal
- Some rubber cement to glue my stamp down
- Tape
And last,
- A big screw or cap for the left over caulk in the tube.
- A vented area to make and leave your mold for 1-2 days
- Photopolymer to make your stamp from the mold
- Ink pads to stamp with
- Paper to stamp on
- Gloves for handling photopolymer

Because I’ve made photopolymer stamps the standard way, I already had these two sheets of glass. However, this time I wanted thicker foam. The tiny strips of foam already on the glass is for the thickness of a stamp. For molding a stamp we’re going to need thicker foam to accommodate both the stamp and the silicone. This will also determine how thick the final mold will be.
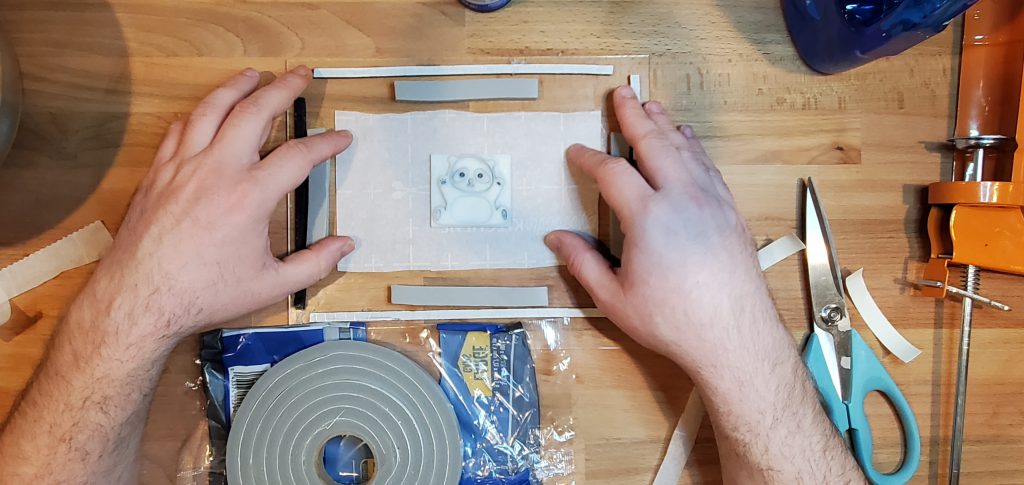
I used rubber cement and glued my 3D printed stamp down to parchment paper that I cut down to the size of my mold making area between the foam strips. Parchment paper will be relatively easy to remove from the silicone once it has set and you won’t have to fight with ripping silicone off glass. You can then tape the parchment to the glass if you wish. This should stop anything from shifting around.
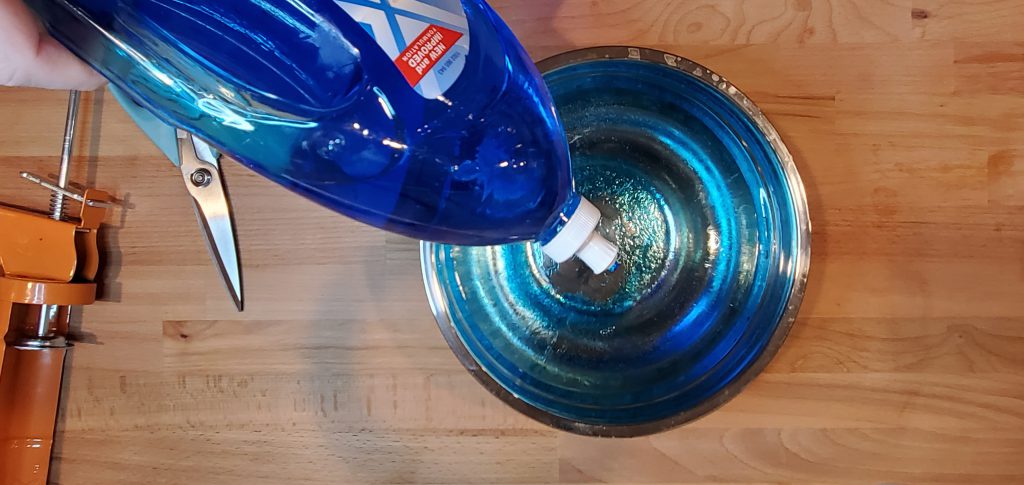
Fill your bowl or bucket with warm water. It doesn’t have to be warm, but you will have your hands in the water for a bit so make it a pleasant temperature.
Then, add lots of blue dish soap. The soap acts as a catalyst for the silicone and causes it to start to set up quicker. It will also help the silicone to not stick to everything, including your hands (but it still will a little bit).
There really isn’t a set ratio of soap to water. Most of the information I’ve seen suggests what looks like 5% soap to water. Just dump a bunch in and make it very soapy.
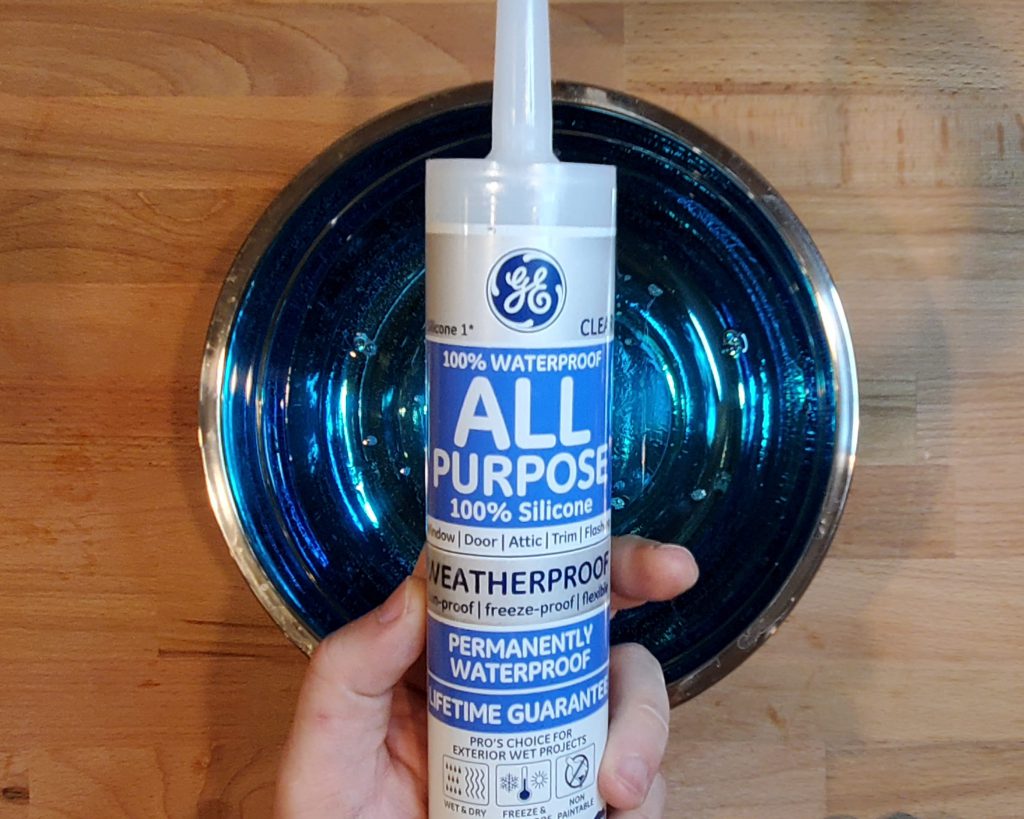
It is important that your caulk is Type 1 and 100% Silicone. Type 2 will not set up properly. You will know very quickly if you have the right kind as Type 1 strongly smells of vinegar. Type 2 doesn’t really have a smell.
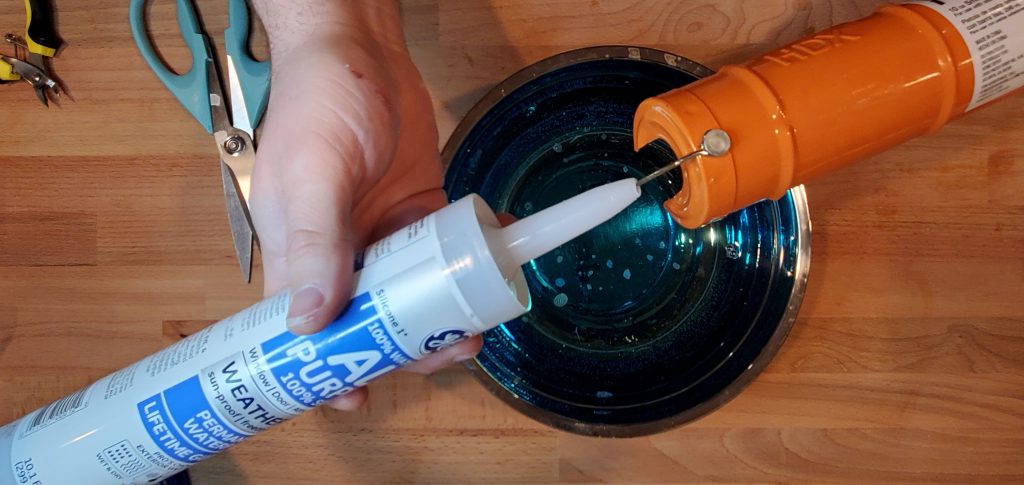
If you haven’t used caulk before, you’ll need to cut the tip off the tube then break open the seal in the tube. Most caulking guns have a little poker attached for this purpose. Really wiggle it around inside the tube and break the seal wide open otherwise it’ll take forever to get the caulk into the bowl and you’ll likely have to start over because the caulk will start to set up before your ready.
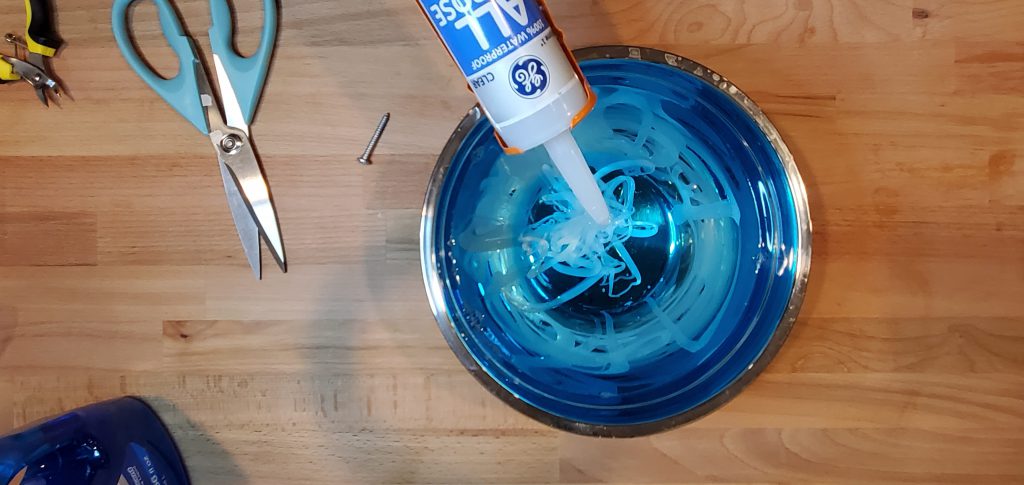
Squeeze as much silicone as you’ll think you need into the soapy water. Keep in mind that the soap is your catalyst, so don’t waste time. I wanted plenty of extra silicone for a large mold, so I emptied about half the tube into the water.
Don’t forget to cap your caulk when you’re done. I normally just shove a big screw or nail into the hole. They also sell caps.

This is where the best and worst parts of the process begin.
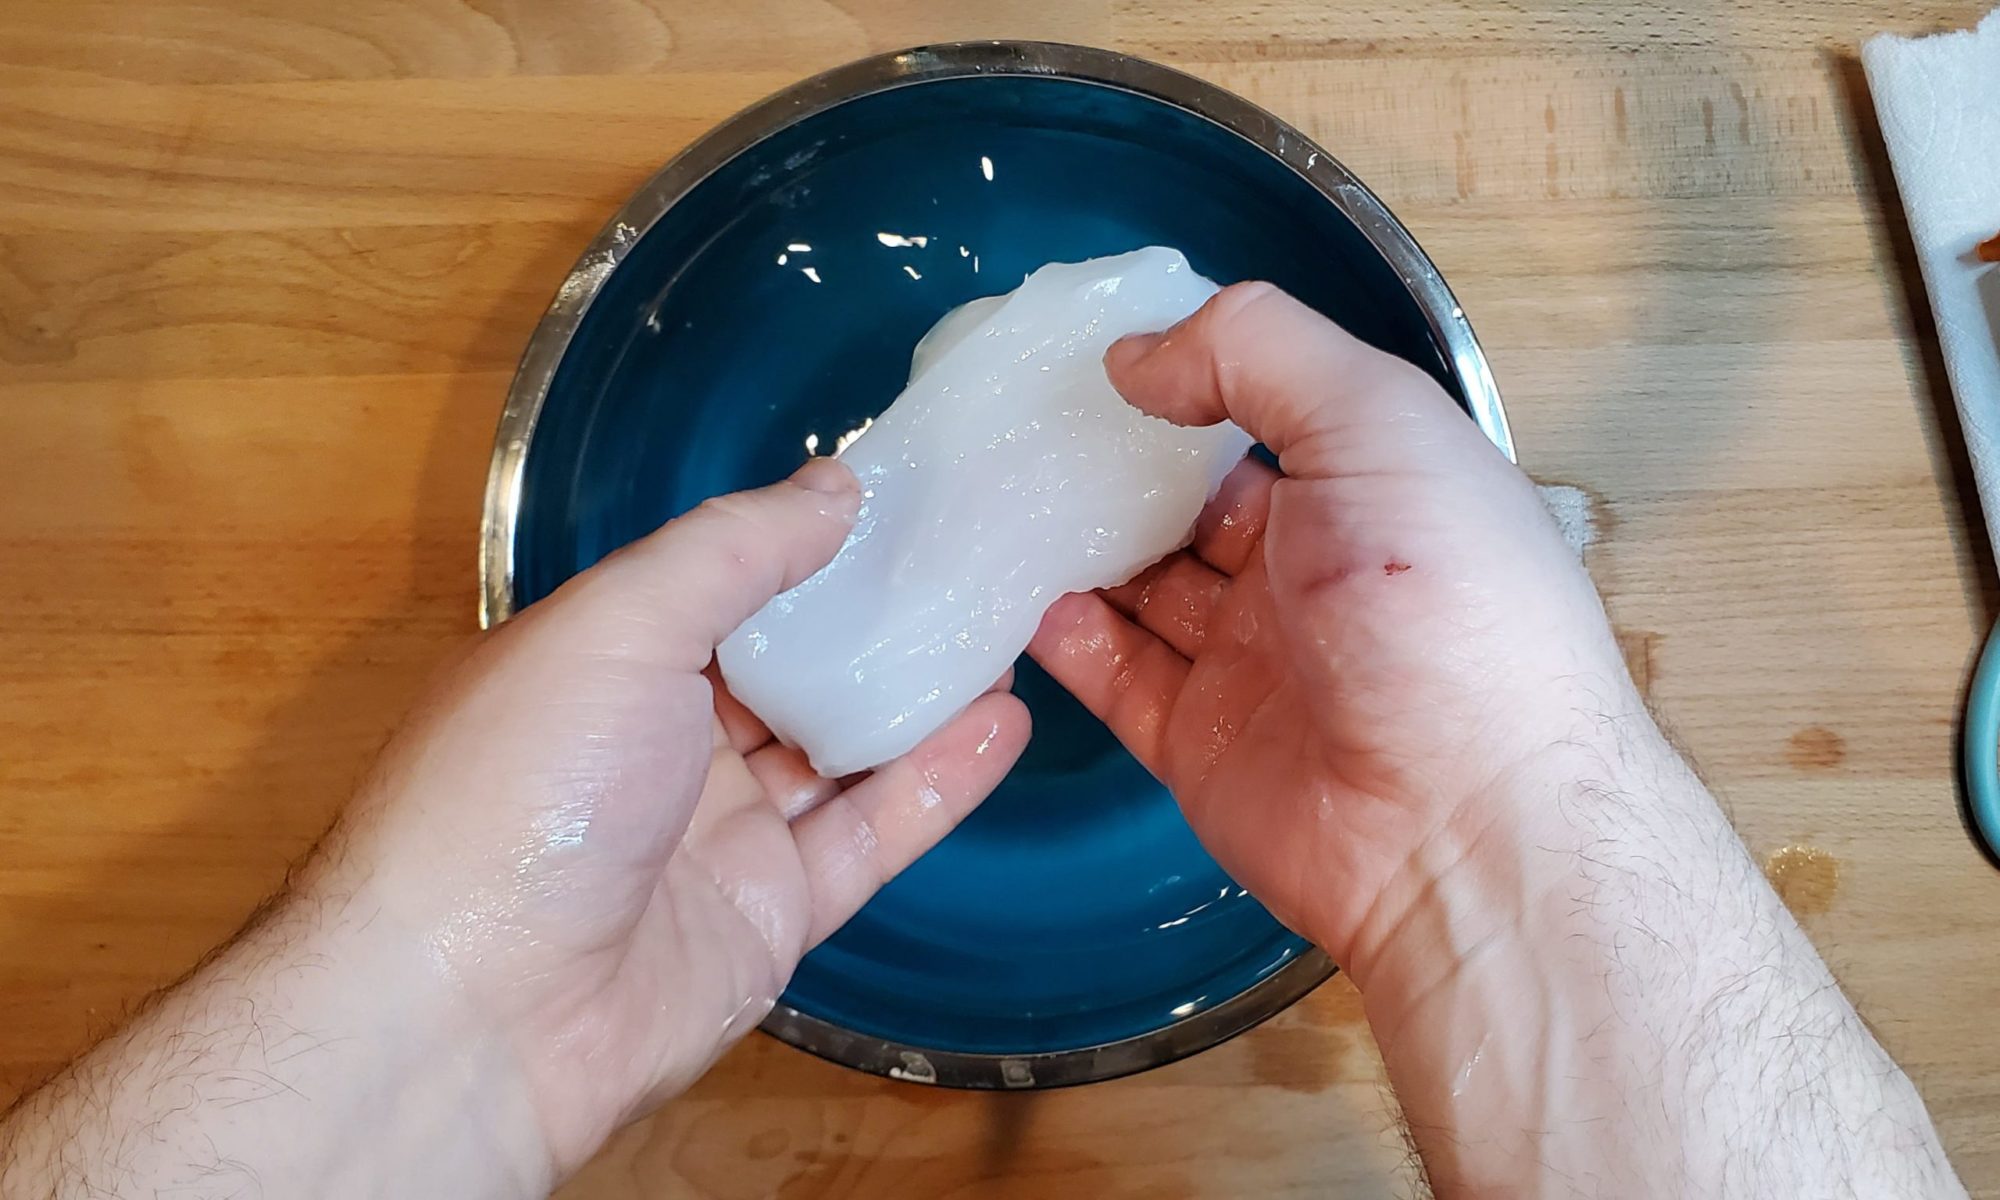
Reach in and scoop up the silicone and begin kneading, stretching and folding it. I kept dunking it back into the water to help with any stickiness. It will STINK. It’ll make you cough. The vinegar smell is basically a punch right to your sinuses.
If you ignore the smell you can play around a bit. It’s basically slime for grown-ups. Have fun with it, you’re a hard working adult and you’ve earned it.
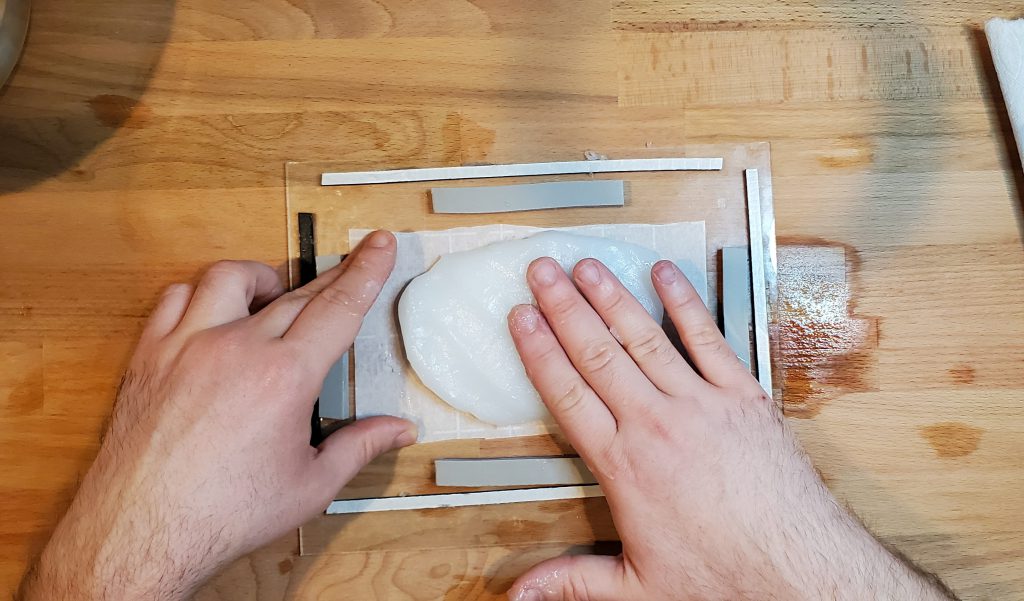
When you feel it start to firm up the fun is over and you can start molding your stamp. Squish it down into all the little recessed areas of the stamp the best you can.
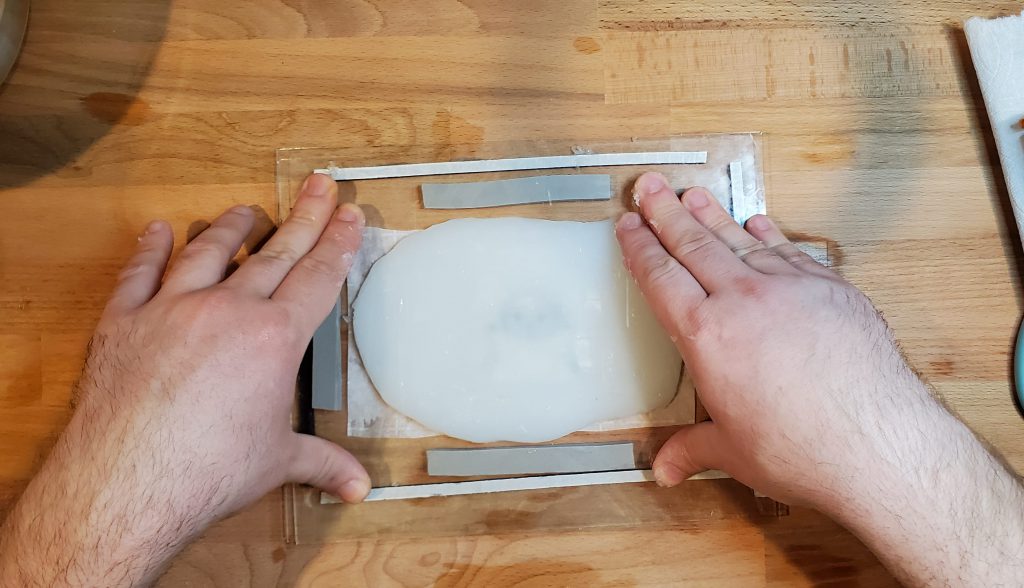
Then I took a second sheet of glass and pushed it down until it rested on my foam strips. This will make the mold flat and level. I used plenty of silicone so that it would be a nice big pancake when it’s done.
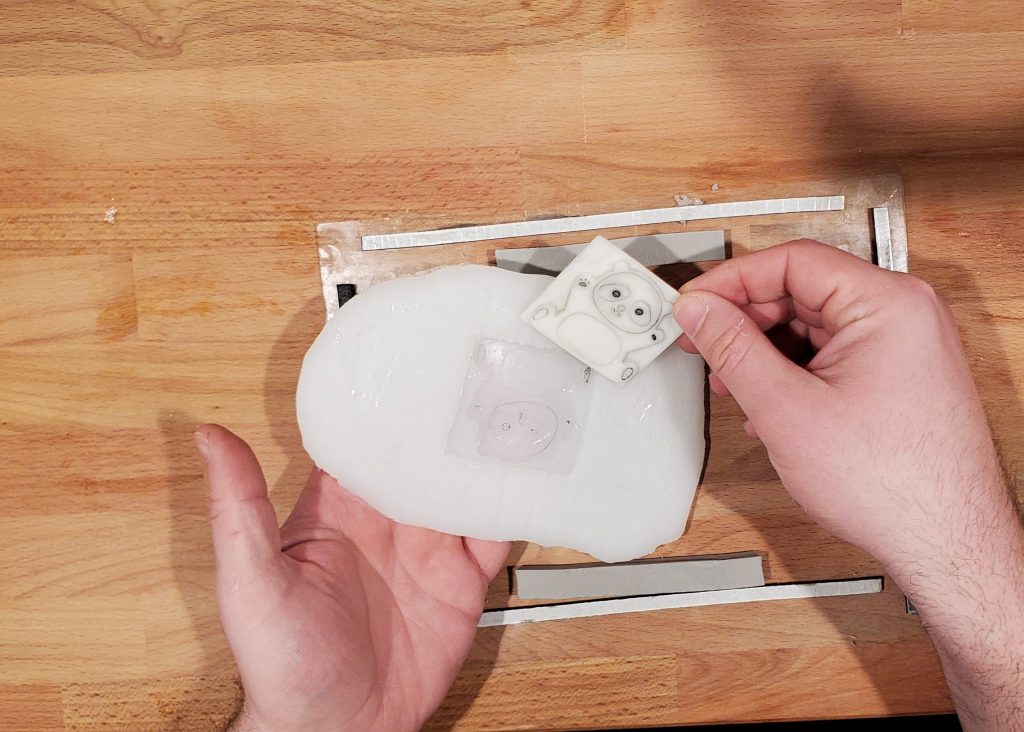
Let sit for 1 hour and then you can pull the parchment paper off and remove your stamp.
Your mold will stink and continue to stink for up to 2 days. You can put it outside or somewhere it won’t bother anyone (or put it somewhere it will definitely bother someone).
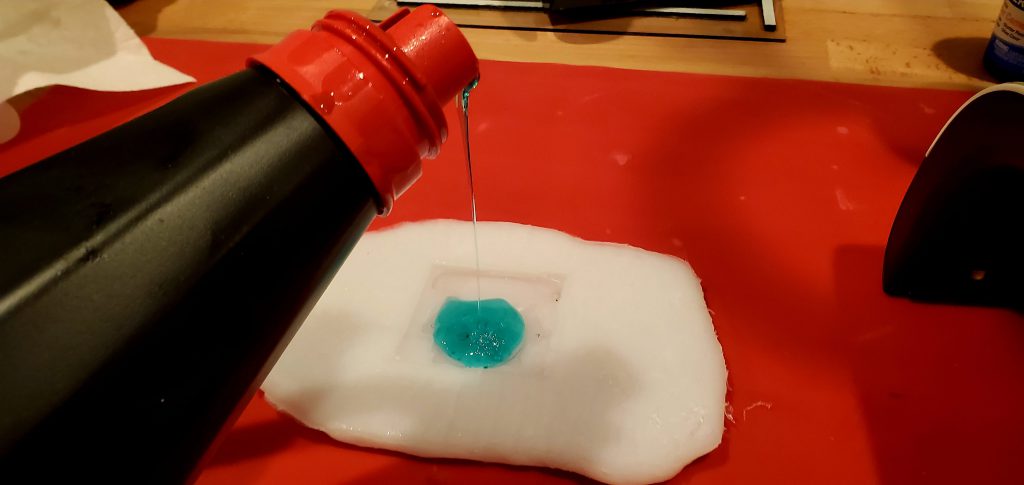
To test out the mold, I grabbed some photopolymer liquid gel and very slowly add it to the mold until completely full.
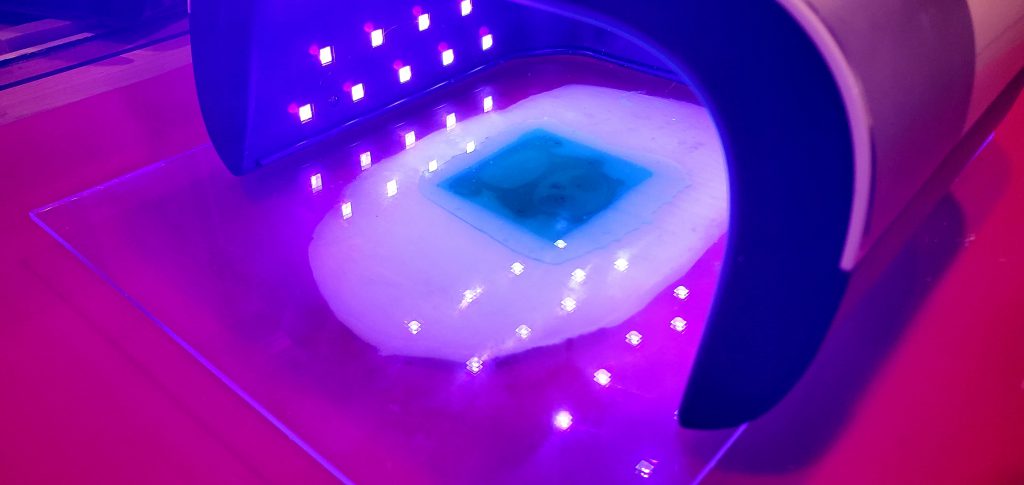
I pressed my glass plate down on top of my mold allowing the gel to overflow a bit. Because I made my mold a big pancake, the glass will easily rest on top and the back of my stamp will be perfectly flat.
I turned on a UV light and let it go for a few minutes. It probably only needs 1-2 minutes, but I just turned it on and walked away for a bit.
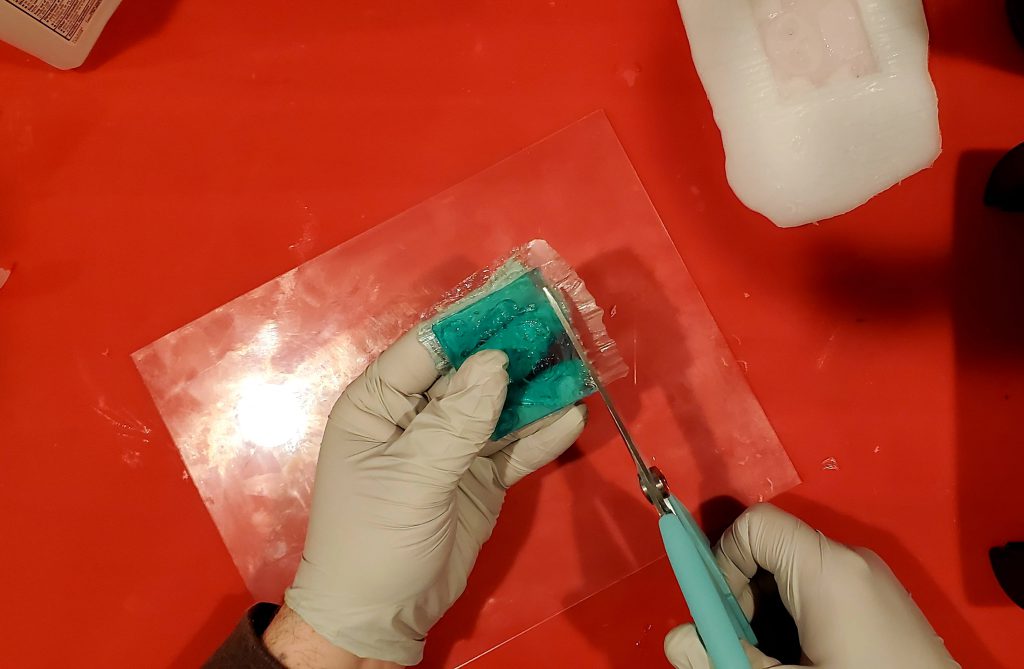
When I came back, I unmolded my stamp and cut off the edges where it overflowed.
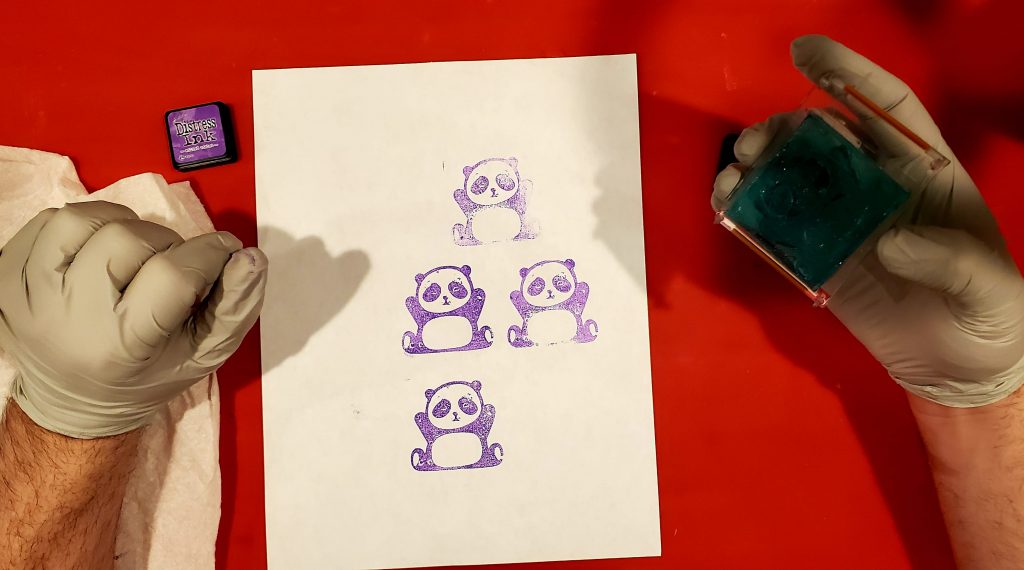
I slapped my stamp onto a stamping block and gave it a try. I don’t really do much stamping so my little stamp pads are old. It took a few tries to get the ink loaded onto the stamp.
I did notice some artifacts on the stamped image. This was likely from air trapped between the stamp and the silicone while making the mold. If I was to remake the mold, I would probably slowly roll the silicone onto the stamp to try and push out any air, or I might even rip off some gobs of silicone and fill the cavities of the stamp prior to covering the whole stamp with the silicone.
Overall, I was pretty impressed but I think a liquid mold kit might do a slightly better job. Next time I see one I might grab one and try again.